Conversational modules
Programmable Channels
Platform functionality
Business segments
Industry verticals
Department
Our services
Solutions for telecoms
See why leading telecoms around the world choose Infobip to transform their network
Create new B2B revenue streams with our omnichannel communications platform
Telecom core & security
Secure your network from SMS and Voice fraud with our firewall that protects 120+ operators
Ensure all A2P SMS traffic is properly charged and eliminate revenue leakage with our SMS Firewall


Community & Resources
Knowledge hub


Title
A guide to building chatbots for Instagram
Learn how to get the most out of the most dynamic channel of all with chatbots that help to capture attention, make more sales, and support customers.
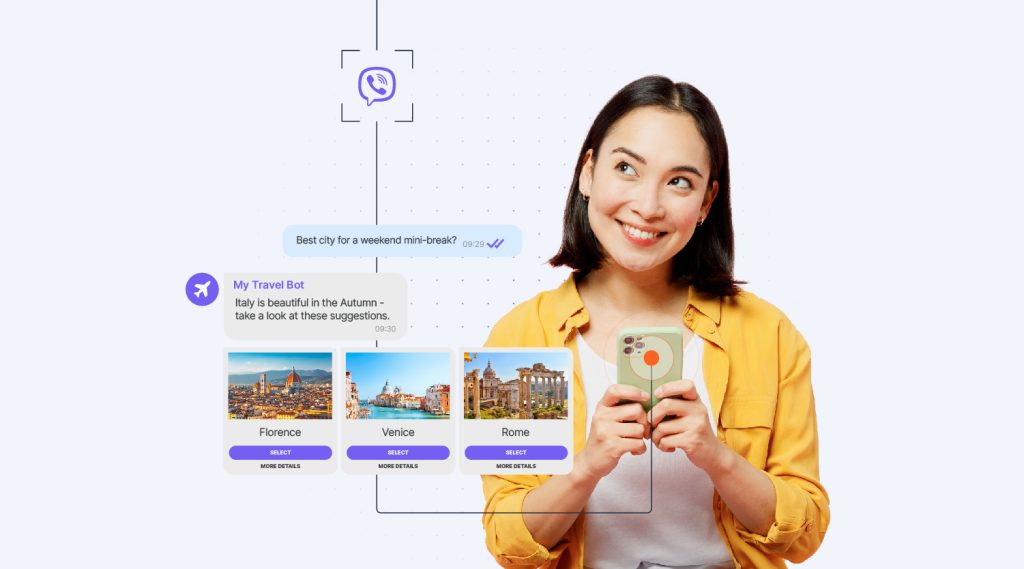
It is difficult to think of a more engaging channel than Instagram. As a social media platform, it has literally been designed to draw attention and encourage participation.
Visually striking images, videos, and stories. Easy options for people to like, repost, explore hashtags, and add their own comments. As true fans of the Gram will know, the best part of a post is often the comments section.
Influencers already know this, and now brands are catching on too. Case in point – there was a x4 increase in Instagram business interactions on the Infobip platform in 2023 according to our Messaging Trends research.
‘Interactions’ on Instagram can take many forms – from direct messages exchanged with customers, story mentions and replies, and transactions on Instagram Shopping, the feature that enables brands to integrate customizable digital storefronts into their business profile.
But who is sending these messages you might ask? Who has got time to monitor all social channels 24/7?
In many cases it is chatbots doing the heavy lifting when it comes to answering questions, progressing sales, and promoting the brand on Instagram.
What is an Instagram chatbot?
An Instagram chatbot is a computer program integrated into the Instagram platform that can automatically reply to messages and comments, process sales, schedule appointments, and work 24/7 to promote your business and engage with your customers.
Types of Instagram chatbot
Instagram chatbots can be deployed in two ways.
1. Public replies
These are chatbots that reply directly to Instagram comments that people have made on your posts. These are public and anyone viewing the post can see them. The chatbot needs to be sophisticated enough to understand the meaning, context, and tone of the comment so that the reply is appropriate. The comment could be genuine praise or sarcasm – a human agent would be much better placed to know which.
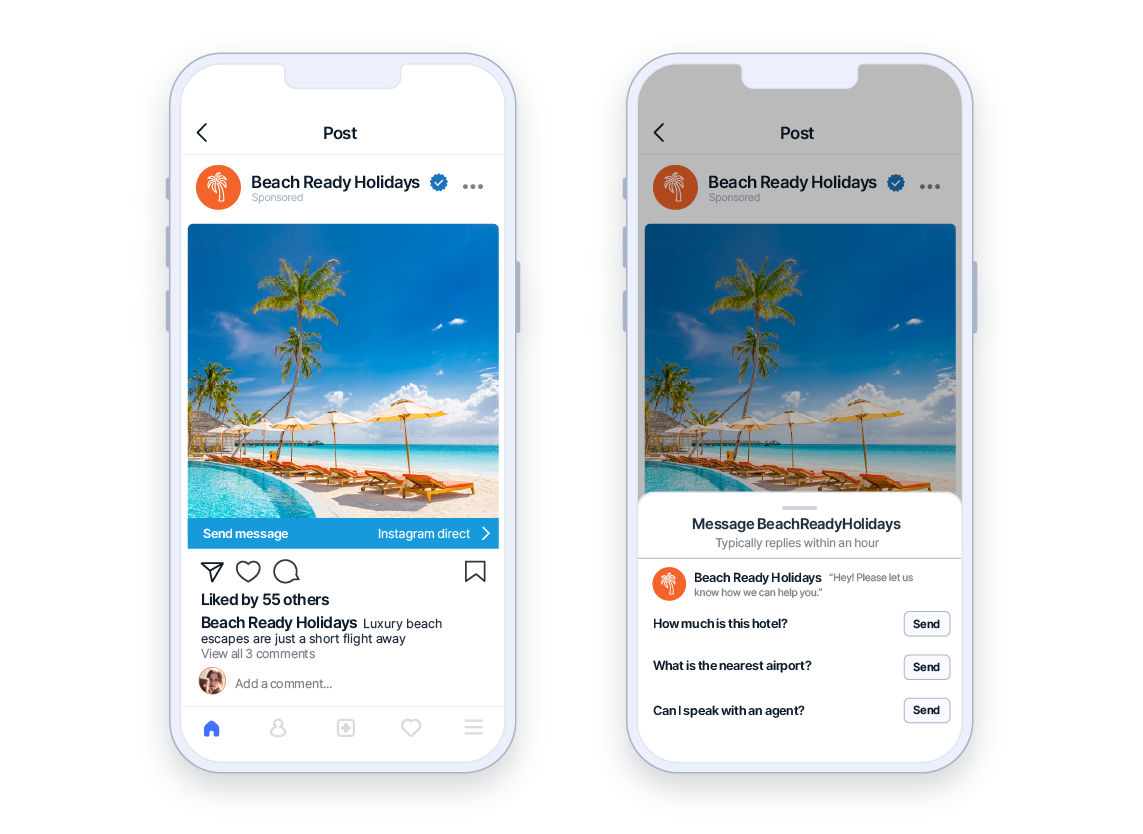
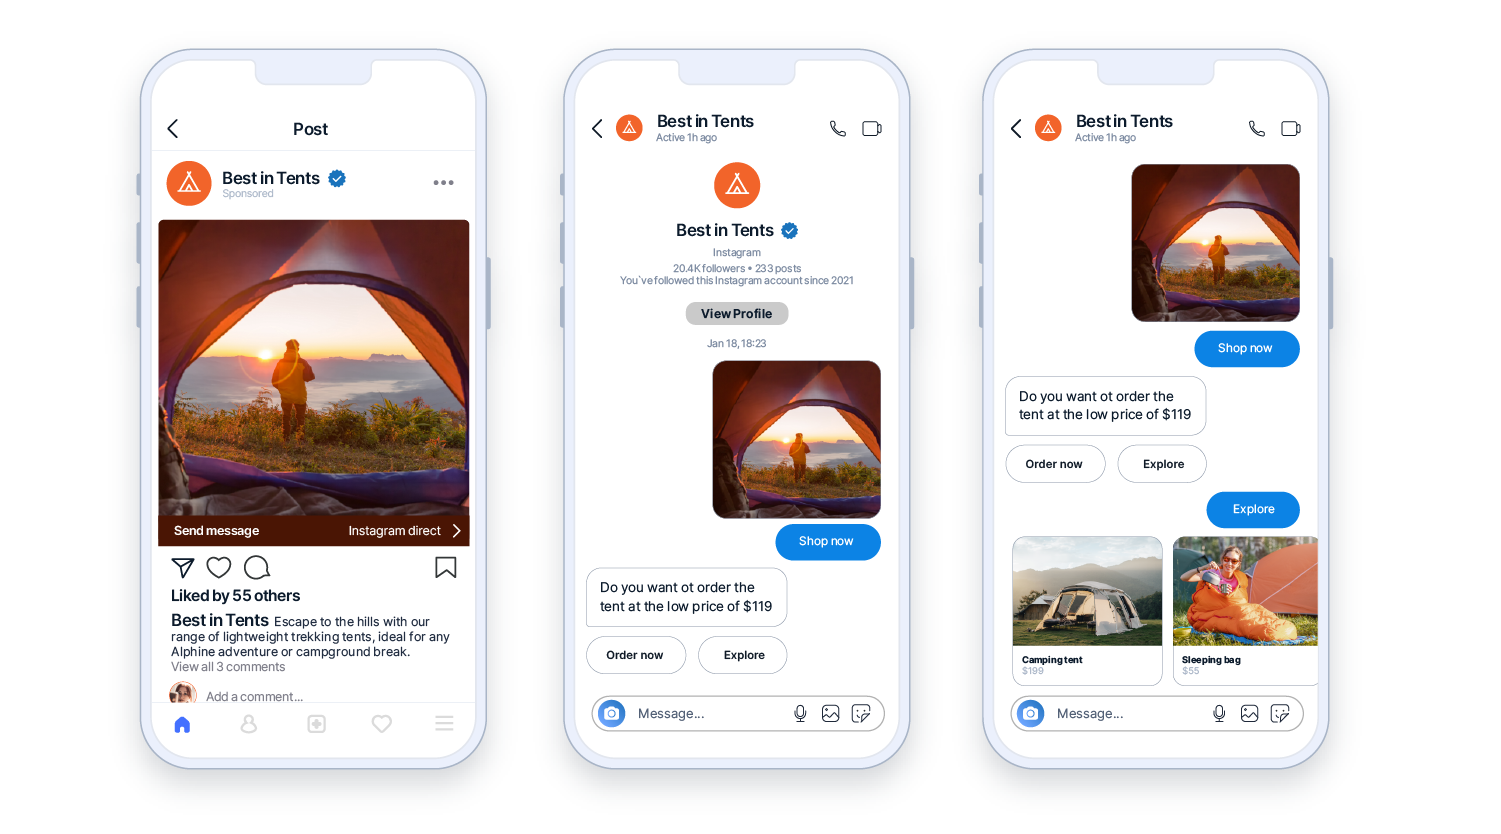
2. Private messages
These are chatbots that can be used to reply to private messages that have been sent either from Instagram ads or posts on your account. This is the most popular use case for businesses as it allows them to automate a number of important functions with almost no risk of reputational damage. These include:
- Lead generation and sales support
- Customer service
- Automating bookings
- Gathering feedback
How to build a chatbot for Instagram
The Instagram platform doesn’t actually provide options for creating chatbots itself. However, they do make it very easy to integrate a chatbot built using a third-party tool into your Instagram Business account.
In this section we will show you how to design and build a rule-based bot for Instagram and guide you through all the steps required to launch it live.
If you would like to follow the steps yourself, you can sign up for a free trial of the Infobip platform which allows you to build chatbots and send free messages on a variety of channels.
Step 1 – Get started
Once you have logged into your new account, select the Chatbots option from the menu on the left.
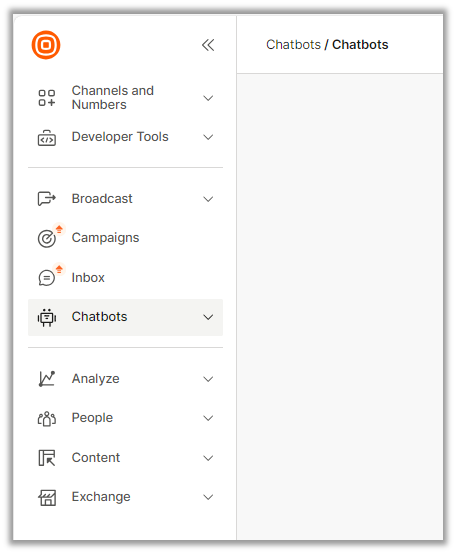
Click New Chatbot and then Start from Scratch.
Give your chatbot a name and select Instagram Messaging from the dropdown menu (depending on your region, you may need to ask your Infobip account representative to add Instagram to your free trail account).

This will open the main chatbot builder canvas.
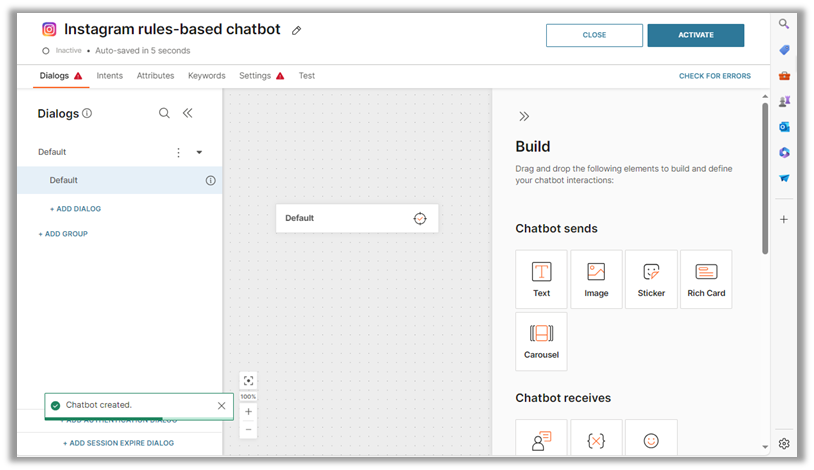
Our chatbot builder has a diverse range of tools that can be used by simply dragging and dropping them onto the workspace to build up the chat structure and flow.
These are divided into three sections, based on the function they perform:
- Chatbot sends
- Chatbot receives
- Chatbot actions
In this example we will use some of the commonly used elements, but they all work in the same way.
- Drag element onto the workspace
- Configure it in the side panel
- Link it into the chat flow
Step 2 – Create an initial greeting
Start with an engaging message to greet people that initiate a conversation with your chatbot.
Instagram chatbots can only respond to messages from people. However, agents can message a customer directly within 24 hours of receiving the last message from the person. See the later section Rules for Instagram chatbots for more information.
Add a Text element from the Chatbot sends menu by dragging and dropping it onto the workspace and configure it with a suitable welcome message.
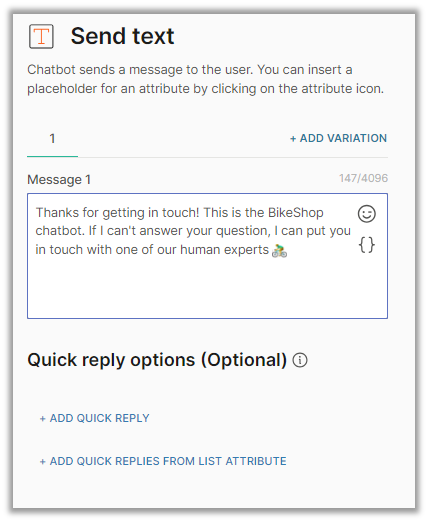
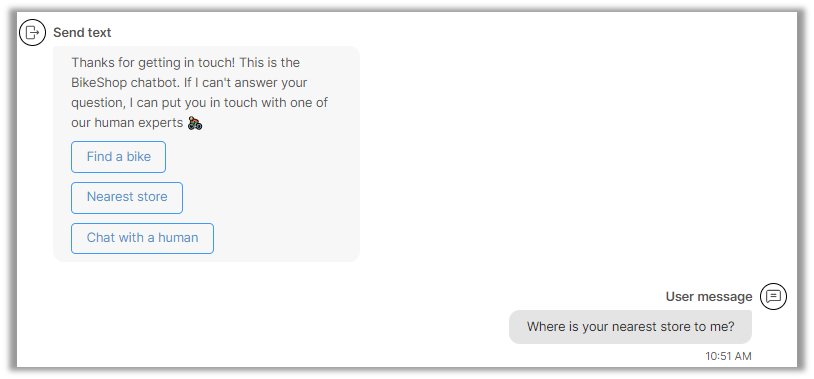
You can optionally add quick reply options if you would like to provide an easy way for people to say what they are after. They would just click the button that matches their response, or type something themselves.
This would look like this in the Instagram chat.
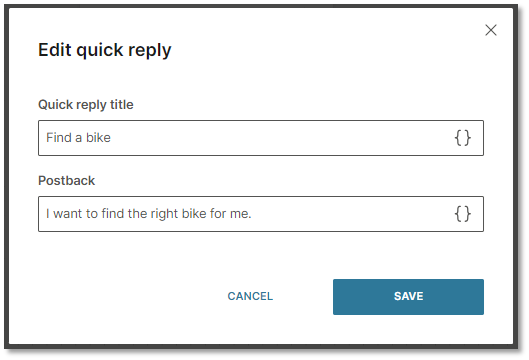
For our Instagram chatbot we are going to use quick replies in a way that enables us to create a specific response for each option.
Remember that at any point you can add a Repeat or Fallback option to cater for scenarios where the person does not respond or responds with text or numbers that the chatbot cannot interpret, like an abbreviation or a slang term that you haven’t allowed for.
Step 3 – Create a menu of options for people to choose from
It would be impossible to anticipate and support every query that people are going to ask your chatbot. However, based on the questions that you currently get, you should be able to cover the most common ones.
The key to a positive customer experience when dealing with a chatbot is to design the flow so it seems natural, and knowing when the chatbot should hand over to a human.
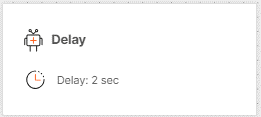
Before creating a list of options for the person to select from, you should add a Delay to give them time to read the previous message.
Do this by dragging on a delay element from the Chatbot actions menu and setting an appropriate time.
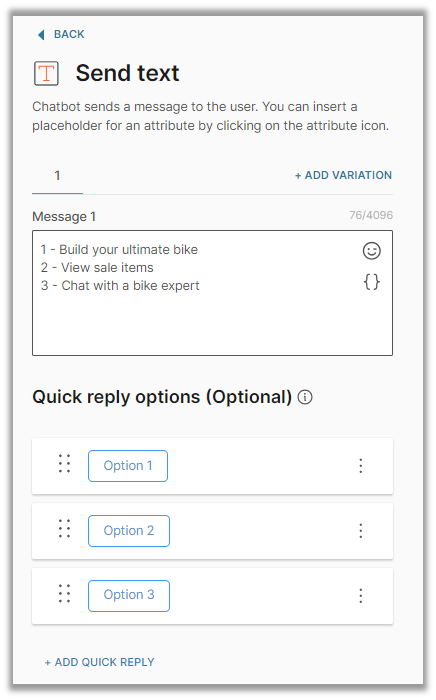
Start by adding a Send > Text dialogue that invites the person to select from the list of menu options that you will present.
This time we will use the optional Quick reply option so that the person just has to tap the response they want and don’t have to type anything.
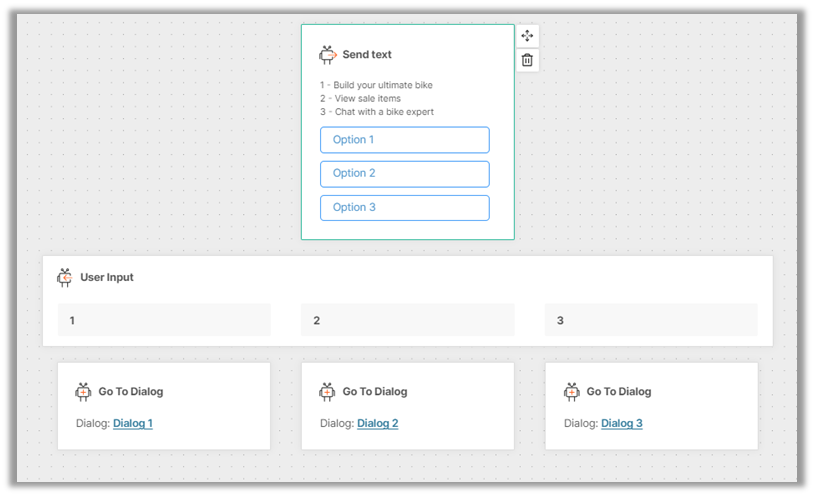
Step 4 – Link menu options to actions
The next step is to provide an action in response to each of the options that a person can choose.
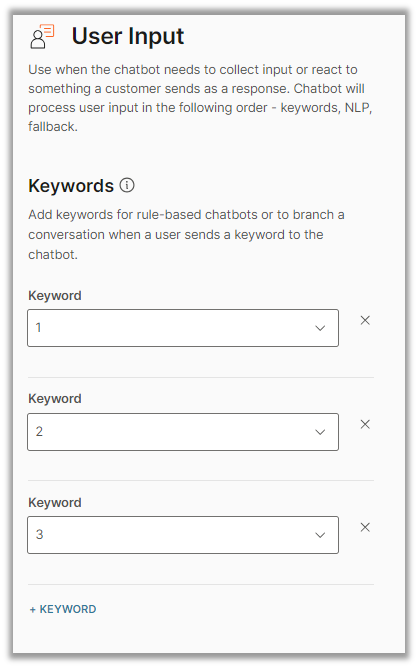
Do this by adding a User input element from the Chatbot receives menu.
In our example there are three possible options that a person can choose from, so we need to add three keyword branches.
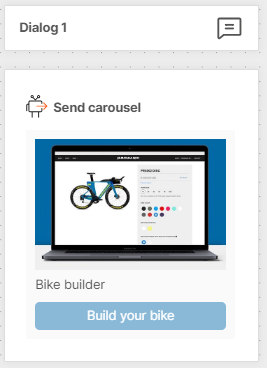
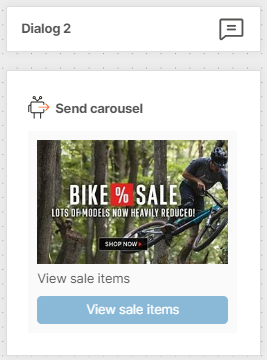
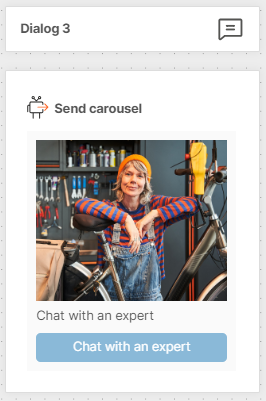
The next step is to configure three separate dialogs. We can do this in the Dialogs section on the left of the screen. Note that we must include an option that enables the person to chat with a human (as per the Instagram terms of service).
As Instagram is a very visual channel, we will use the Send carousel element to send a photo and button that represents the selected option.
The final step is to add a Go to Dialog for each of three user input options and link to the correct dialog for each one.
This part of the Instagram chatbot flow will now look like this:
We could keep building up more and more rules and sub menus of options, but what we have done should give you a good idea of the process. It is often better to start small with a proof of concept and then build your Instagram chatbot out to cover more use cases.
Step 5 – Create a seamless exit path
It is always a good idea to provide a smooth exit for the person once the chatbot has answered their query.
Something as simple as ‘Can I help you with anything else?‘ with a suitable response for each option.
When the interaction is complete – add a Close session attribute which will reset the chatbot and purge any saved data (if required for compliance purposes).
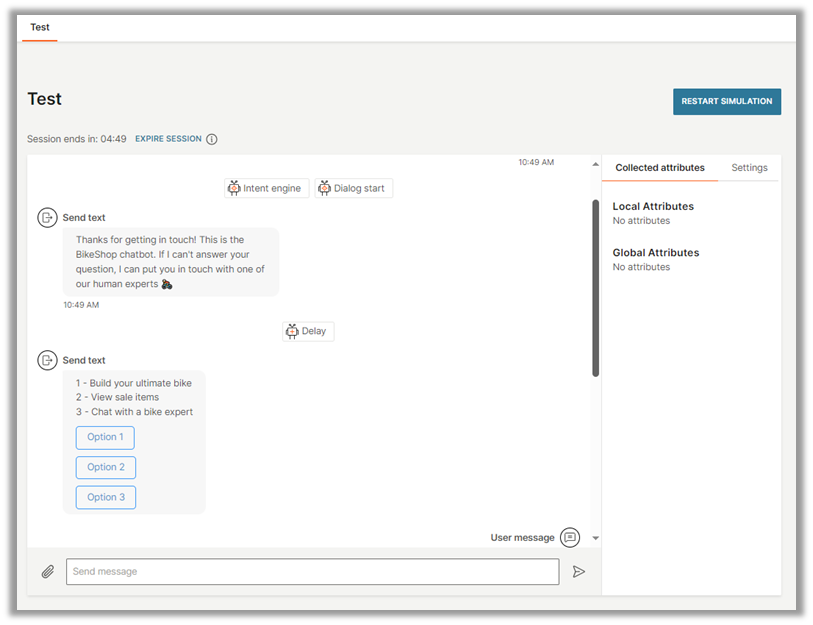
Step 6 – Test your chatbot
The last step before you go live is to test your chatbot using the Simulation option.
Click the Test option in the overhead menu and then click on the Start Simulation button.
If you have missed any configuration steps, these will be flagged at this point, and you will need to fix them before you can continue with the simulation.
Go further and build an Instagram AI chatbot
The above is an example of a simple rule-based chatbot. Using the same approach there is no limit to the complexity and sophistication of the chatbots that you can create, including chatbots trained to understand human language and to respond in a way that mimics the conversational responses of a human agent.
Check out this video to give you an idea of how to take your Instagram chatbot to the next level.
Next steps to deploy your Instagram chatbot
Make sure you have an Instagram Business Account
Chatbots are only available for business accounts. However, it is simple to convert a standard Instagram account into a business account by following these steps:
- Log in to your Instagram account.
- In the top-right corner of the page, click your profile > Settings.
- In the menu on the left, click Switch to Professional Account.
- Click Continue.
- Choose a category for your account.
- Follow the onscreen instructions to complete the conversion.
Connect your Instagram account with your Facebook account
If your Instagram Business Account isn’t connected to your Facebook account, then you will need to do this by following these steps:
- Log in to your Facebook business page as an administrator.
- Open your Facebook business page.
- In the menu on the left, choose Settings.
- Choose Instagram.
- To add an Instagram account to your page, choose Connect account.
- Enter your Instagram username and password.
Connect your Instagram account with your Infobip account
If you are using your Infobip account to create your Instagram chatbot then you will need to grant your Infobip with certain permissions.
Similarly, if you want to send Instagram messages from the Infobip interface then you must enable these permissions.
Step by step instructions for performing both these actions are detailed in our online documentation.
Review the rules for Instagram chatbot messaging
Meta has well enforced rules for protecting the privacy of its users across Facebook, WhatsApp, and Instagram. Make sure to read the Instagram Terms of Use to make sure you avoid a breach that could result in you getting suspended or blocked from using Instagram for your business.
A few points to highlight:
Human in the loop
To use the channel, it is mandatory to have human agent support even if you have automated communication set up. Customers must have the option to escalate any automated communication to a human agent.
Opt-in
A conversation between a chatbot and the end user can start only when the end user sends a message to your business using one of the entry points that you have enabled.
Bots can message a customer directly within 24 hours of receiving the last message from the customer.
Agents can message a customer directly within 7 days of receiving the last message from the customer. When an agent responds within this period, the tag ”HUMAN_AGENT” is added to the message automatically.