Oracle Responsys messaging
 Answers
This guide describes how to connect Oracle Responsys with Infobip using either WhatsApp, Viber, or RCS as a communication channel.
For more information about integrating SMS messages with Oracle Responsys, see the listing for SMS for Oracle Responsys (opens in a new tab).
In addition, this guide describes how to integrate Oracle Responsys with Answers to build two-way chatbot messaging between clients and customers. For more information, see Oracle Responsys with Answers.
What you will need
- At least one Infobip account (if you do not have an account, you can create one (opens in a new tab))
- Senders for WhatsApp and Viber
- Answers enabled in your Infobip account for Answers chatbots
See Create an Account for more information on Infobip accounts.
Features
- Outbound text and media templates with placeholders to personalize the content
- Media templates with image/video/document/location headers and buttons for reply, call, and click-to-URL
Viber
- Outbound text messages with placeholders
- Rich media messages: characters, interactive buttons, and links to boost customer engagement
RCS
- Supports message types: text, file, rich card, and carousel
- Sending to India possible using registered templates
- Outbound file messages with suggestions including: Reply, Open URL, Dial phone, Show location, Request location
Answers
- Use conversational features directly in the Oracle Responsys environment
- Enable two-way chatbot messaging between clients and customers
- Enhanced customer engagement and support through responsive chatbot interactions
Add callback data parameters
- Add your custom values or select from the placeholder list based on customer data (ℹ️ availability is subject to the contract type)
Contract type
Some features and procedures may vary based on your contract type:
- Oracle Full-Service Contract - you were offered the messaging solution (WhatsApp or RCS) by Oracle and you are billed by Oracle. Certain configuration steps are done for you by Oracle/Infobip crew.
- Direct Infobip Contract - you are Infobip’s client with own Infobip account and want to connect it to Oracle Responsys.
Installation and configuration
Follow these installation instructions to set up the Infobip app for Oracle Responsys for messaging channels and for integrating with Answers. When setting up the Answers integration, you then continue the installation using the instructions in Oracle Responsys with Answers.
Install the Infobip messaging app for Oracle Responsys (opens in a new tab) from the Oracle Cloud Marketplace.
Next, you need to connect your Infobip account with Oracle Responsys.
If you do not have an Infobip account, you can create one (opens in a new tab).
-
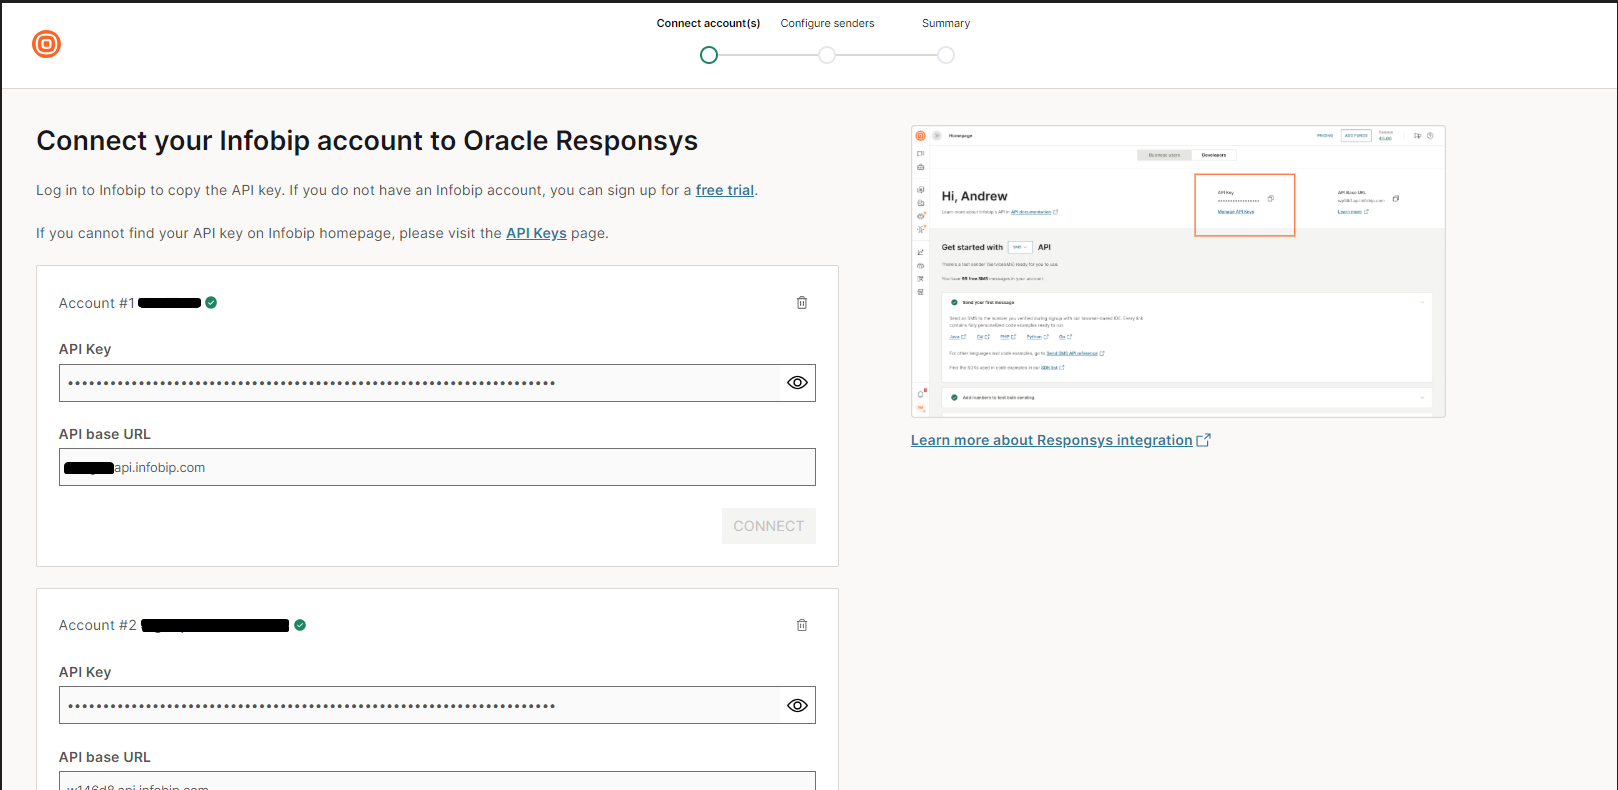
Connect one or multiple Infobip accounts to your Oracle Responsys account by creating an API key (opens in a new tab).
Select the following API scopes for the integration to work correctly:
-
Messaging only:
message:send account-management:manage numbers:manage subscriptions:manage application-entity:manage whatsapp:manage rcs: manage -
Answers chatbot setup:
   answers:manage
   onboarding:manage
   voice-message: manage
-
-
Copy your Infobip API base URL.
-
Connect your Infobip account(s) to Oracle Responsys by entering your API key and API base URL.
-
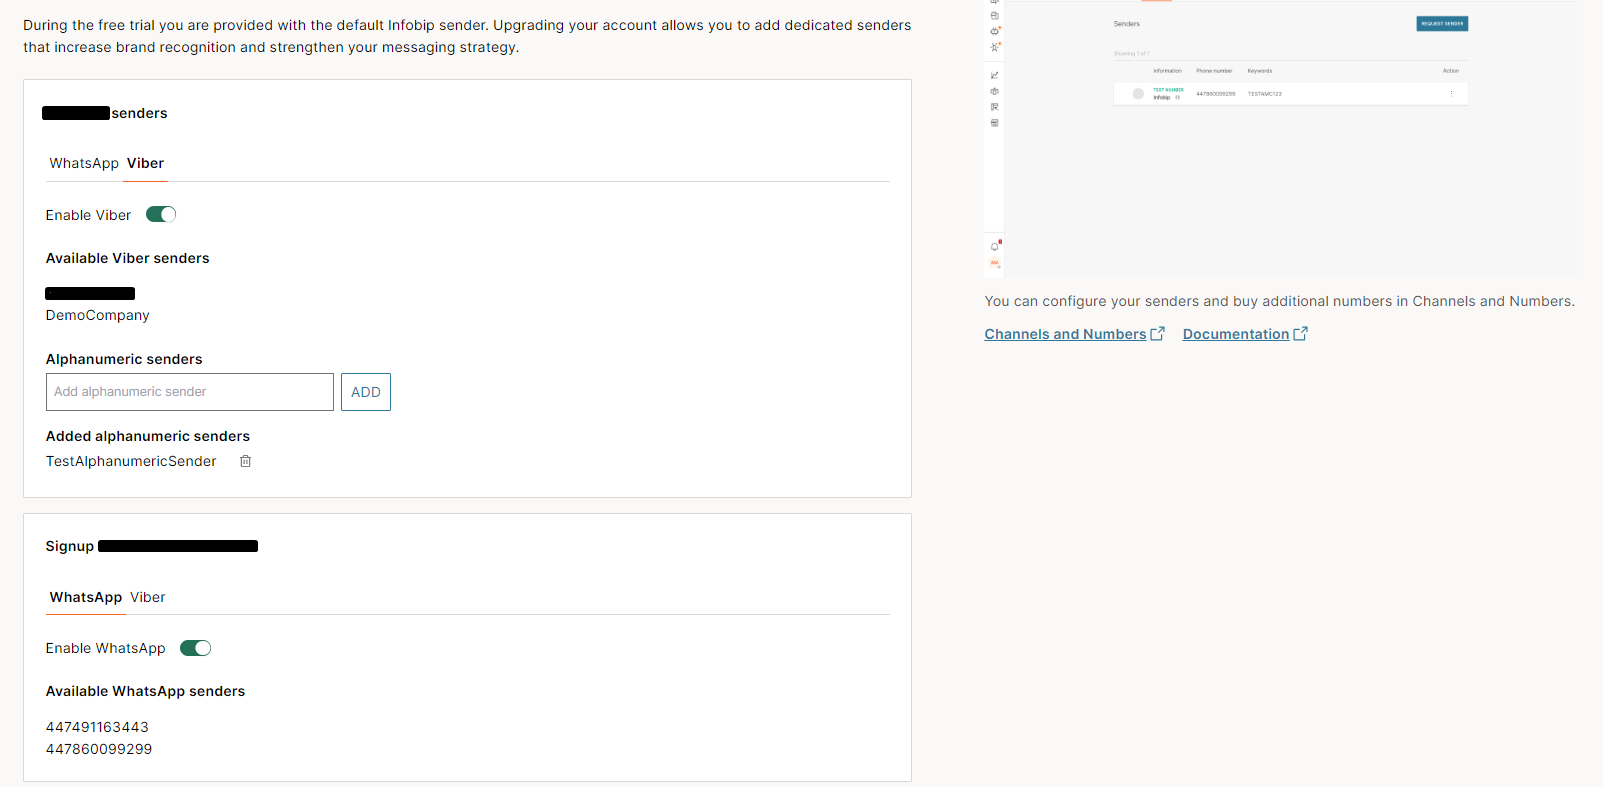
Enable the channels you want to use by clicking the toggle button. (For Full Service users, this step is not required - go to step 6 to save the configuration.)
-
If you plan to use an alphanumeric (short code) sender as a Viber sender, add it to the Alphanumeric sender text box.
-
Click Finish to save the configuration. A pop-up message displays a message when the configuration is successfully saved.
Create a Responsys program
When you have an Infobip account, and testing or purchased Infobip resources (numbers, RCS agents), you can start testing and sending programs.
To send messages using Oracle Responsys, your program design must include the Infobip Messaging application. If you are unfamiliar with how programs are configured in Responsys, see the Oracle Responsys Help Center (opens in a new tab) documentation.
This program example uses the following elements:
- Scheduled filter or view as an entry point
- Apps to configure the Infobip Messaging application
- Set data to save the information from the Delivery Reports
- Validate and Publish IMAGE
Program entry point
The entry point is a scheduled filter, and messages are sent based on this filter. For more information about program entry points in Oracle Responsys, see Programs (opens in a new tab) in the Oracle Responsys documentation.
Filter and segment audience
You are recommended to filter the customers based on opt-in. Filter the audience to include only customers who have opted in.
For more information on filters and segment groups, see Filters and Segment Groups (opens in a new tab) in the Oracle Responsys documentation.
Configure the Apps element
After configuring filters and scheduling the time of the campaign, drag and drop the Apps element and start the configuration.
-
Right-click the Apps element, and click Configure app.
-
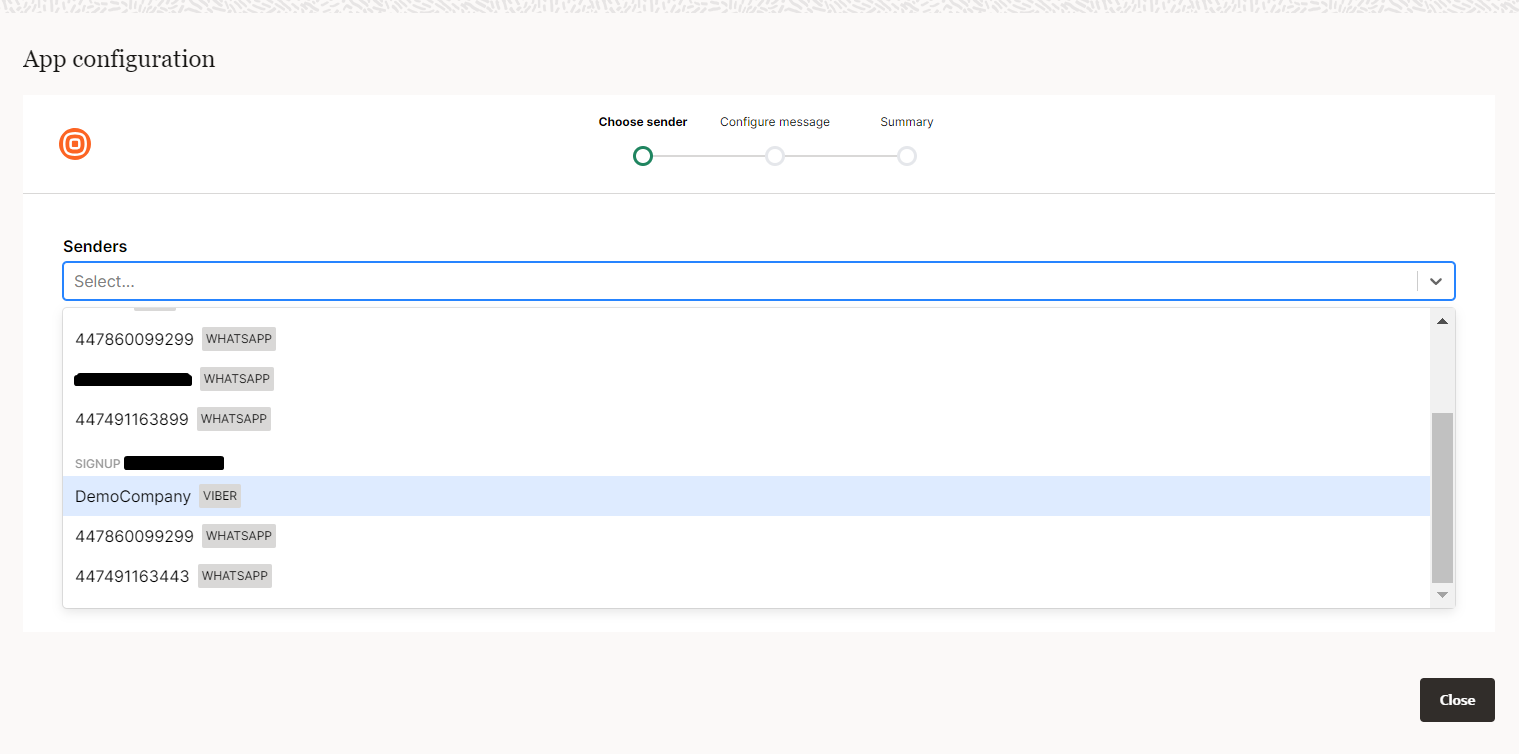
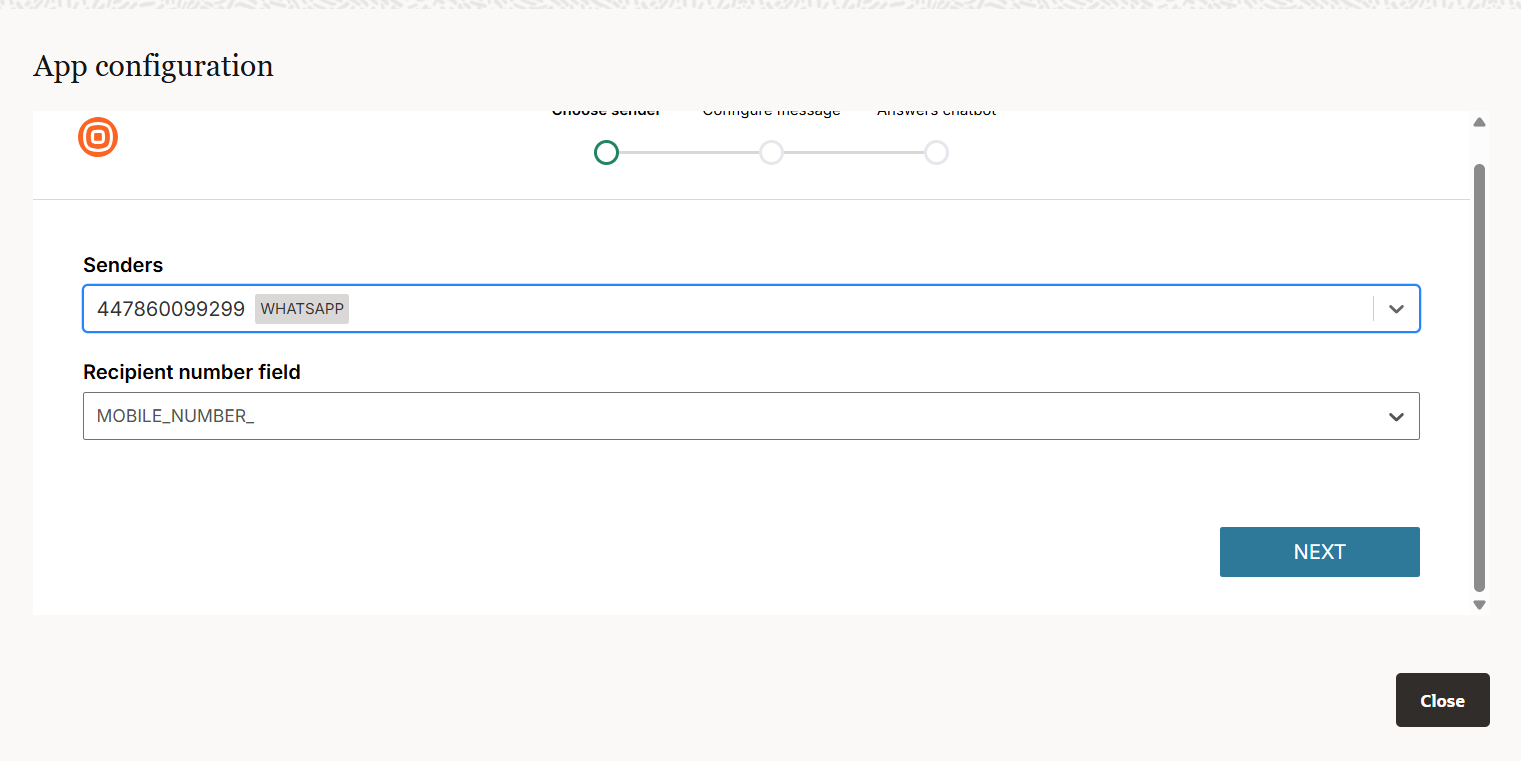
After the Choose sender screen opens, select a sender from the Senders drop-down list. This list is of registered Infobip senders for all the accounts you have connected and channels enabled.
-
Enter the default field MOBILE_NUMBER_ in Receipt number field. Messages are sent to numbers that are stored in the profile list default field MOBILE_NUMBER_. You can choose a different destination field, if required.
-
Configure the sender: When you select a sender from the list, you see the Configure message screen. This step depends on the channel you have chosen:
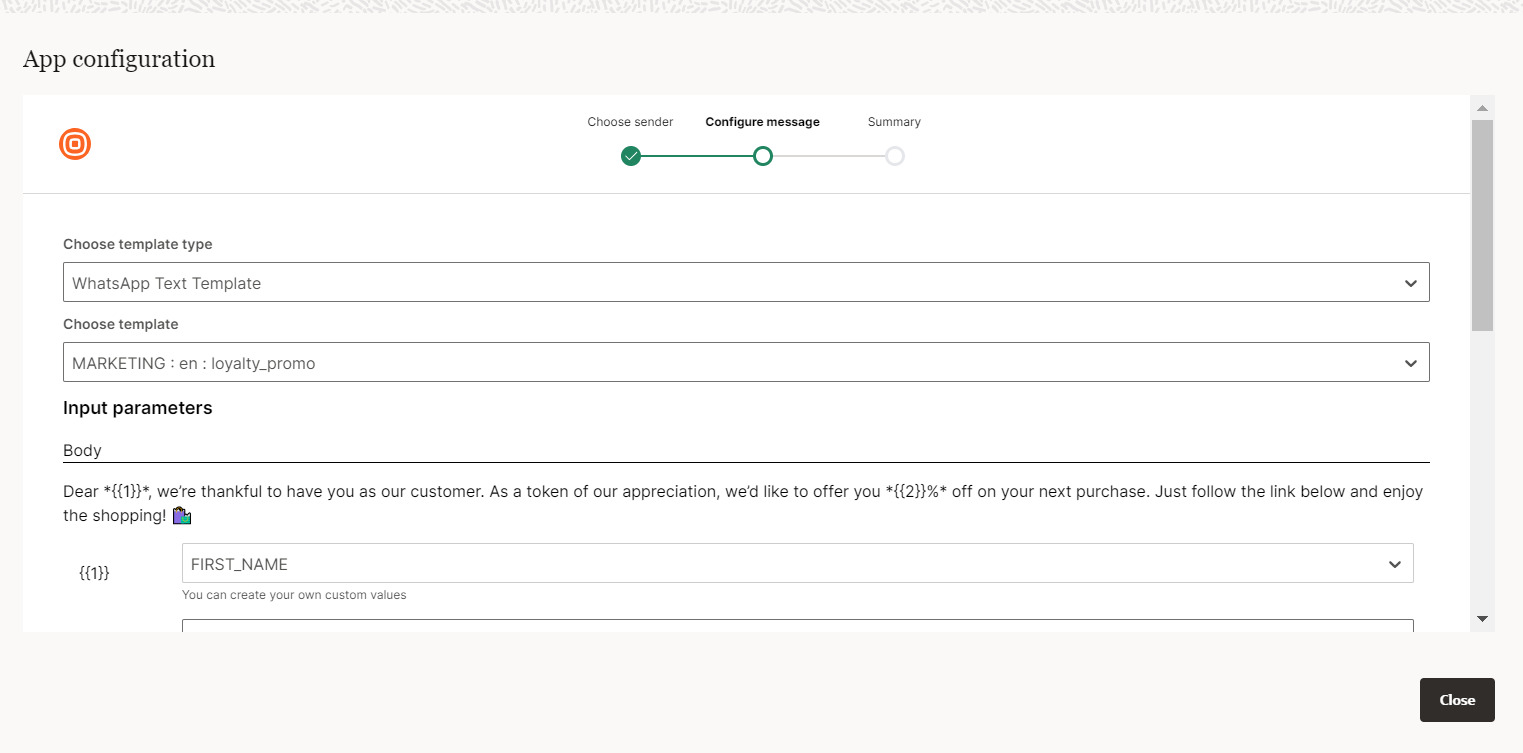
- WhatsApp: Select a template from the available options. Choose whether to send the message as a text or media template. See WhatsApp template details for more information.
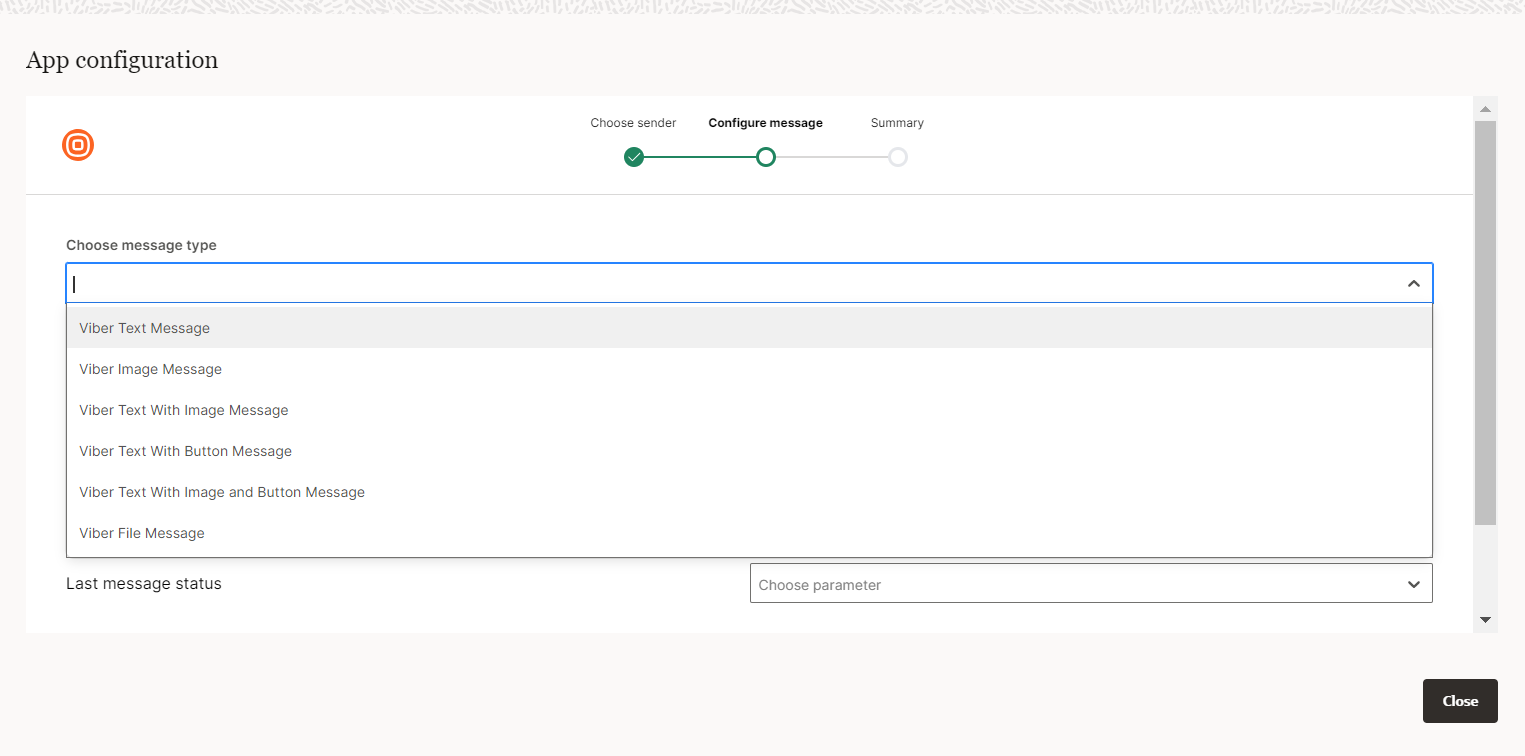
- Viber: Select the message type from the available options. Choose whether to send the message as text or a rich media template message (image, text with image, text with button, text with image and button). See Viber message details for more information.
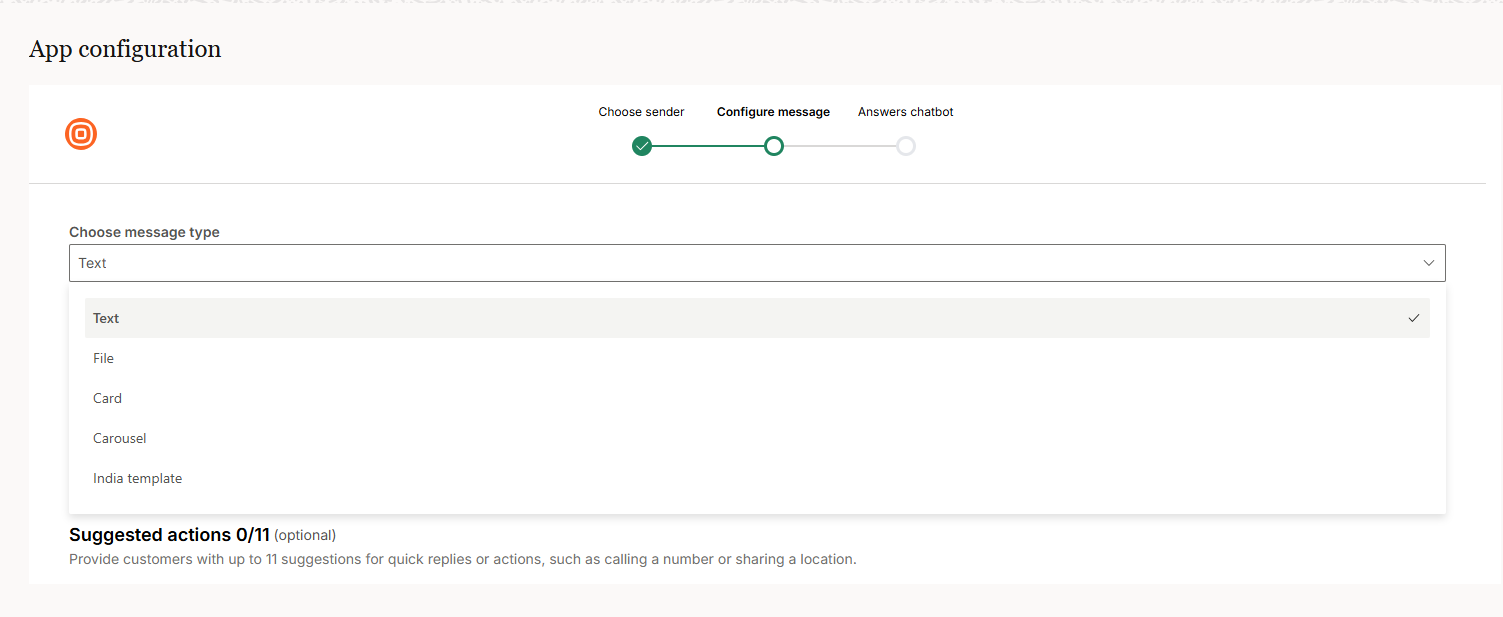
- RCS: Select the message type from the available options. Choose whether to send the message as a text, file, card, carousel message, or India template. See RCS message details for more information.
The remaining configuration steps are the same for all channels.
-
Define your message: Add your message in the predefined textbox and add rich media, if required.
-
Personalize the message: Use placeholders in the Placeholders field. This step depends on the channel you have chosen:
- RCS: Click the placeholder icon
{}to select from the available placeholders - WhatsApp and Viber: Choose a placeholder from the list based on customer data obtained from:
- Profile list
- Profile extension table
- Event variable
- For WhatApp only: Manually type the information in the Placeholder textbox
- RCS: Click the placeholder icon
-
Configure optional features:
- Callback data (optional): Add your custom text as the value or select from the predefined placeholder list. The placeholder list is based on customer data obtained from the Profile list, Profile extension table, and Event variable fields. ℹ️️ This feature is available only to users under a Direct Infobip Contract.
- Enable URL shortening for URLs in the WhatsApp body by toggling the URL Shortening button. ℹ️ This feature is available only to users under a Direct Infobip Contract.
- Add the Last message status to create failover campaigns based on the status of the last message. Set Timeout for receiving message status. The minimum timeout is 10 minutes, and the maximum is 23 hours. ℹ️ This feature is available only to users under a Direct Infobip Contract.
- Set Timeout for receiving message status. The minimum timeout is 10 minutes, and the maximum is 23 hours.
-
Save the configuration: Click Submit.
For example, see the following sections for more detail on the configuration flow for WhatsApp, Viber, and RCS.
WhatsApp template types
When you configure the Apps element for WhatsApp, you first choose a template type, which defines how to send the message. WhatsApp templates are of the following types:
- WhatsApp text template
- WhatsApp media template
Viber message types
When you configure the Apps element for Viber, you first select a message type, which defines how to send the message. Viber messages are of the following types:
- Text
- Image
- Text with image
- Text with button
- Text with image button
- File
RCS message types
When you configure the Apps element for RCS, you first choose the message type, which defines how to send the message. RCS messages are of the following types:
- Text
- File
- Card
- Carousel
- India template
Configure output parameters (optional)
ℹ️ This feature is available only to users under a Direct Infobip Contract.
If you wish to store the status of messages:
- Go to Settings > Tracking and Variables section > Entry Tracking.
- Click the Add + icon.
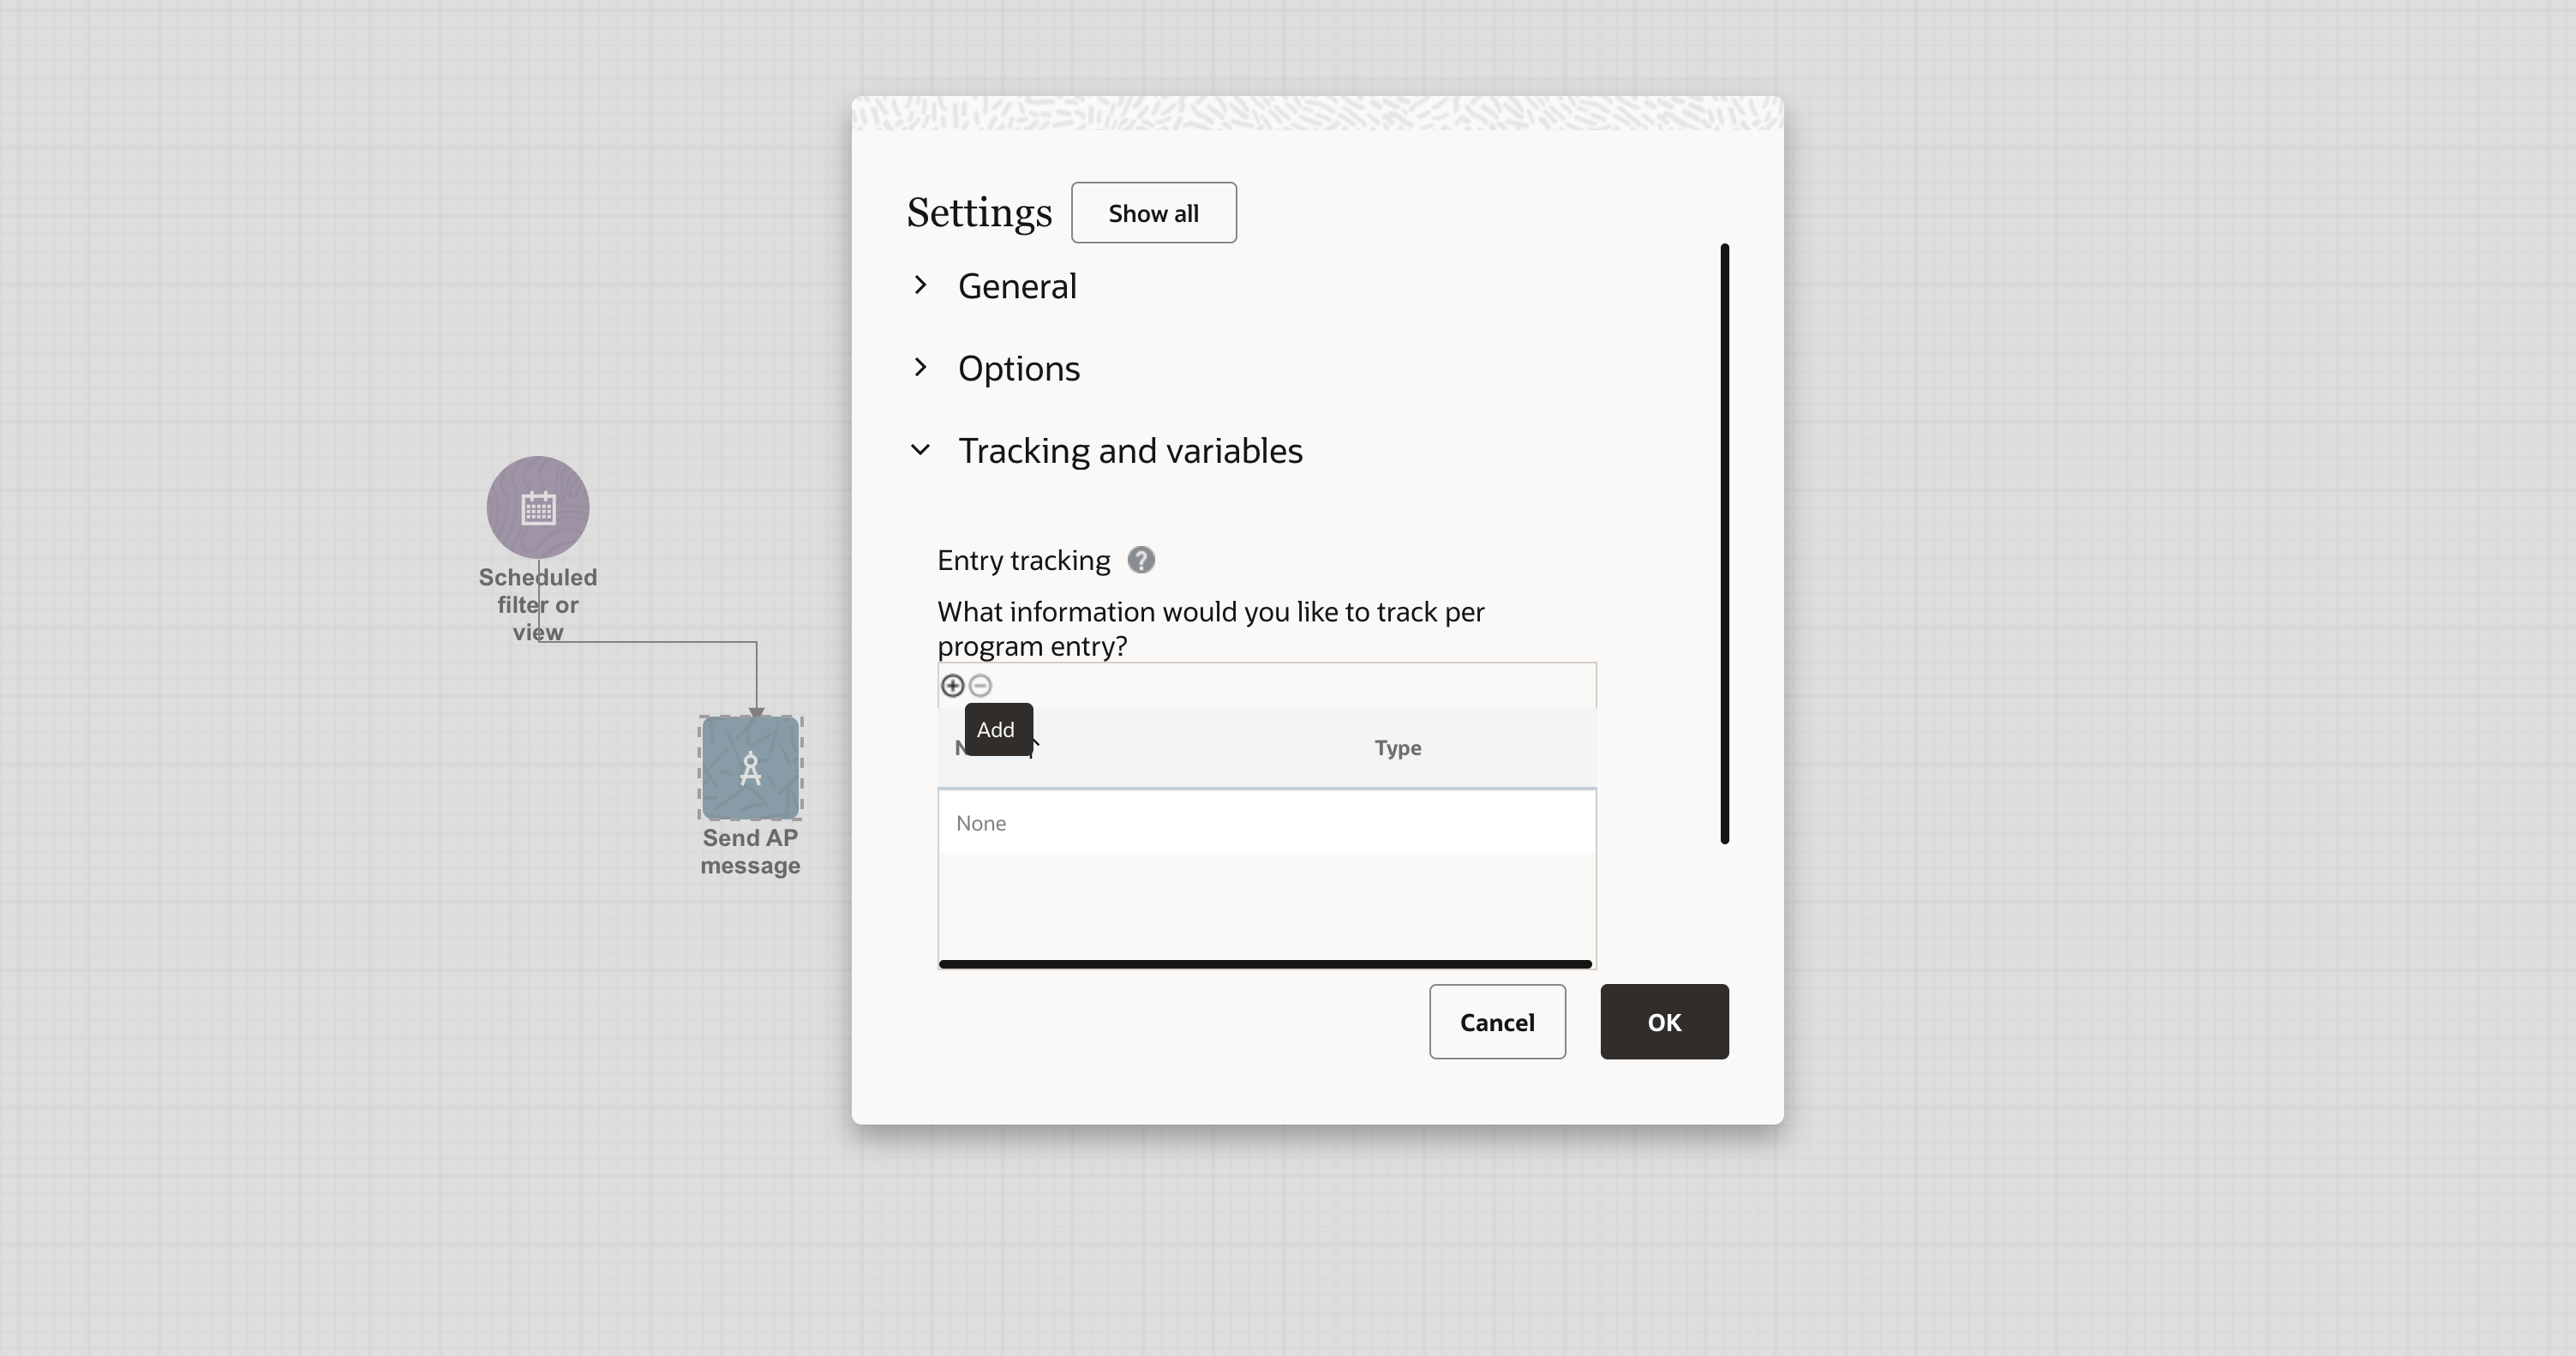
- Create the variable with the message status you want to track.
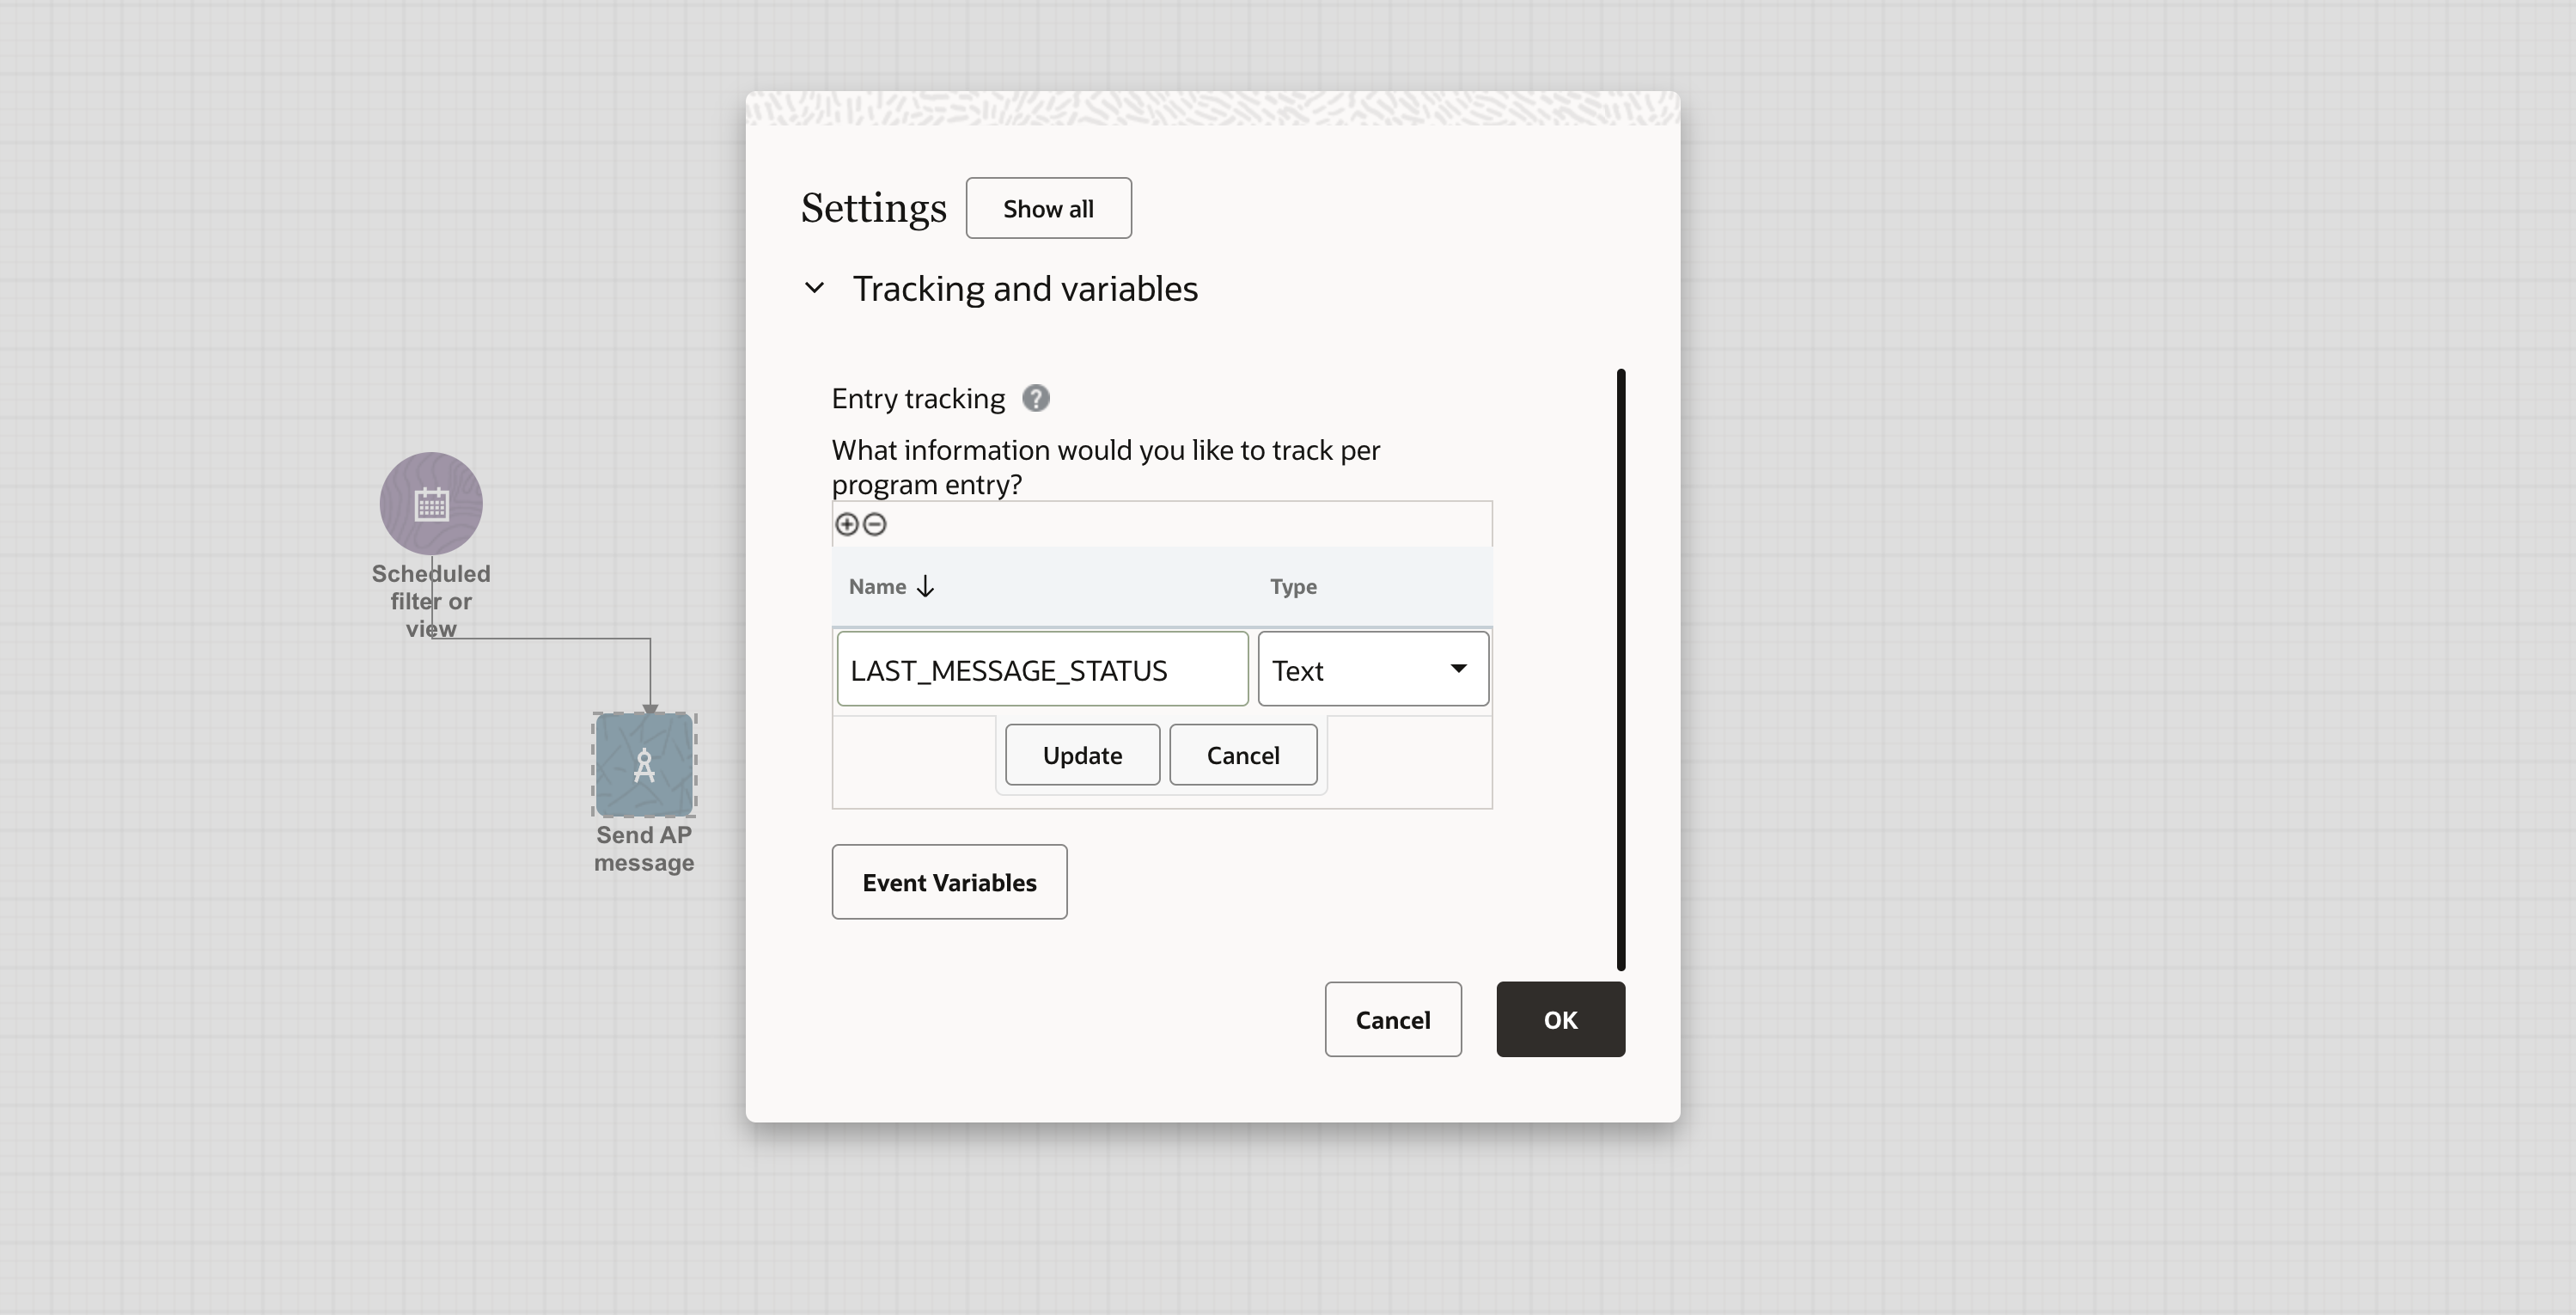
- Click Update and save changes.
You can create complex failover campaigns based on the status of the last message. Store and retrieve the following message statuses:
| Message statuses | Description |
|---|---|
| Sent | The message was sent to Infobip and is sent to the end user. |
| Failed | The message was not delivered because of one of the following reasons: Message was rejected by Infobip, Message was rejected by the MNO, End user blocked the sender |
| Delivered | The message was delivered successfully. |
| Seen | The end-user has received and seen the message. |
| Clicked | The number of URL Links that are clicked. |
Set a timeout to receive message status
Because of limitations in Responsys, the message status (Delivery Report) cannot be sent to Responsys in real-time. You can define the interval after which Infobip sends the message status to Responsys.
This interval is stored as a variable in the output parameter Timeout. The minimum timeout is 10 minutes and the maximum is 23 hours. After the timeout period expires, the output parameter is forwarded with the Set data element.
After the message status is stored in this variable, you can use the variable to do the following:
- Populate profile lists
- Populate profile extension tables
- Data switch
The following scenario shows how to configure the data switch:
You can forward the data from the variable to either a profile extension table or a profile list. While profile lists are preconfigured, you can add attributes to profile extension tables. For more information about profile extension tables, see Creating Profile Extension Tables (opens in a new tab).
This example forwards the data from the variable to a Profile Extension Table in which WhatsApp attributes are configured.
To configure the profile extension table, right-click the Set data element and choose Properties.
The message status is stored in the profile extension table. You can use this status in your campaigns.
Validate and publish
Once you have configured all elements, you can activate the campaign by doing next steps
- Validate your program to check whether the settings are correct.
- Publish the program.
Analyze reports
You can review the performance of the channel in the Analyze tab.
Request verified sender
When you have finished testing, you can request dedicated WhatsApp senders from the Infobip web interface. When you have finished testing, you can request dedicated Viber senders from the Infobip web interface.
Oracle Responsys with Answers
ℹ️ This feature is available only to users under Oracle Full-Service Contract.
Answers integration lets you use conversational features directly in the Oracle Responsys environment. The goal is to integrate Infobip Answers with Oracle Responsys to enable two-way chatbot messaging between clients and customers. This integration allows automated, interactive communication, enhancing customer engagement and support through responsive chatbot interactions.
To use this integration, initially, you need to set up the Oracle Responsys messaging application without the Answers feature. For more information, see Installation and configuration.
Once you have defined the outbound customer engagement using messaging channels, follow the instructions below to configure the Answers chatbot for the specified program.
What you will need
- Infobip account used with Oracle Responsys Messaging
- Answers enabled in your Infobip account
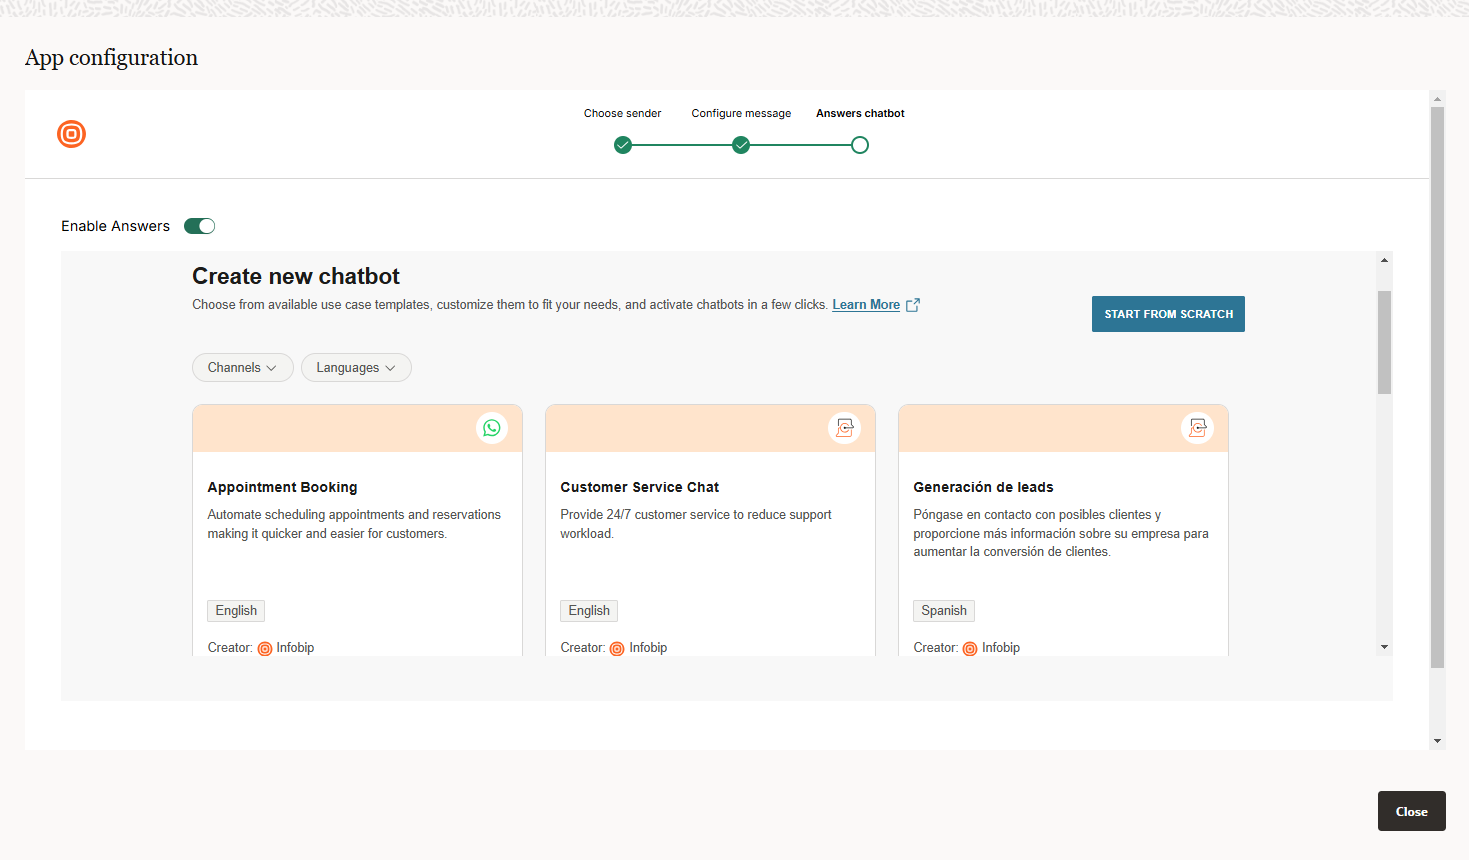
Configure chatbot in App configuration
To setup the integration in the App configuration:
- Right-click the Apps element, and click Configure app.
- Select the Enable Answers option during the app configuration.
Setup Answers
To use the integration, setup the following chatbot features in Answers:
- Attributes: Create a text attribute to store
callbackDatafrom the Responsys campaign template message.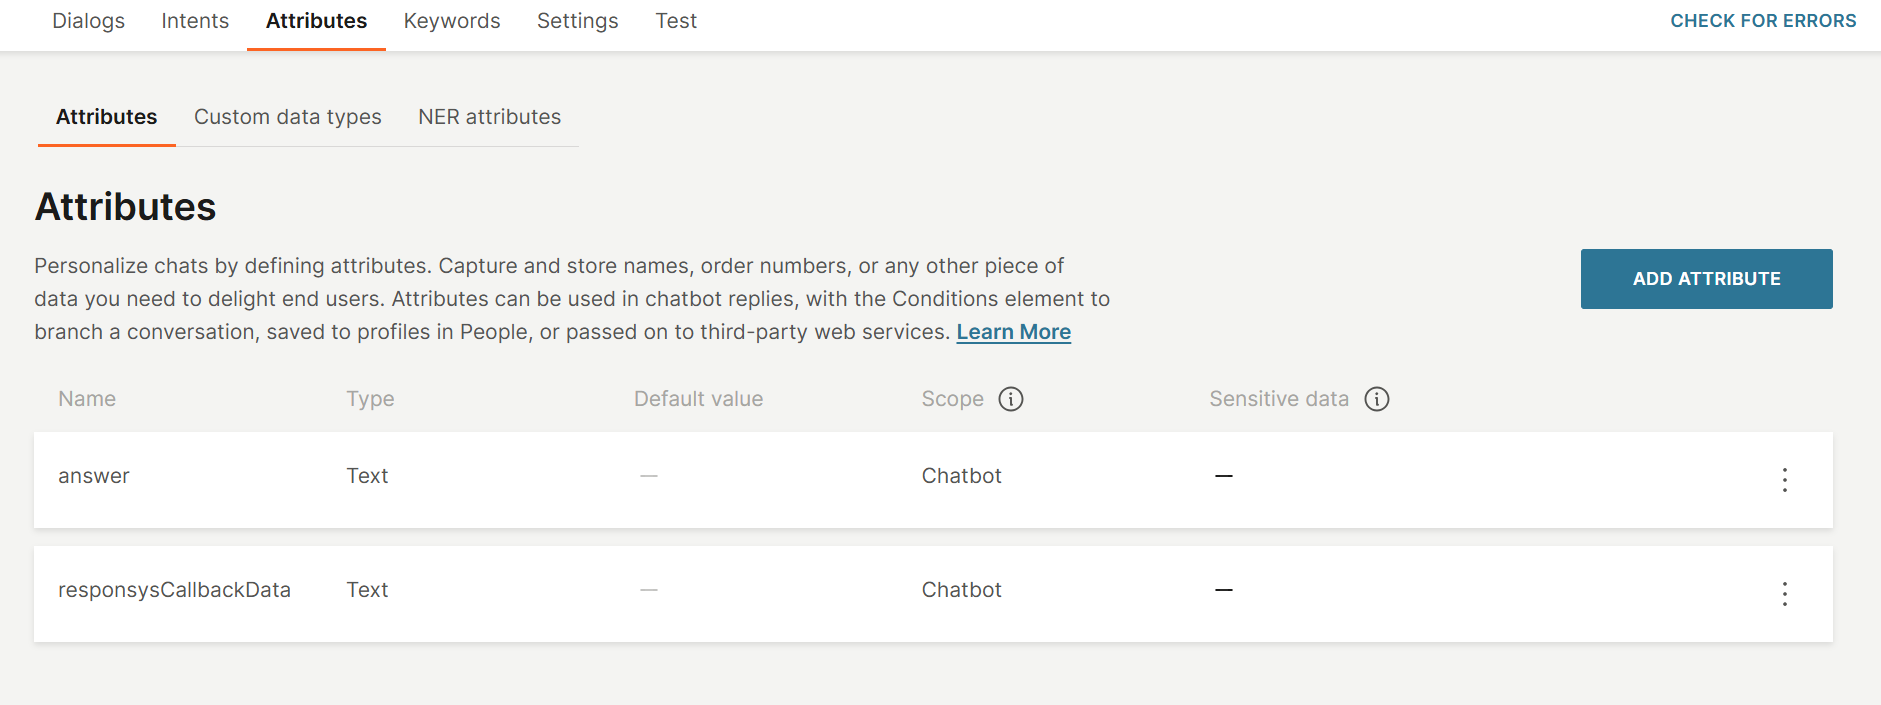
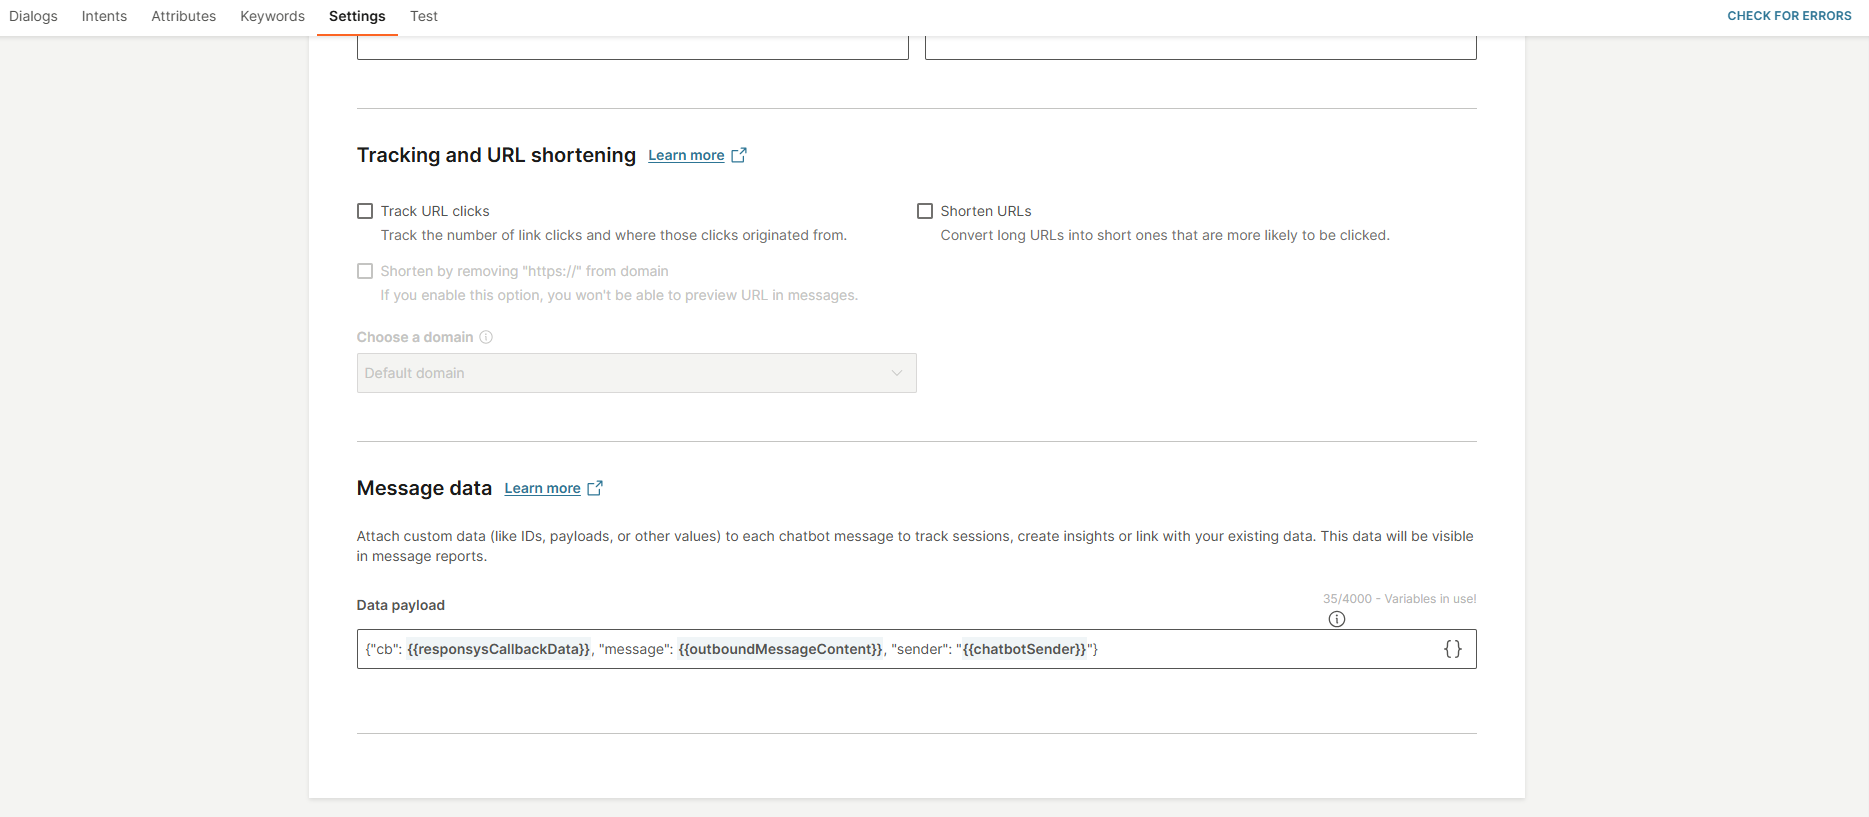
- Message data: Configure the message data to include additional content details in message reports.

- Code block Create a coding element for more flexibility when designing a dialog and the use of attribute values. In this case, the code block should be invoked at the start of the flow. Its purpose is to retrieve the
callbackData(metadata from the Responsys campaign message) and store it in a predefined chatbot attribute.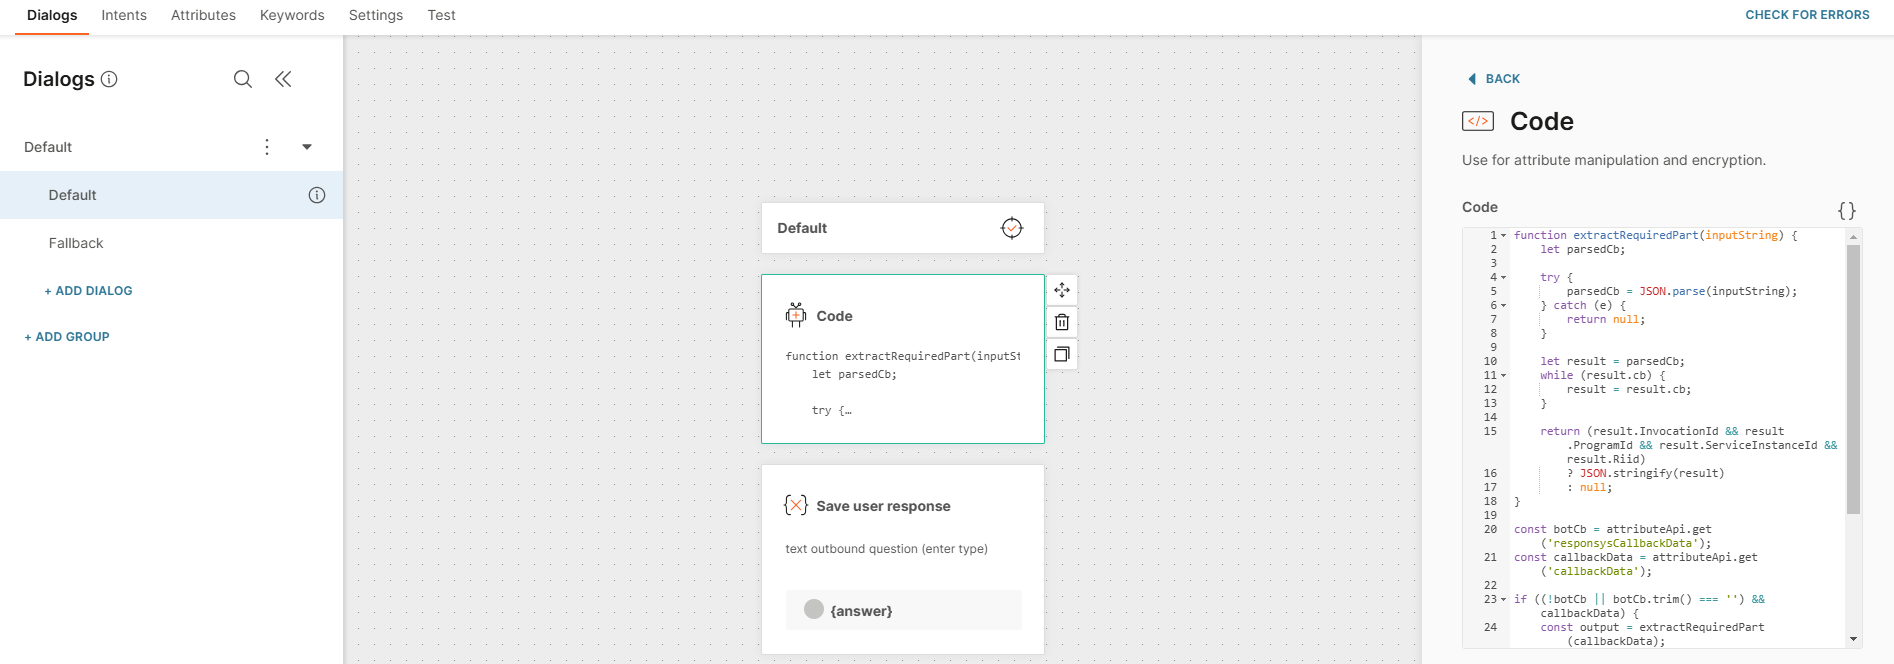
function extractRequiredPart(inputString) {

    let parsedCb;
    try {

        parsedCb = JSON.parse(inputString);
    } catch (e) {
        return null;
    }
    let result = parsedCb;
    while (result.cb) {
        result = result.cb;
    }
    return (result.InvocationId && result.ProgramId && result.ServiceInstanceId && result.Riid)
        ? JSON.stringify(result)
        : null;
}

const botCb = attributeApi.get('responsysCallbackData');
const callbackData = attributeApi.get('callbackData');

if ((!botCb || botCb.trim() === '') && callbackData) {
    const output = extractRequiredPart(callbackData);
    if (output) {
        attributeApi.set('responsysCallbackData', output);
    }
} else if (botCb && callbackData && botCb !== callbackData) {
    const output = extractRequiredPart(callbackData);
    if (output) {
        attributeApi.set('responsysCallbackData', output);
    }
}
Test the chatbot flow
To test the chatbot flow:
- Configure the Infobip Responsys application.
- Create a program and include a messaging action service:
- Configure a WhatsApp template message or RCS message
- Configure a chatbot with the same sender resource that is used for sending messages
- Reply to the message from your mobile phone.
- Wait for the chatbot to answer.
If a message is not replied to and is treated like a simple outbound message, it is not possible to collect callback data from the campaign. As a result, the API call for importing messages to Oracle will be rejected, even though the chatbot flow concludes normally.