ServiceNow messaging
 SMS
SMS
 Voice
Voice
Engage your customer or employees with Infobip apps available on ServiceNow. There are two apps available that you can install on your ServiceNow account:
- Infobip Notify - an app for one-way messaging with the SMS, WhatsApp, and RCS channels.
- Infobip Omnichannel Conversational Messaging - an app for two-way messaging with the SMS and WhatsApp channels.
- Infobip SPOKE (opens in a new tab) - this is a 1-way solution for automating your SMS messaging.
Infobip Notify
This app provides a one-way solution serving as a notification system connected to a Notify plugin. The available channels are SMS, WhatsApp, and RCS. Messages can be sent from an Incident or a Case object. This app provides logs in object when the message is sent and and a page with the listed delivery reports for all messages.
The supported message types for each channel are:
- SMS - text only
- WhatsApp - text templates
- RCS - text only and image only, SMS failover is available
- Voice - text to speech messages sent using Workflow Editor
What you will need
Before you begin, you need:
- An Infobip account with the role:
x_infob_infobip_admin. If you do not have an account, you can create one (opens in a new tab). - An API key from your Infobip account
- A ServiceNow account with the ServiceNow Notify plugin installed
Installation
The setup procedure is as follows:
- Install the Infobip Notify app from the ServiceNow Store (opens in a new tab).
- Go to Notify, and then select Administration > Infobip Configuration.
- Ensure that you have copied your Infobip API key.
- On the Infobip Config page, enter your Infobip API Key.
- Click Connect. This calls the Infobip API to fetch all purchased WhatsApp and SMS numbers.
- If the connection is successful, you'll see the message “Connected to Infobip”.
Use the following configuration sections to complete the setup.
Get phone numbers
After connecting with an application, go to either Notify > Numbers (for sending SMS) and Notify > Infobip Senders (for other channels) for all the numbers associated with the Infobip account.
Create a number group
Number groups are used identify the Infobip numbers. To create the group:
- Go to Notify-> Numbers Groups.
- Create a new group called Infobip SMS Group and assign it to Infobip Number in the numbers table.
- For sending SMS, assign the only workflow on the Outgoing SMS workflow Infobip SMS Group.
Associate a number to number group
Identify the Infobip numbers to be associated with the new number group (Infobip SMS Group).
- Go to Notify > Numbers.
- Select the numbers from Infobip and assign them the Notify Group (Infobip SMS Group).
Notify configuration
Go to Notify > Notify Properties page, and then update the phone number for sending SMS.
RCS delivery reports configuration
To configure RCS delivery reports, you need to set up authorization with OAuth, create a user for access, and pass the OAuth credentials to Infobip. These steps are described in the following sections.
Create an OAuth application endpoint for external client applications to access the ServiceNow instance:
- Go to System OAuth > Application Registry, and then click New.
- On the interceptor page, click Create an OAuth API endpoint for external clients and then complete the form.
- Specify a unique name that allows you to recognize the entry.
- Click Submit. The record is saved in the Application Registries [oauth_entity] table. This part creates an application endpoint for Infobip to be able to receive an access token, which is used to authenticate a request for updating message statuses.
To create a new user:
- Go to User Administration > Users.
- Click New and enter the following information:
- User ID
- Password
- Check Web service access only.
- Click Update. The user is created.
Infobip request
To finish the configuration, you need to contact Infobip and include all of the following information:
- Your instance URL
- Client ID and Client Secret
- User ID and User Password
- Token
- List of senders that you would like to configure with ServiceNow
Infobip prepares the mechanism for forwarding messages to your instance. Make sure that you share data via the Infobip S-Pass app.
Send notifications from Incidents and Cases
Use this app from Incidents and Cases. The following steps cover Incidents, but you can use the same steps for Cases.
- Go to Incident, and select All.
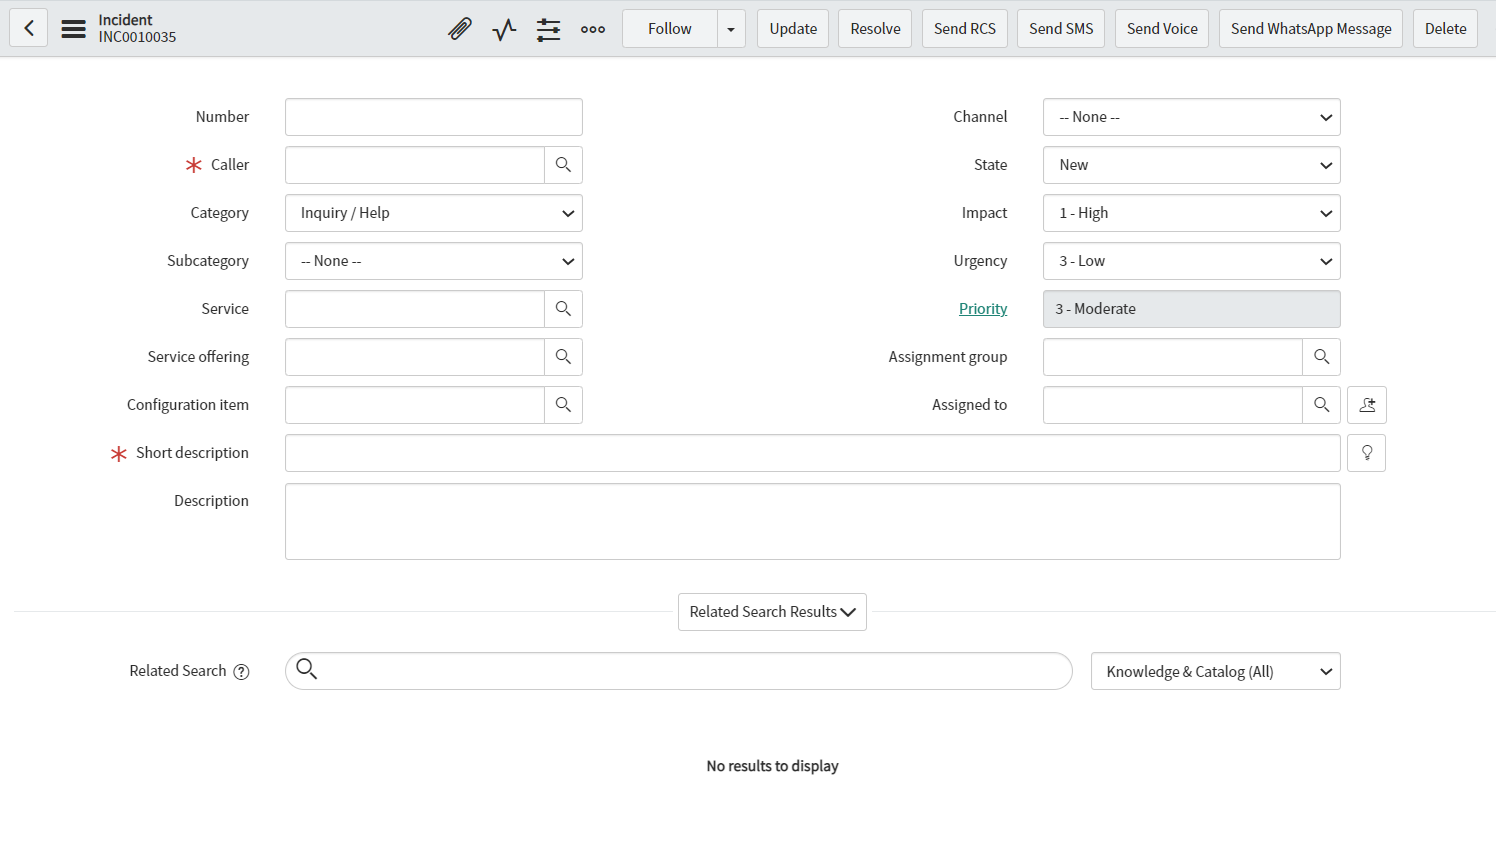
- Select a case from where you want to send a notification, and choose a channel by clicking one of the Send RCS, Send SMS, Send Voice, or Send WhatsApp Message buttons.
The following sections describe the steps for each of the channels.
Send RCS
- Select an RCS Sender.
- Select Message content - Text or Image. If you select Image content, provide the image URL.
- Enter the Recipient’s Phone number.
- Enable the Failover to SMS option and enter the required message details.
- Go to Notify > Messages or Infobip Messages to check the message status.
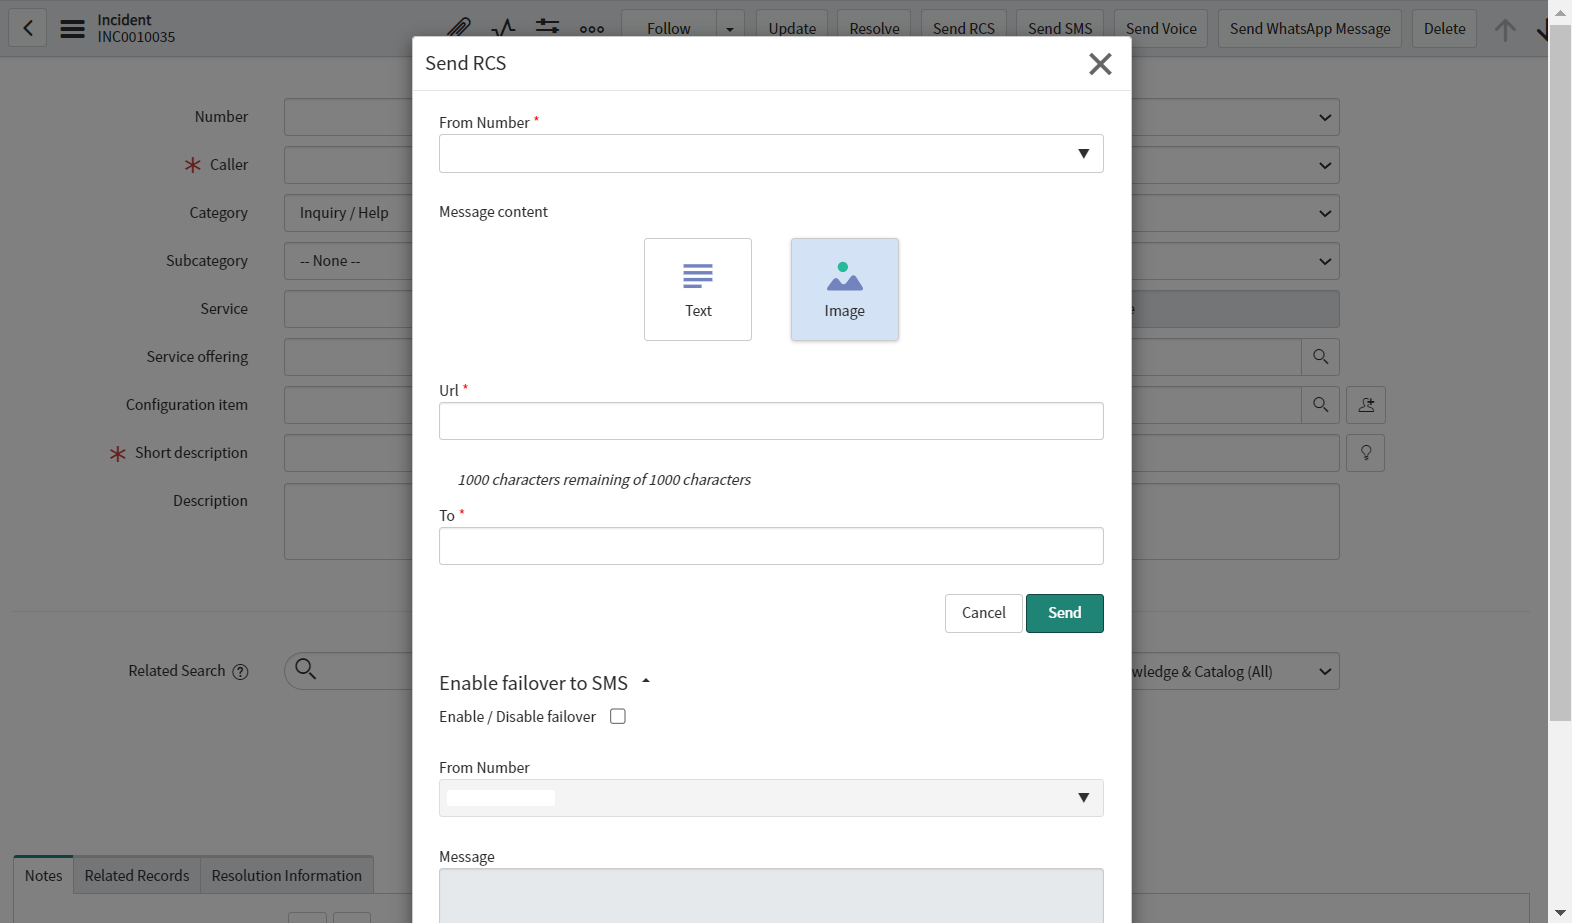
Send SMS
- Select an SMS Sender.
- Add Recipients.
- Add Message Content.
- Go to Notify > Messages or Infobip Messages to check the message status.
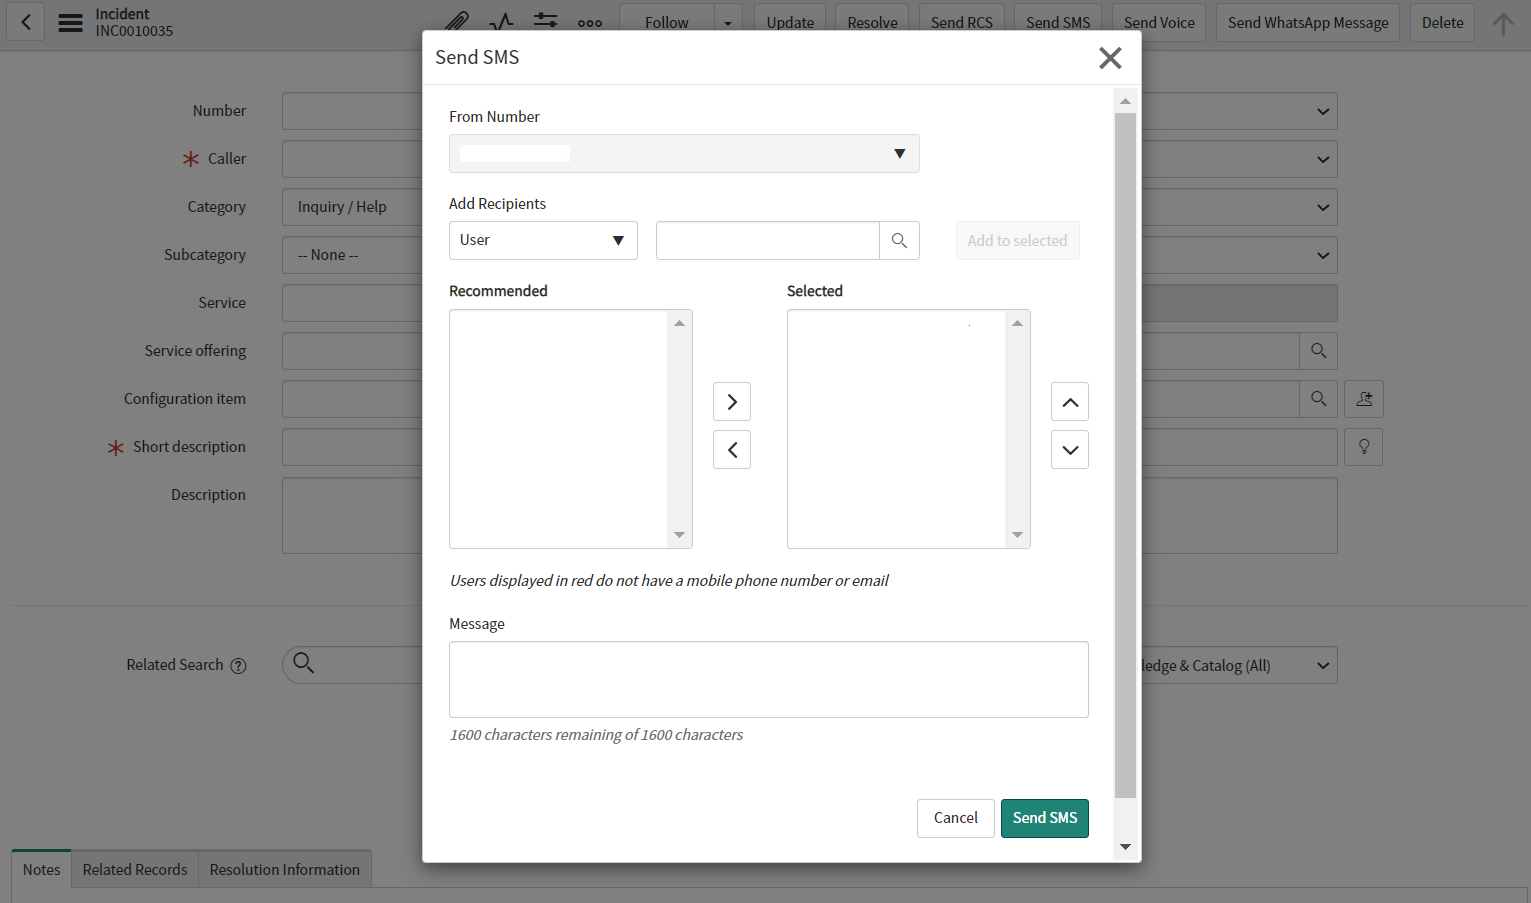
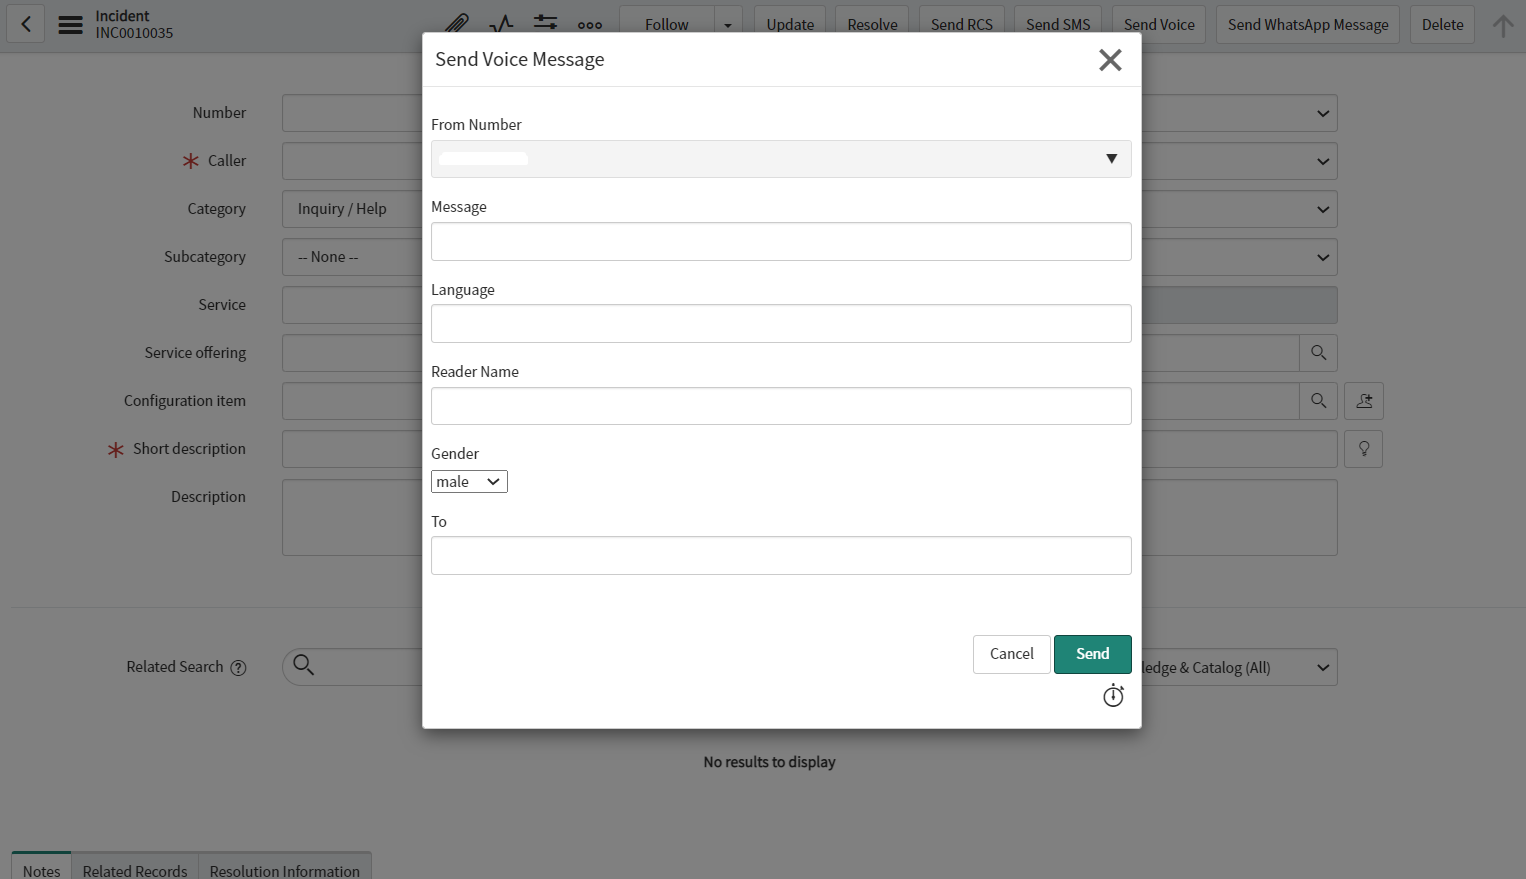
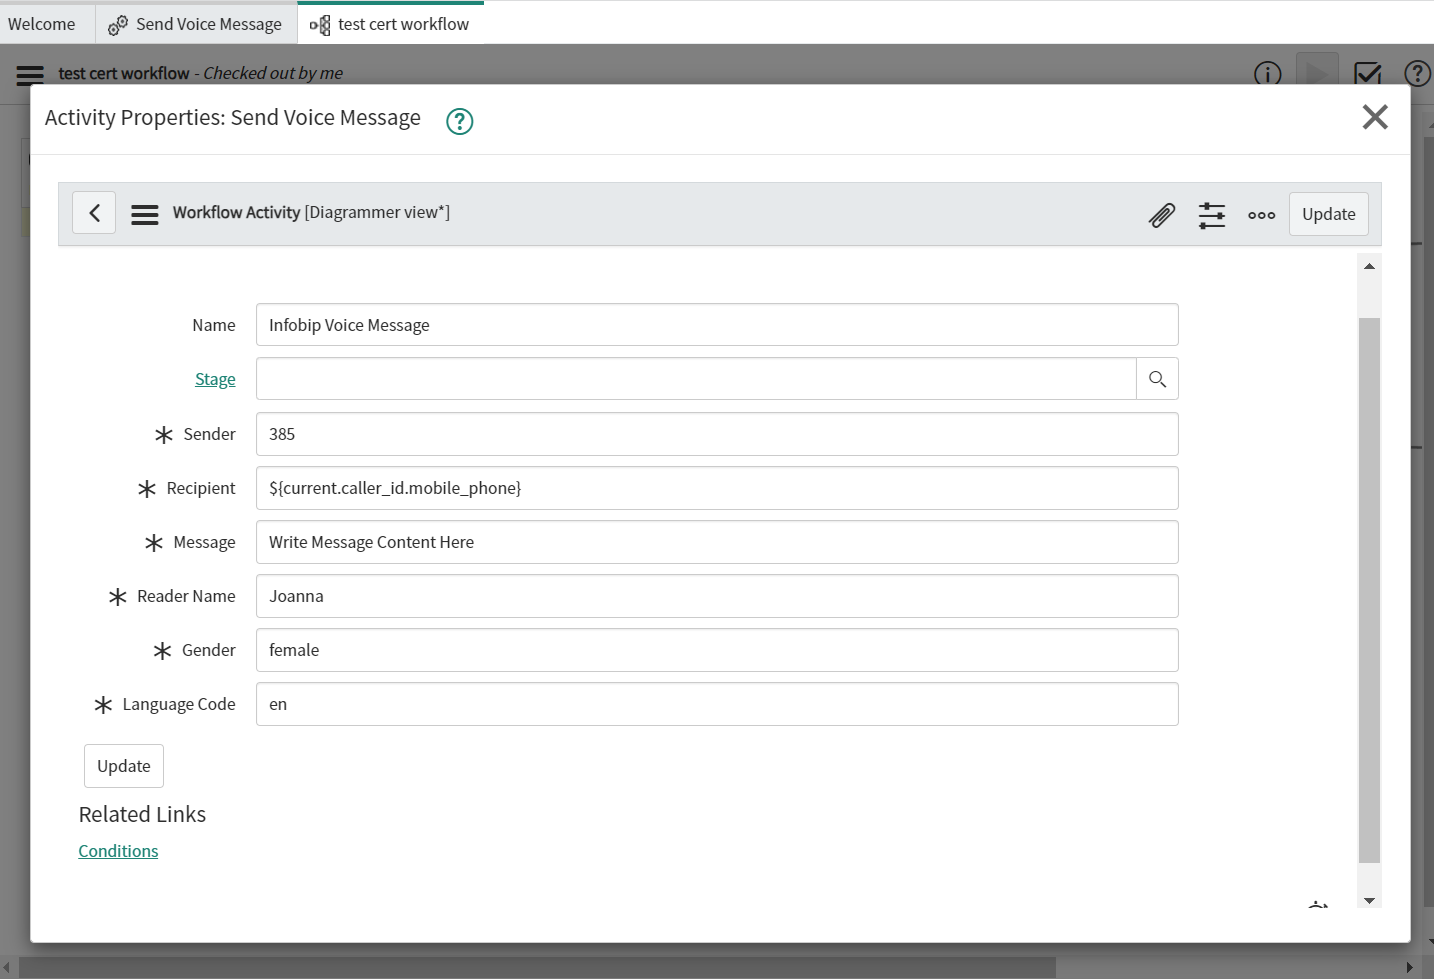
Send Voice message
- Select Sender.
- Add Message Content.
- Enter Language and Reader Name. To check which languages are supported, see Text-to-Speech languages Keep in mind that you have to pair Language with the Reader’s name.
- Select the Gender of the Reader.
- Enter the Recipient number.
- Go to Notify > Infobip Messages to check the message status.
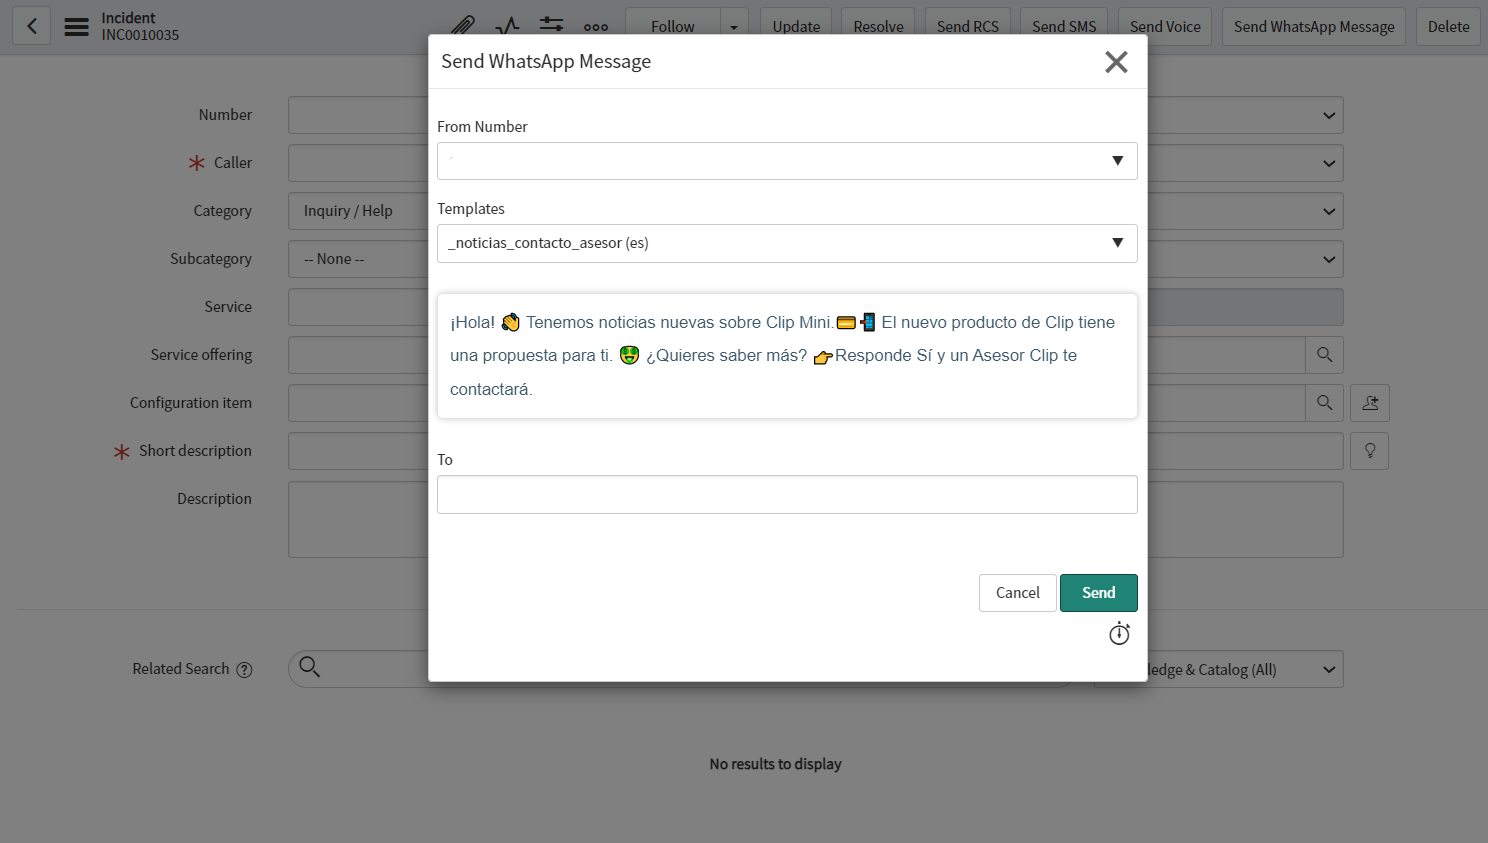
Send WhatsApp message
- Select WhatsApp Sender.
- Select Template from the drop-down list and if needed provide further information.
- Enter the Recipient number.
- Go to Notify > Messages or Infobip Messages to check the message status.
Send a Voice notification from workflow and check message delivery
To send a voice message from the Workflow Editor, you need to install the orchestration plugin.
- Go to Workflow Editor.
- Create a new Workflow.
- Select the Send Voice Message activity from the Custom tab, and then drag and drop it into your workflow.
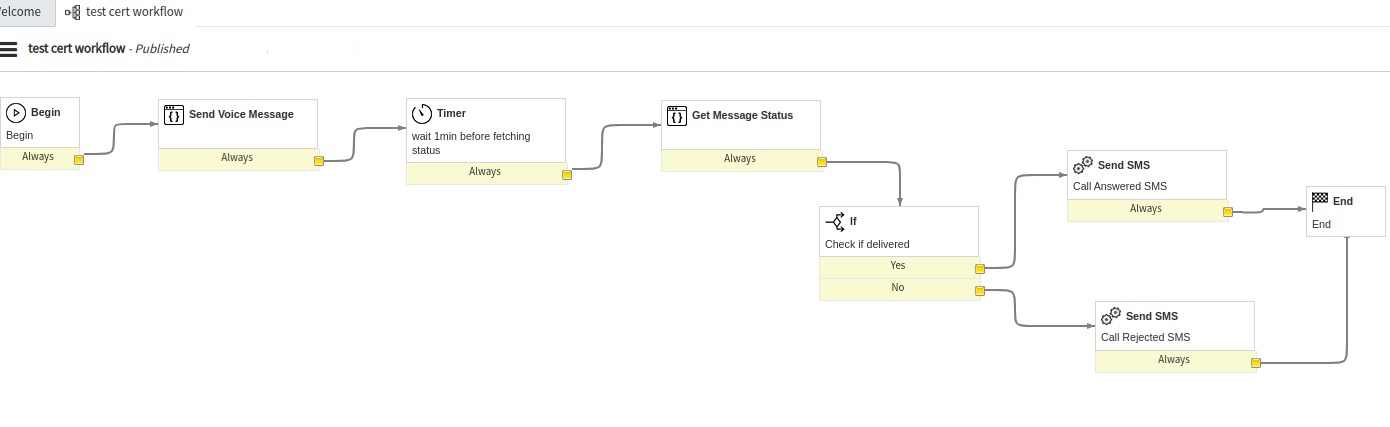
- Populate the required fields for the Send Voice Message activity.
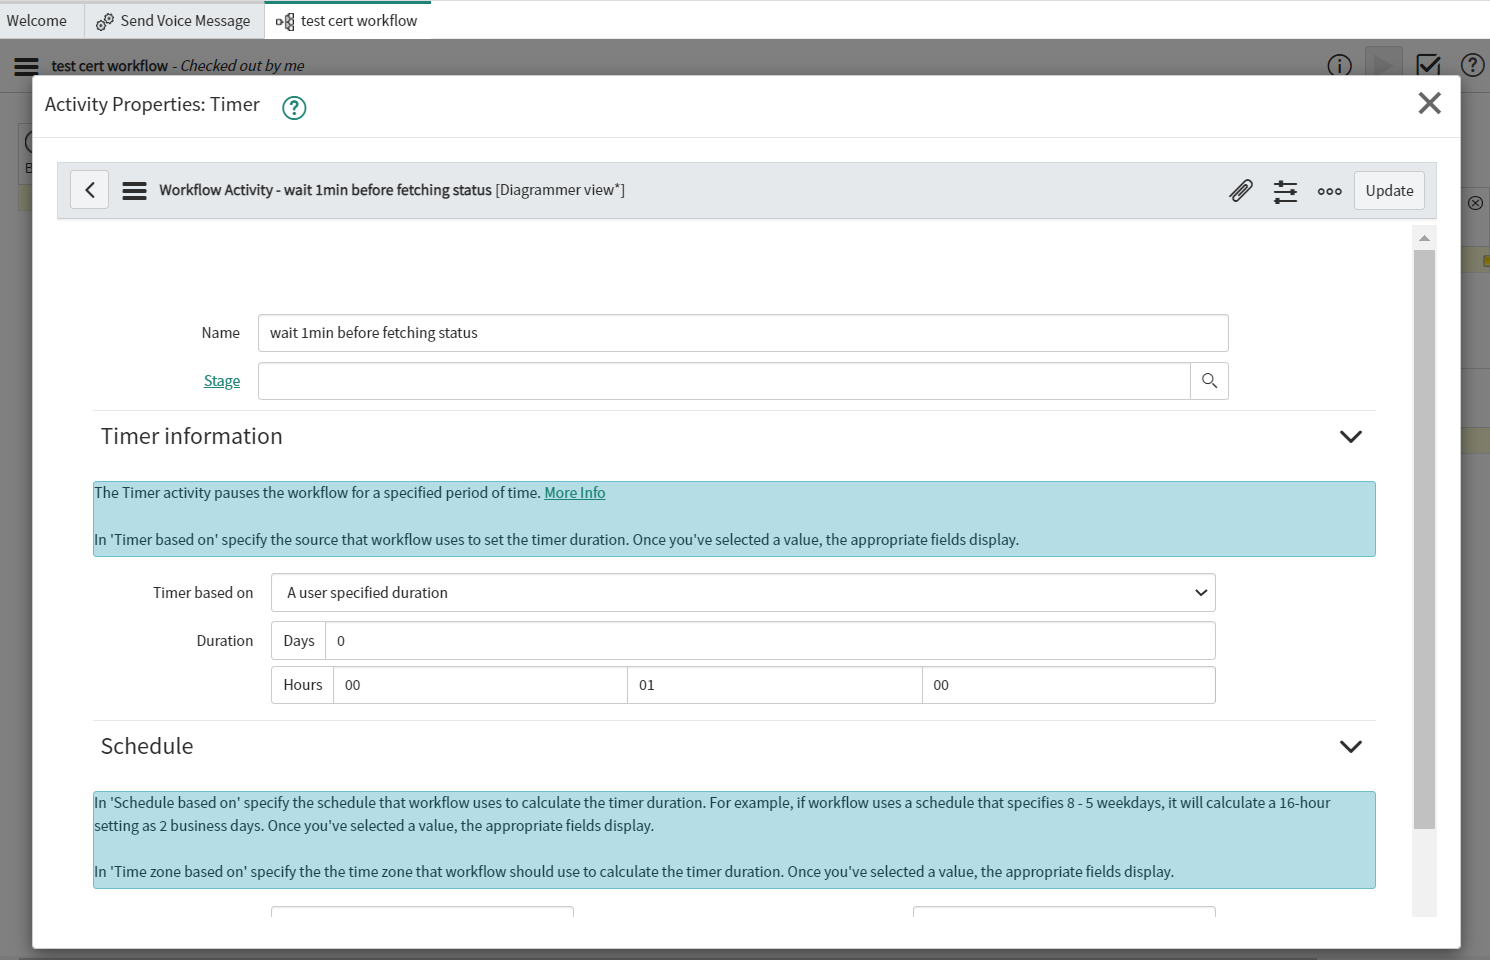
- Add a Timer activity property, and set it to one minute. The timer is used to pause the workflow for one minute so that the message status can update in the Infobip Messages table.
- Select the Get Message Status activity from the Custom tab, and then drag and drop it to your workflow.
- Select the Message_Id from Activity Outputs > Send Voice Message Activity under the Data tab. Drag and drop it to the Message_Id input field on the Get Message Activity, and then click Submit.
- Create an If condition to check whether the message has been delivered. See the following sample code.
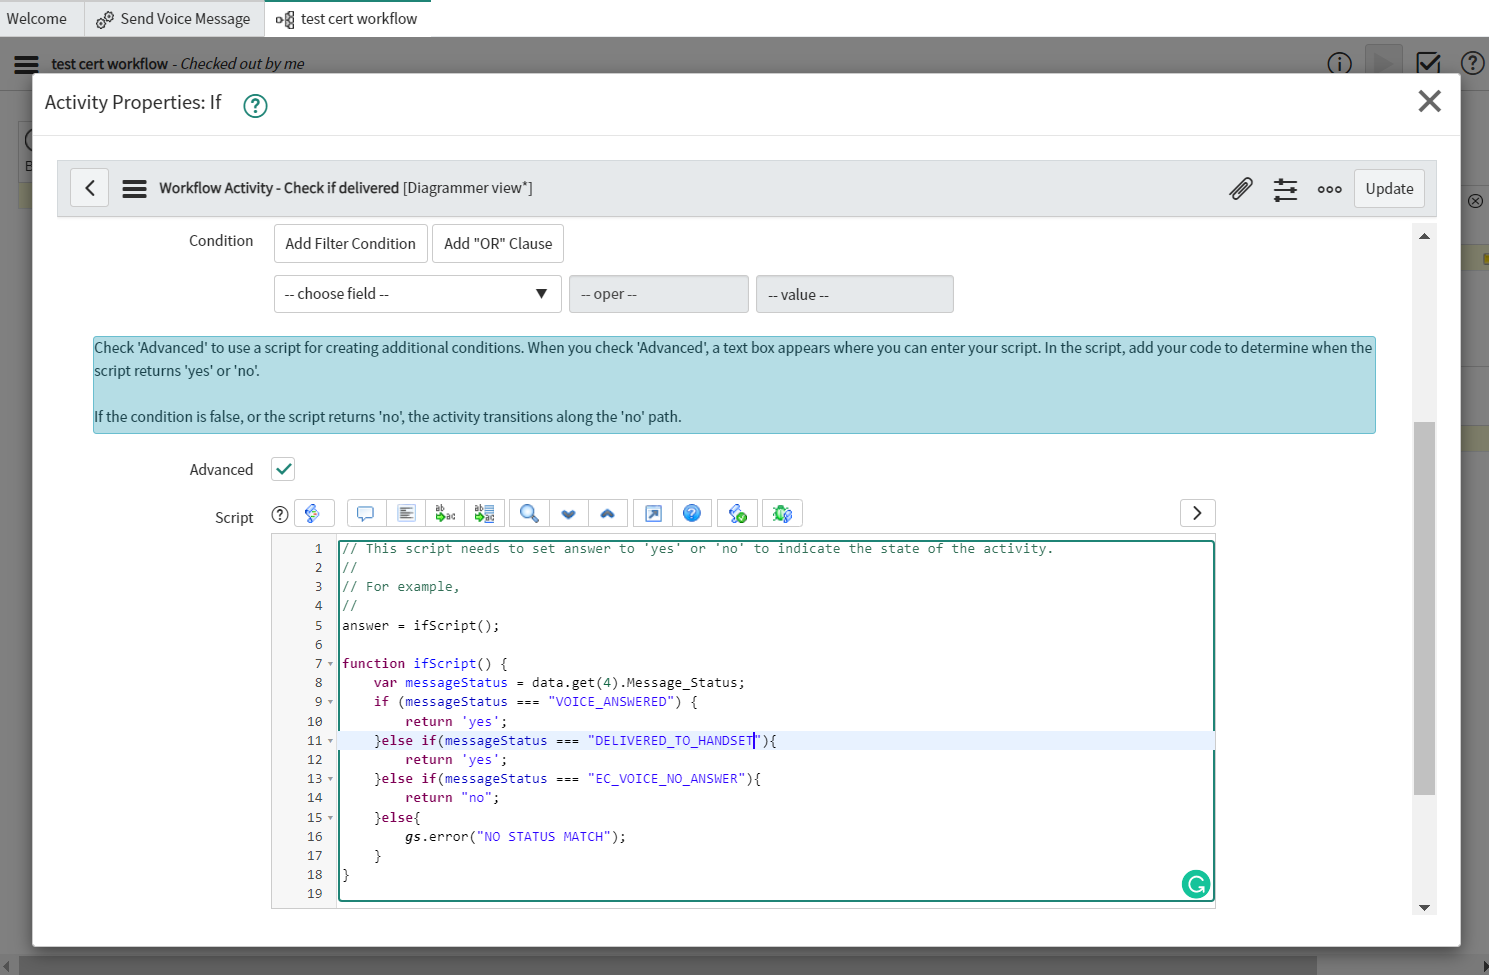
- Build the rest of your workflow based on your requirements and use case.
DTMF codes from Voice message in a workflow
A DTMF code, or Dual-tone Multi-frequency Code, is a response code that is generated when an end-user presses the numbers on a mobile or landline phone keyboard. Each keyboard number is represented with a unique DTMF code. The codes are typically used for authentication solutions, entering credit card numbers, and navigating automated telephone menu systems.
To capture the DTMF codes:
- Go to a Workflow Editor.
- Create a new Workflow.
- Select the Send Voice Message activity from the Custom tab, and then drag and drop it into your workflow.
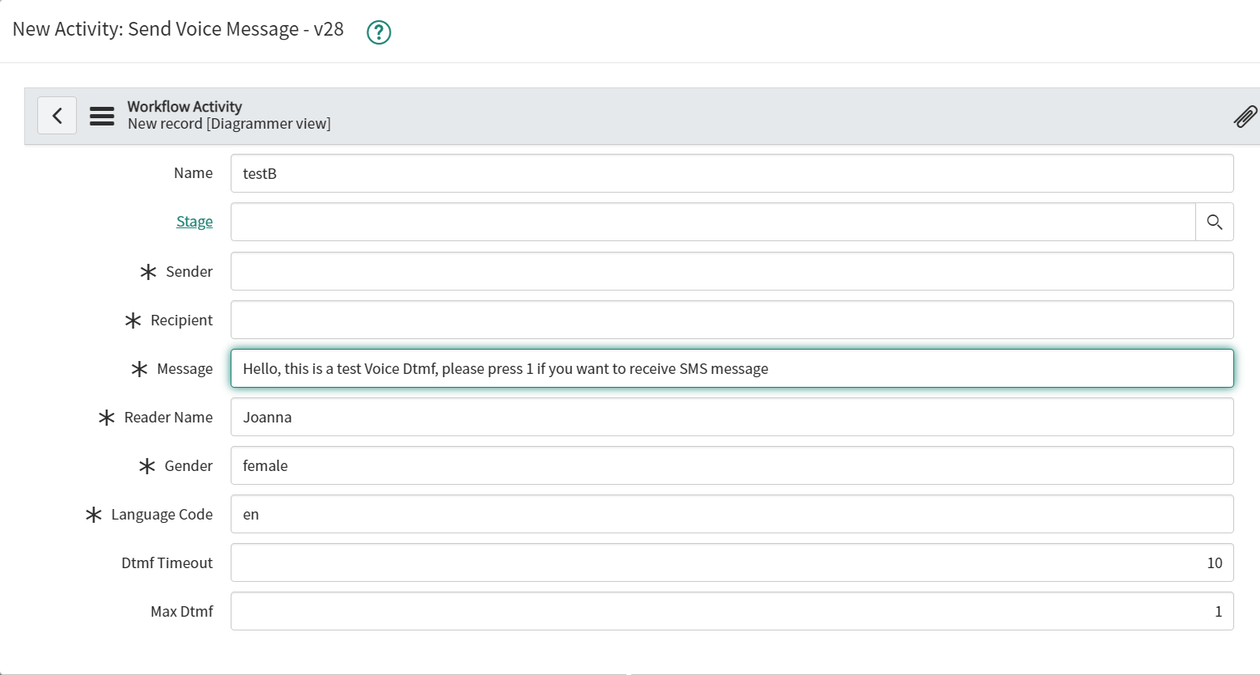
- Populate the required fields:
- Populate the Dtmf Timeout[sec] and define how much time the end-user has to enter DTMF digits. In the example, the system waits for 10 seconds after prompting the user for DTMF input before it moves on.
- Populate the Max Dtmf and define the maximum number of DTMF codes that an end-user can enter. In the example, the system collects up to 1 DTMF digit from the end-user only, and any additional digits entered are be considered.
The following example is a script sample that checks if the user pressed the number “1” in the call:
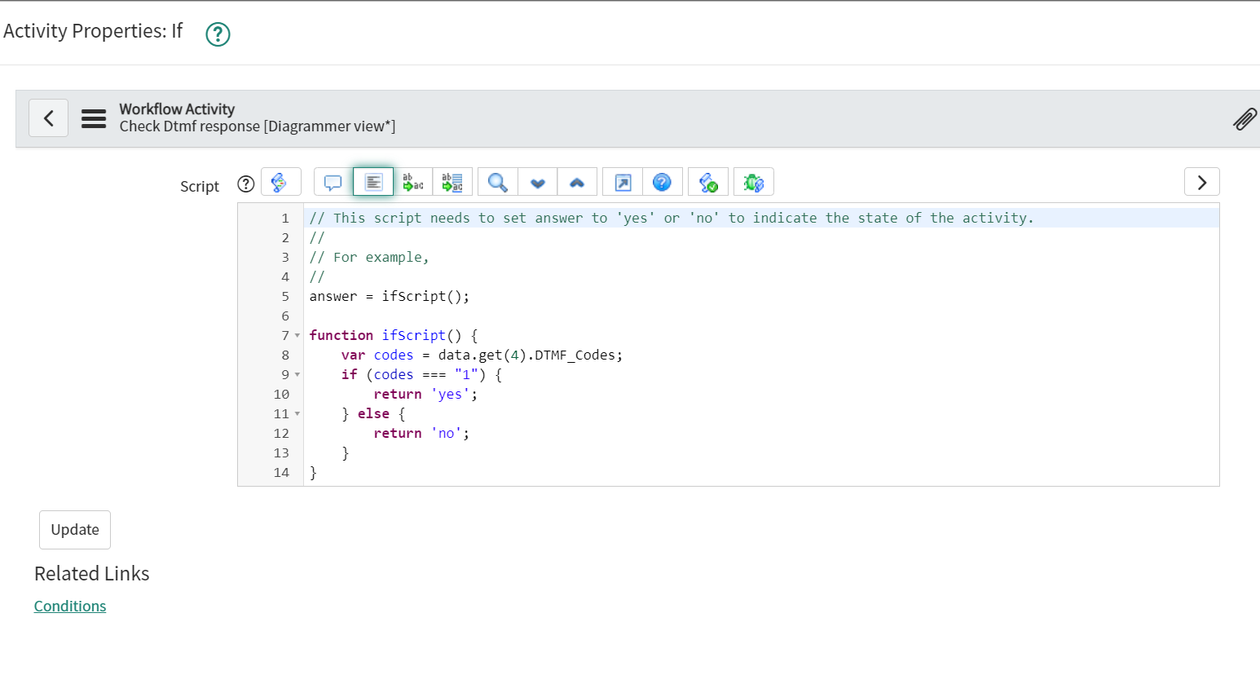
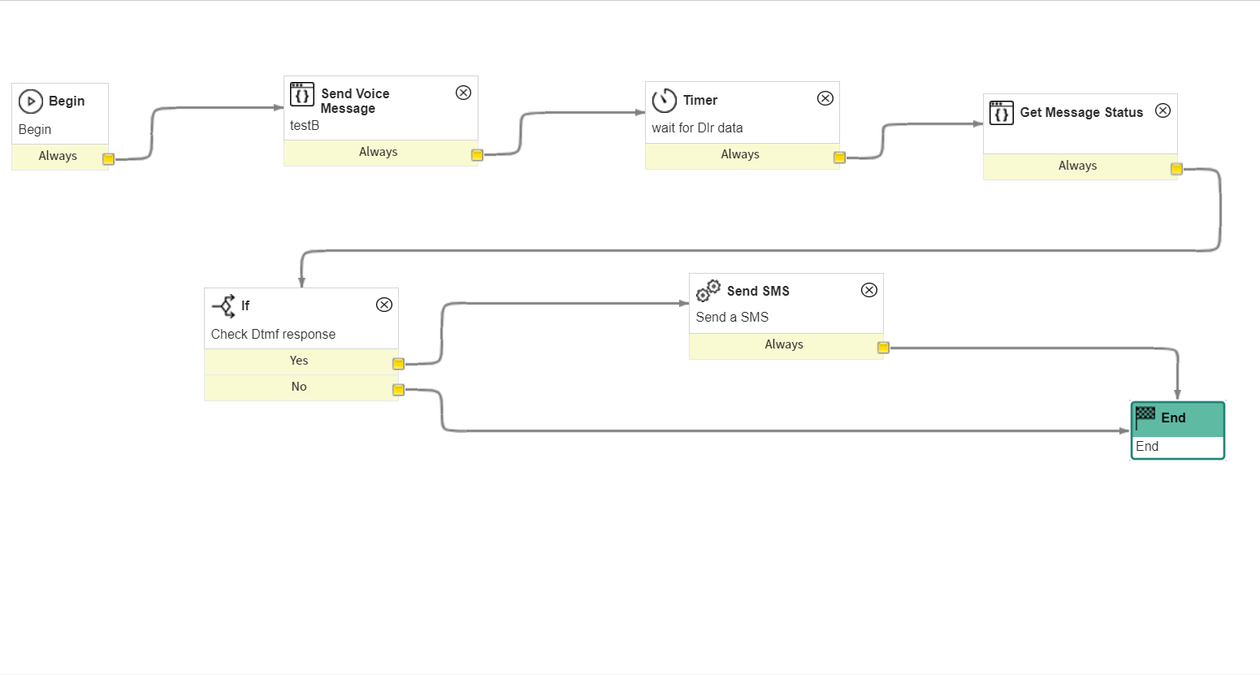
The following a sample of the Workflow with all functionalities:
Infobip Omnichannel Conversational Messaging
This integration provides a two-way solution to integrate with the Conversational adapter, providing SMS and WhatsApp as the messaging channels. The solution is directly available from the Agent Workspace.
What you will need
Before you begin, you need:
- An Infobip account with this role:
x_infob_infobip_co.adminIf you do not have an account, you can create one (opens in a new tab). - An API key from your Infobip account
- A ServiceNow account
In addition, the following components are app dependencies for two-way messaging:
- Glide Virtual Agent (
com.glide.cs.chatbot) - Conversational Custom Chat Integration (
com.glide.cs.custom.adapter) - Customer Service (
com.sn_customerservice) - Advanced Work Assignment (
com.glide.awa) - Conversational Messaging (
com.glide.messaging.awa)
Installation and configuration
These setup steps are the same for all channels but differ depending on the type of send method you use. You need to complete these steps (some optional) before you can start sending messages. Before proceeding to configuration, ensure you installed our integration (opens in a new tab) from ServiceNow store.
The supported message types for each channel are:
- SMS - sending and receiving text only
- WhatsApp - sending and receiving text, images, videos, audio and documents
The setup procedure is as follows.
- Install the Infobip Omnichannel Conversational Messaging (opens in a new tab)from the ServiceNow Store.
- Go to Infobip - Conversational Adapter > Infobip Configurations.
- Ensure that you have copied your Infobip API key.
- On the Infobip Config page, enter your Infobip API Key.
- Click Connect. This calls the Infobip API to fetch all purchased WhatsApp and SMS numbers.
- If the connection is successful, you'll see the message “Connected to Infobip”.
Use the following configuration sections to complete the setup.
Configure the app
To configure the app, you need:
- ApiKey for Infobip Account. You need to have installed the app dependencies listed in this documentation.
- Role required: x_infob_infobip_co.admin
Go to Infobip - Conversational Adapter > Infobip Configurations and paste your API key. Click Connect, and if there's an issue with the connection, a notification appears at top of the screen.
This is only available for users with a role: x_infob_infobip_co.admin
Configure assignment rules
These steps are required for two-way messaging:
- Go to Advanced Work Assignment -> Queues.
- Search for SMS support Queue (service channel should be to Infobip SMS). Open that record.
- Select Assignment Eligibility and click New.
- Choose the appropriate Agent assignment rule (you can use default once called Infobip Chat Assignment Rule).
- Assign the group. The agents from the group are able to handle incoming conversations from Infobip.
- Confirm your choice by pressing Submit.
These steps are required for WhatsApp:
- Go to Advanced Work Assignment > Queues.
- Search for WhatsApp Default Queue (service channel should be to Infobip WhatsApp). Open that record. The steps 3-6 are the same as for the SMS procedure but you can adjust the options to your needs.
- Select Assignment Eligibility and click New.
- Choose the appropriate Agent assignment rule.
- Assign the group.
- Confirm your choice by pressing Submit.
Configure token verification
These steps are required for two-way messaging. If you are only sending one-way messages, you only need to complete app installation.
- In ServiceNow, go to Infobip Conversational Adapter > Token Verification.
- Create a new record named Infobip Token.
- Change the token field from the default to something difficult for added security.
- Click Submit.
Configure message authentication
To configure authentication for SMS messages:
- Go to Infobip - Conversational Adapter -> Message Auth Infobip
- Create a new record using the following credentials:
- Name: Infobip
- Provider**: Infobip**
- Inbound message verification: Infobip Token
- Outbound message creation: Infobip Token
- Click Submit to submit your changes.
- Go to Infobip Conversational SMS -> Provider Application, and then select Infobip Messaging Provider Application.
- Fill out the Message auth field with the record you’ve just created (Infobip).
- Click Update to confirm your changes.
To configure authentication for Whatsapp messages:
If you have set up SMS already, you can use the new record that you set up in steps 1-3 for SMS. To complete the steps for WhatsApp:
- Ensure that you have set up the new record described for SMS above.
- Go to Infobip Conversational SMS -> Provider Application, and then select Infobip WhatsApp Provider Application.
- Fill out the Message auth field with the new record details (Infobip).
- Click Update to confirm your changes.
Configure connection alias
The following steps help you to configure the connection alias:
- Go to Connection & Credential Aliases and search for Infobip Connection Alias (
x_infob_infobip_co.Infobip_Connection_Alias). - Create a new Connection.
- Specify the Connection URL to https://api.infobip.com/ (opens in a new tab) and name to Infobip Connection.
- Click Submit. The record is created.
Configure webhook
For this step, you need to set up OAuth for authentication, which creates an endpoint for Infobip to receive the access token and set credentials for users. Both steps must be complete so that the system can authenticate requests to update messages.
Create an OAuth application endpoint for external client applications to access the ServiceNow instance.
- In ServiceNow, go to System OAuth > Application Registry and click New.
- On the interceptor page, click Create an OAuth API endpoint for external clients.
- Fill in the form and give the endpoint a name that you can easily recognize
- Click Submit.
To create a new user:
- In ServiceNow, go to User Administration > Users.
- Click New and enter a User ID, Password, and enable the Web service access only option.
Configuring queues (optional)
You can create as many queues as you want and spread messages to each of them. The logic behind dividing them is ensured by conditional script and requires an adjustment to your needs, however, you can easily specify a fixed set of Infobip numbers that are accepted by the queue.
- Go to Advanced Work Assignment > Queues and click New.
- Specify a name and select an appropriate Service Channel depending on your requirements (Infobip SMS or Infobip WhatsApp).
- Alter the Condition mode to Advanced.
- Paste the code (see 3.8.1) directly into the script view. Adjust variables values
NUMBERS_FOR_THE_QUEUEandNAME_OF_THE_QUEUEto your needs. - Change the Order field to a value below 100.
- Click Submit to confirm your updates.
NOTE: If you want to use multiple WhatsApp or SMS senders and have separate queuing for every one of them, contact Infobip support to provide you with a script for this case.
Share config details
As a last step in pre-setup, you need to send an email to Infobip with the following information for your application to become active:
- Instance URL
- Client ID
- Client Secret
- User ID
- User password
- Token
Once received, Infobip sets up the mechanism for forwarded messages to your instance.
Test connection
After you complete all of the configuration steps and you have received confirmation from Infobip that you can receive incoming messages, the next step is to send a test message to your Infobip sender.
Make sure to test this for all channels you are using with ServiceNow.
ServiceNow agents can start a conversation by directly responding to an incoming message.
Test virtual agent
Virtual agent is a feature of the Glide Virtual Agent plugin. It allows you to configure a chatbot as a first line of communication with a customer. After a customer sends a message, they should see a response from the chatbot on their device. You can localize a virtual agent conversation by using the sys_cs_conversation table.
Testing live agent
When an incoming message is transferred to a live agent, all available agents from the group you set up should see the conversation inside Agent Workspace.
The following steps are important in verifying that you can send and receive messages and that the application is working properly. Make sure you have a device on which you can test locally.
- Login as an agent from the group that has access to the Agent Workspace.
- Go to Agent Workspace home. You are redirected to the agent's view.
- Open the inbox panel and select Infobip Service Channelstatus. This makes it possible for you to receive incoming messages.
- Send a message to the Infobip number.
- When the message is transferred to a live agent, you see a small box on the left side of the screen.
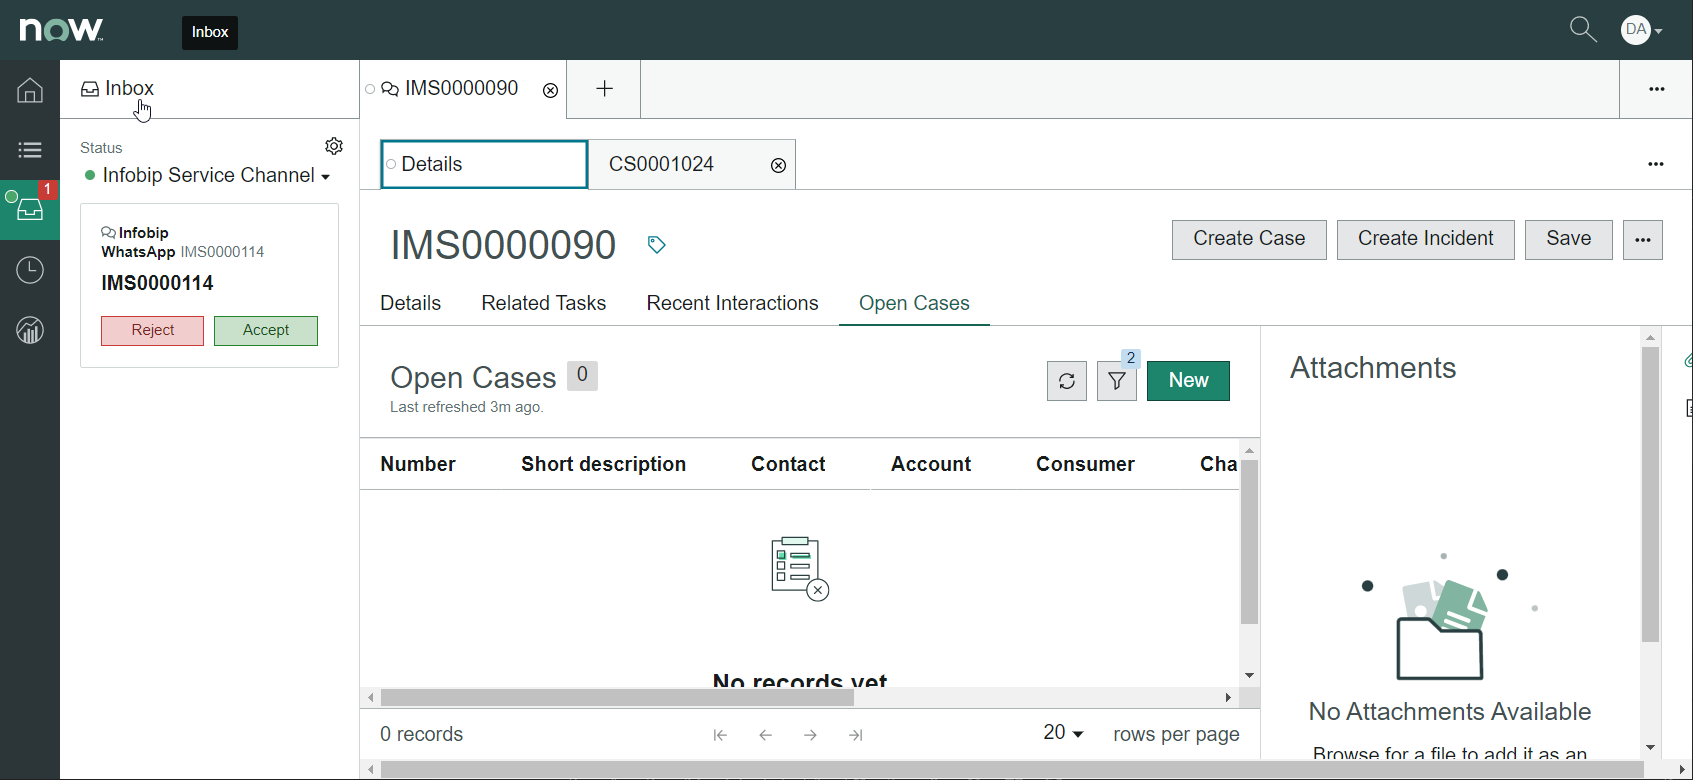
- Click Accept to accept the conversation. After accepting, you see the chat panel with the conversation history.
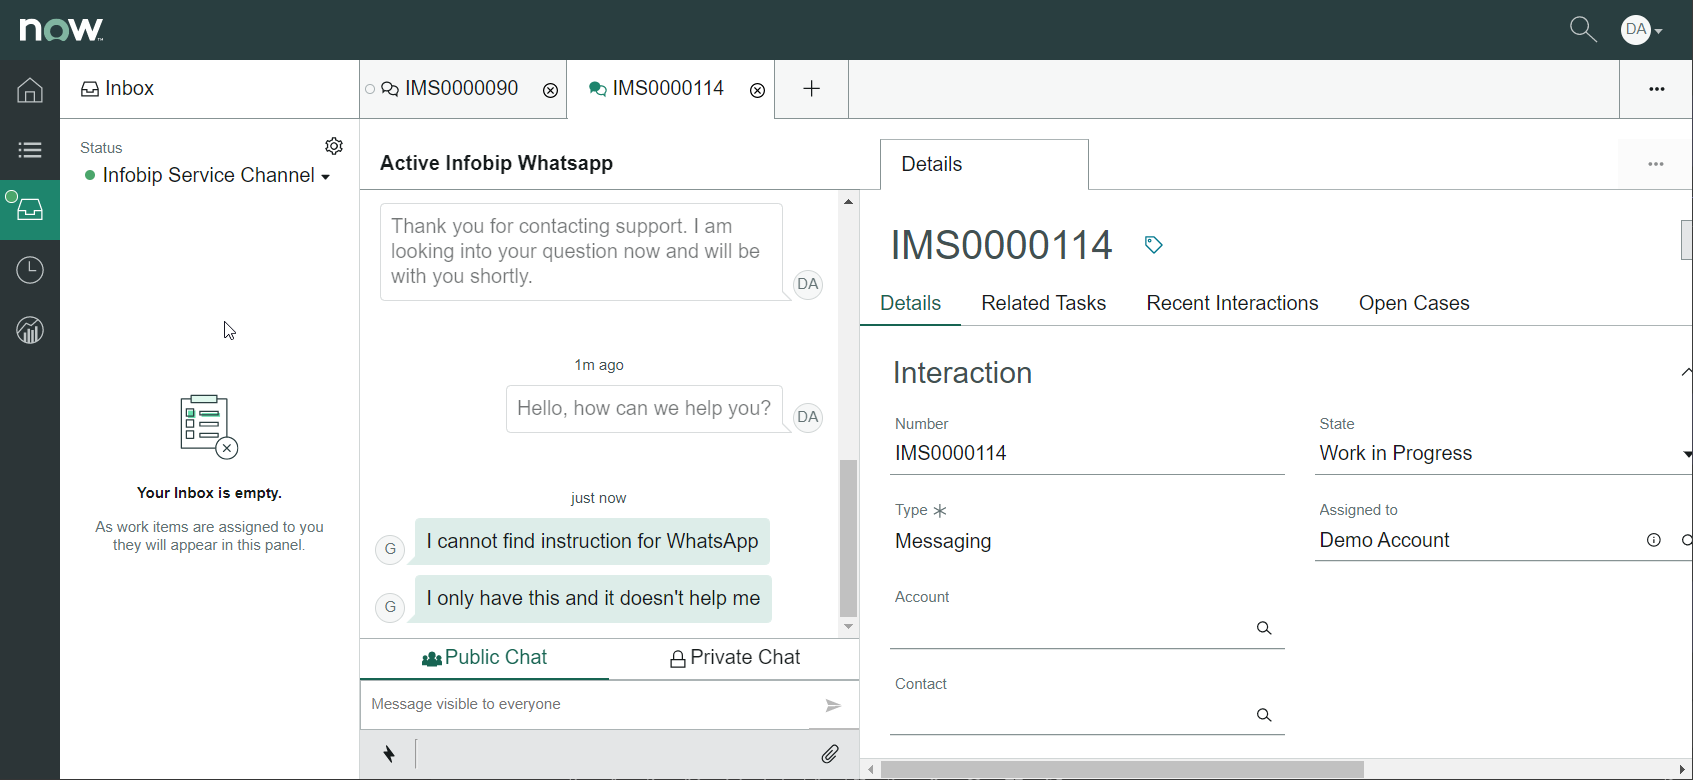
- Open the conversation, add a message, and click Send. The message displays on the device that sent the incoming message.
- Send another message from the device and it displays in the chat box.
Two-way messaging
The current limitations for receiving messages from all channels is that it supports text only.
One-way messaging is available for:
To start a two-way conversation, agents can respond to incoming messages. Incoming messages are handed over to virtual or live agents.
To respond to messages, make sure that you or your agents are in the Agent Workspace Home. Those with agent permissions see the workspace view where they see incoming messages in the inbox panel.
From here, agents can accept or reject the message. Accepting the message automatically opens the conversation along with all of its history.
Infobip SPOKE
Engage your customers or employees with the Infobip app available on ServiceNow. With this integration you can send one-way messages via the Infobip SMS channel for automating your SMS messaging. This feature supports:
- One-way Single SMS messages
- One-way Bulk SMS messages
- One-way WhatsApp message - Text templates
- Voice text-to-speech messages
What you will need
Before you begin, you need:
- An Infobip account. If you don’t have an account, sign up (opens in a new tab). To proceed with this integration, make sure you have the Infobip admin privileges.
- SMS sender, if you don’t have one you can purchase it here (opens in a new tab).
- API Key (opens in a new tab) from your Infobip account.
- Active ServiceNow Integration Hub (opens in a new tab).
- ServiceNow account with the ServiceNow Infobip SPOKE installed.
Installation and configuration
The setup procedure is as follows:
- Install the Infobip SPOKE from the ServiceNow Store Link To Infobip Spoke (opens in a new tab).
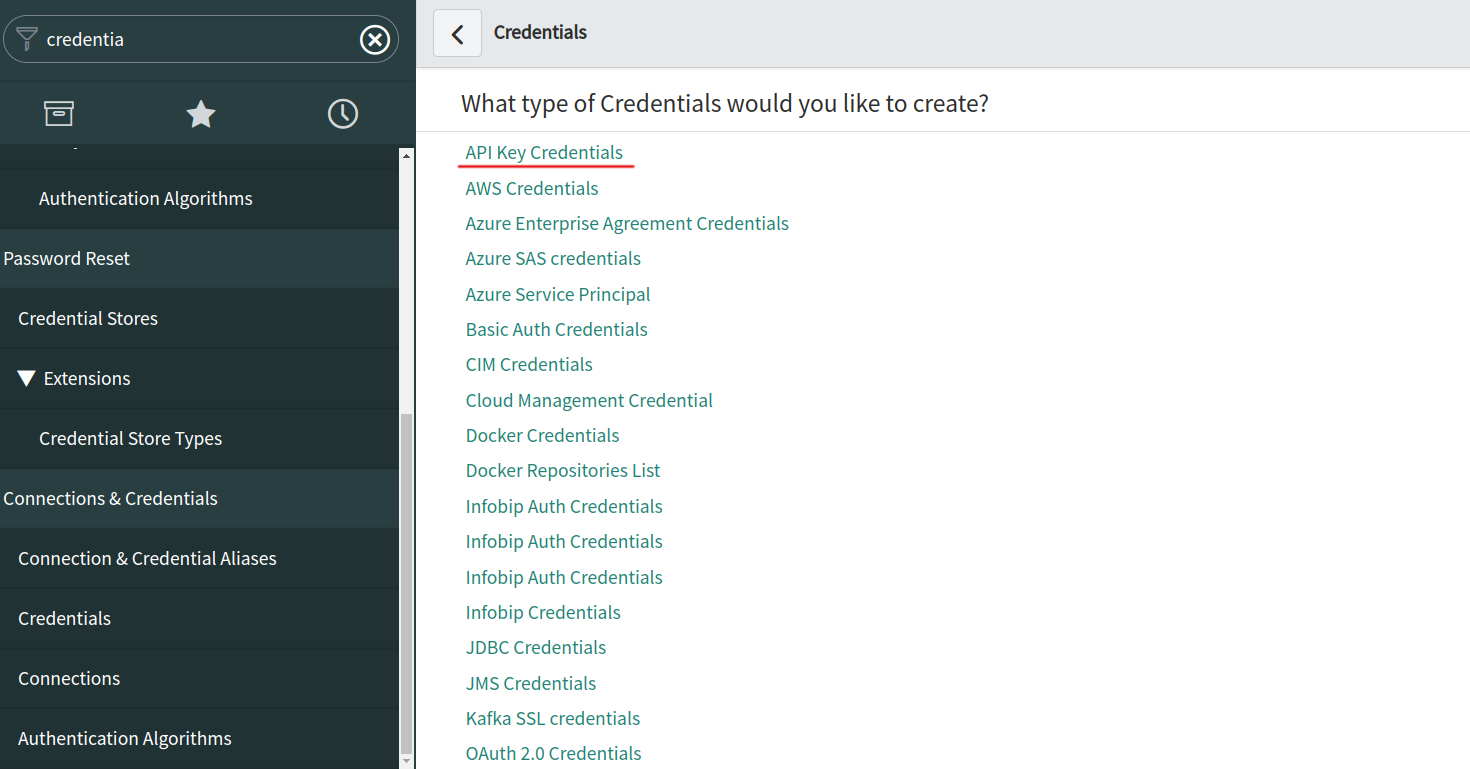
- Go to Credentials ( Connection & Credentials > Credentials).
- Ensure that you have copied your Infobip API key from your Infobip account.
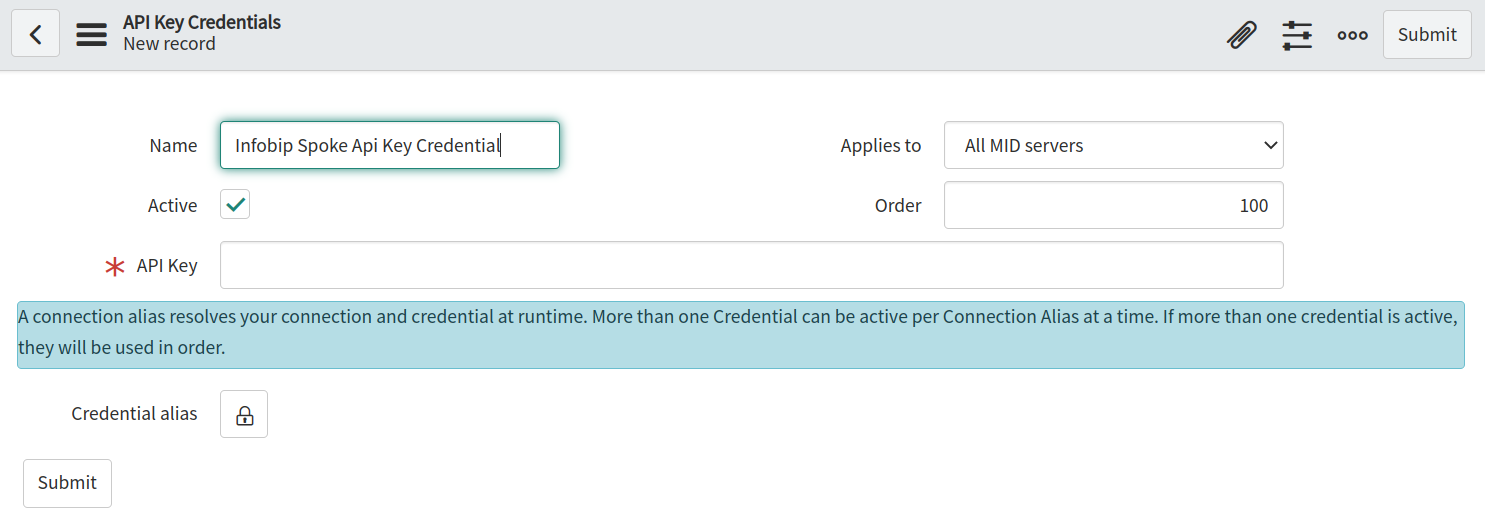
- Select the API Key Credential type.
Use the following configuration sections to complete the setup.
Configure connection and credentials alias
The following sections describe the procedure to create the connection and credentials alias.
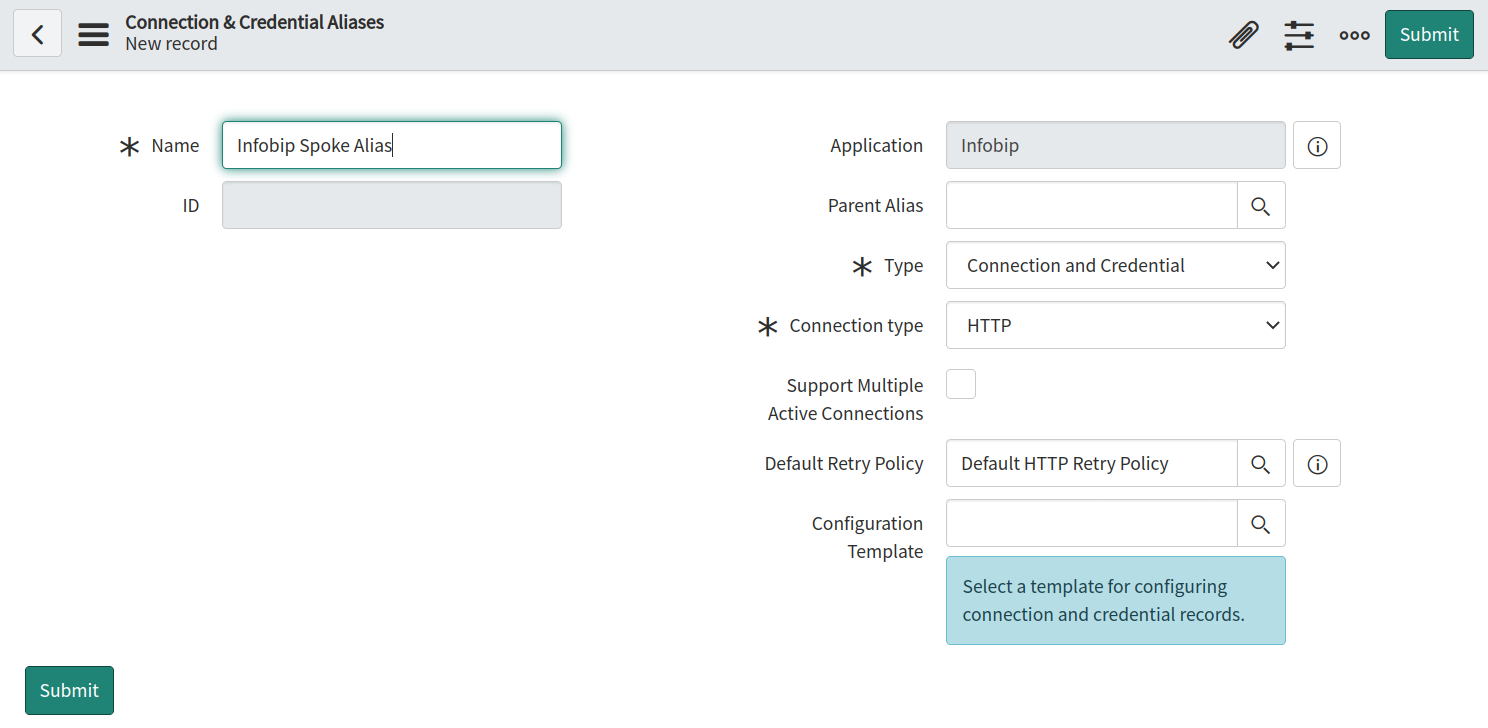
Create connection alias
- Go to Connection & Credentials Aliases.
- Click New to create a new record.

- Enter the name Infobip Spoke Alias.
Create connection
- Go to Connection & Credential Aliases and search for the Infobip Spoke alias
x_infob_infobip_sp.Infobip_Spoke_Alias. - Create a new Connection.
- Specify the Connection URL as https://api.infobip.com (opens in a new tab) and type in the name Infobip Spoke Connection.
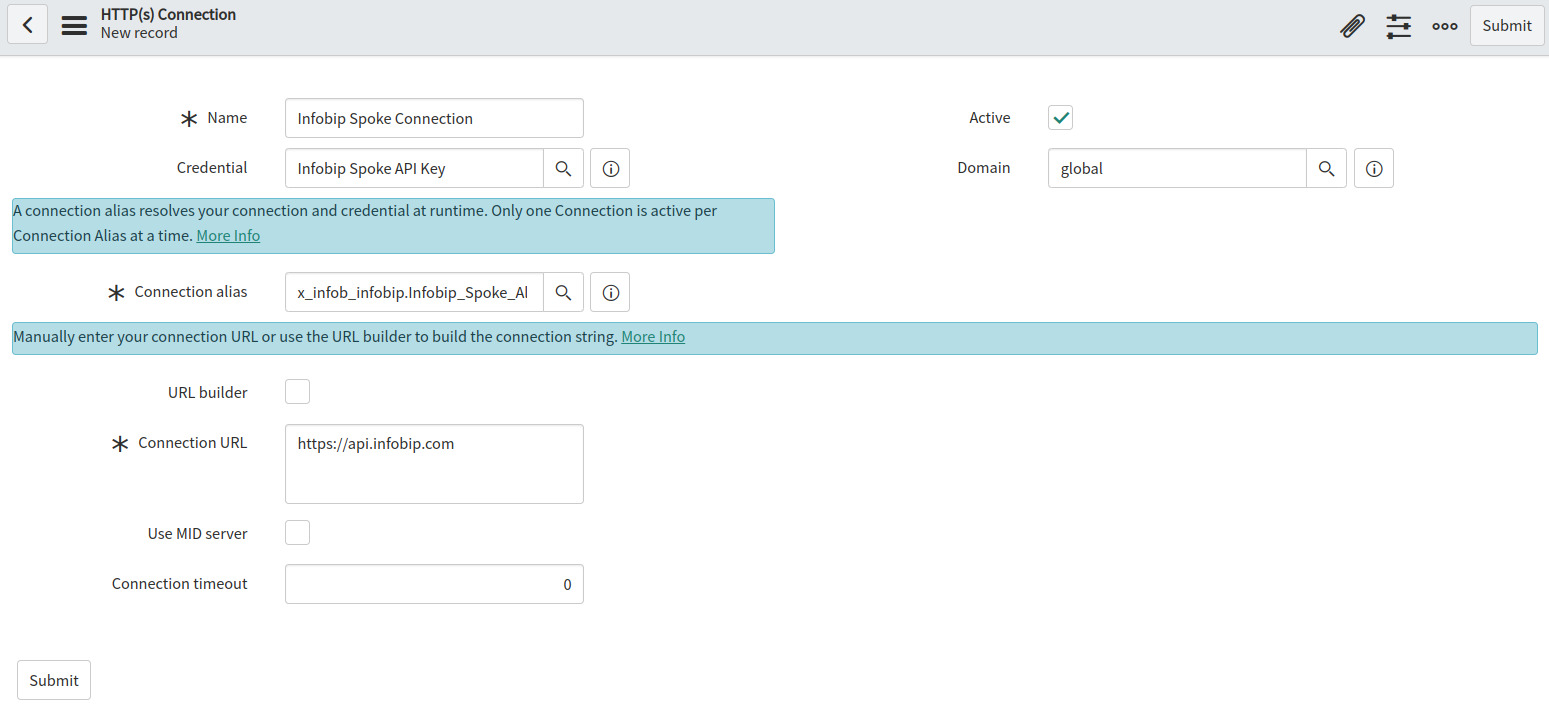
- Select the Infobip Spoke API Key Credential you’ve previously set up, and then save the connection.
Configure Spoke action authentication
To configure authentication for the Spoke action:
- Go to Studio > Infobip Spoke.
- Open the Spoke action that requires authentication. In this case, use Infobip SMS action.
- Go to Rest Step > Connection Details, and then select Use Connection Alias from the Connection drop-down list.
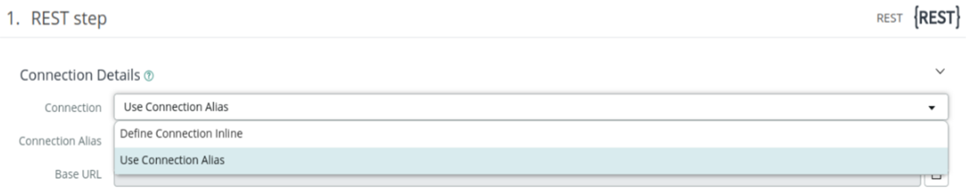
- Select
x_infobip_infobip_sp.Infobip_Spoke_Aliasfrom the Connection Alias drop-down list.
- Drag and drop the Credential Value (API Key) data pill to Authorization header. For more information about data pills, see the ServiceNow Flow Designer documentation (opens in a new tab).
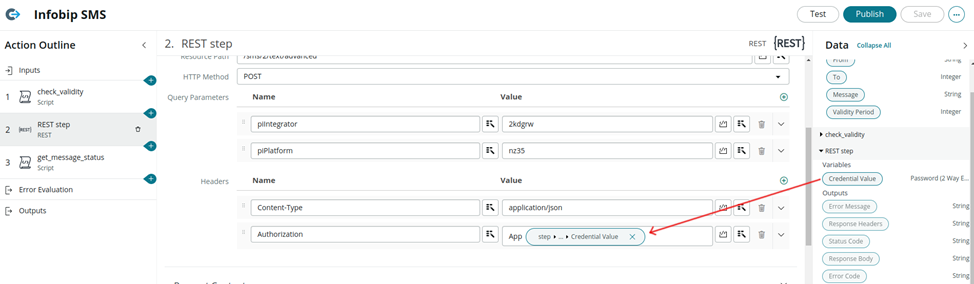
- Click Save, and then click Test to test the action before publishing.
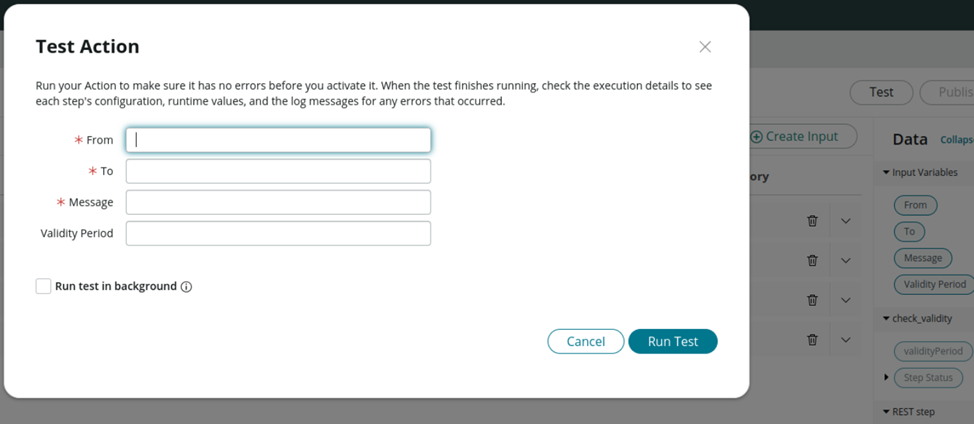
- Publish the action.
Using the Infobip SPOKE integration
Use this app from custom Flows. The following steps cover Incidents, but you can follow the same flow for any other types:
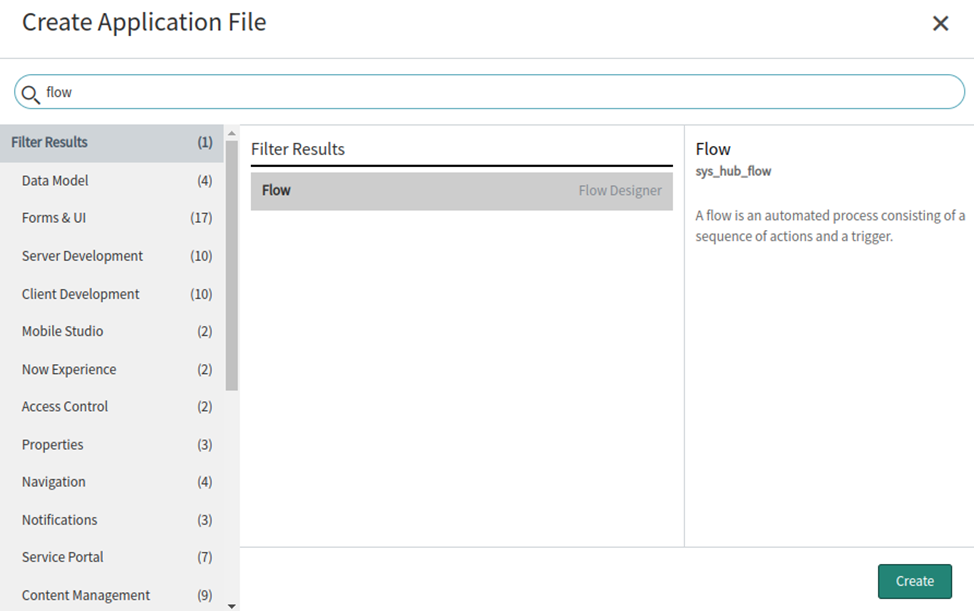
- Go to Flow Designer.
- Click on Create Application File.
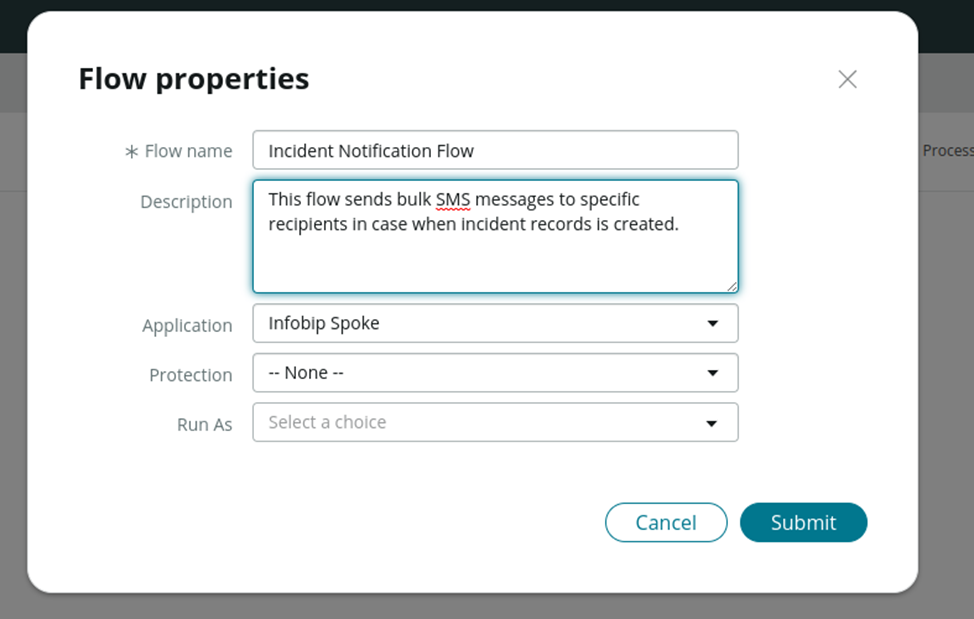
- Create a Flow.
- Provide a name for your flow.
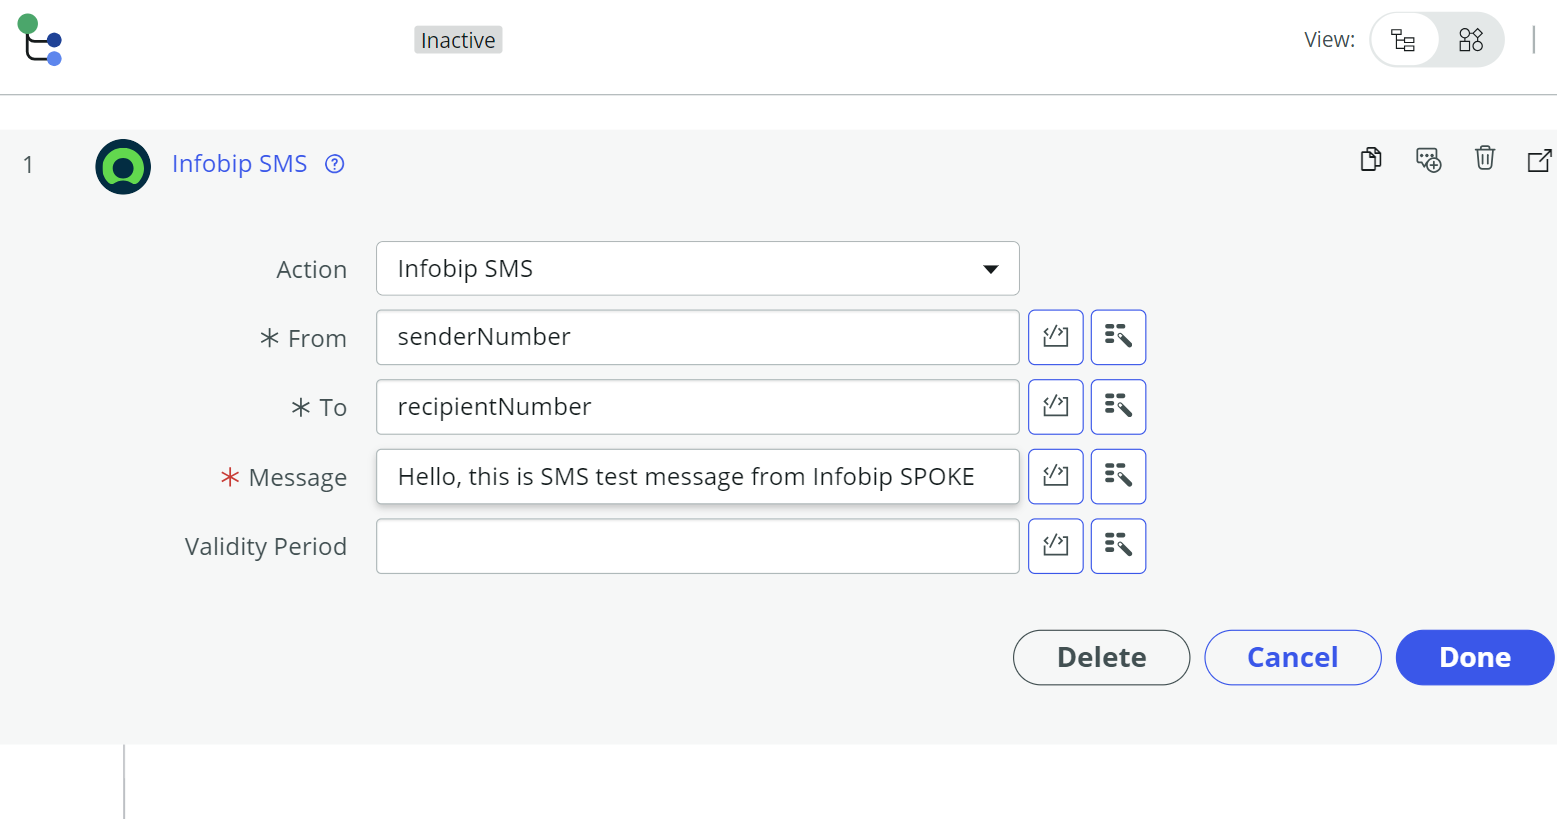
- Add the trigger and select Infobip Bulk SMS Action from Infobip SPOKE.
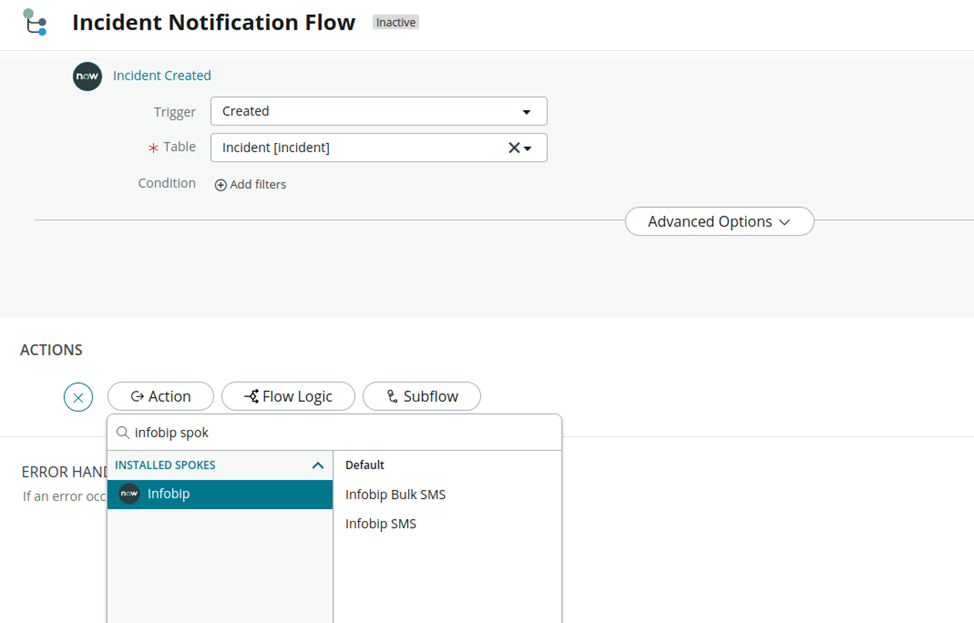
- Populate the Spoke action inputs with the required data.
**SMS
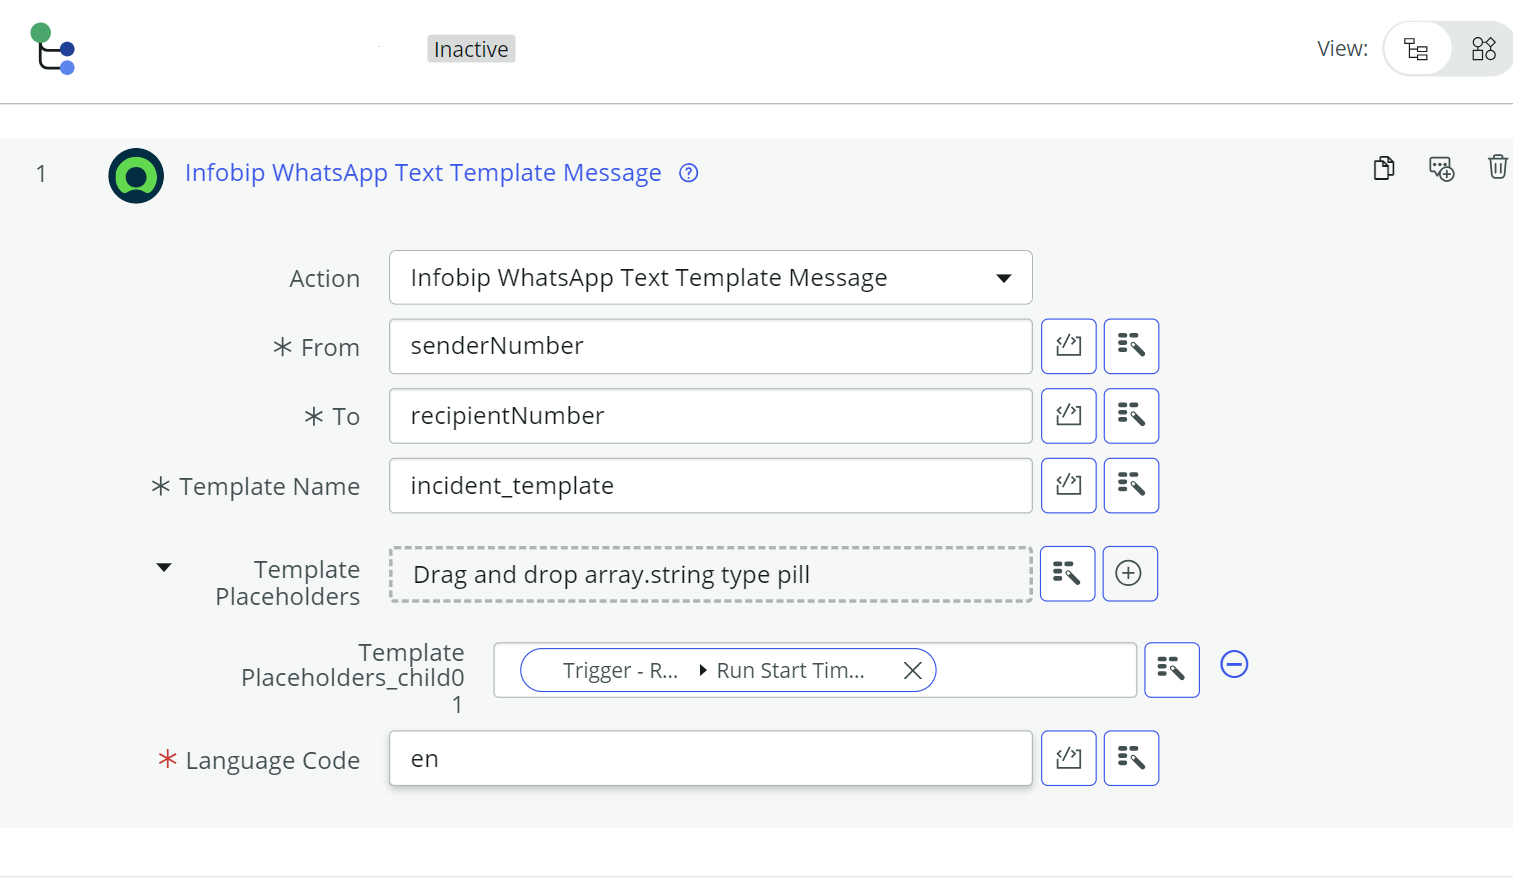
 **WhatsApp
- Save and Activate the flow.
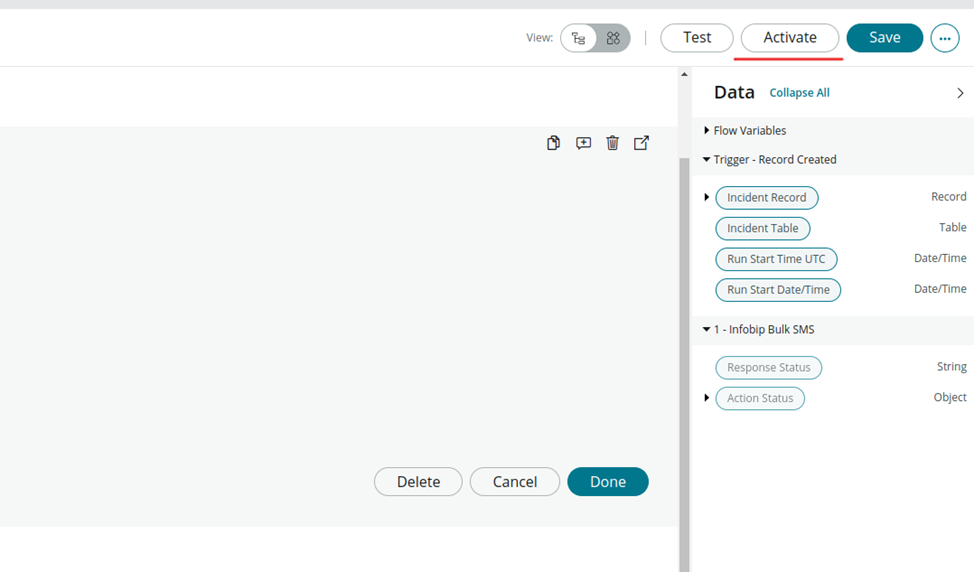
- To test the flow, you can manually create a record in the Incident Tableand then check whether you have received the SMS message successfully.