GenAI tools
EARLY ACCESS
Add GenAI elements from Exchange to your Answers chatbot to add functionality to the chatbot.
The following GenAI elements are available.
Prerequisites
Enable GenAI elements in Exchange
To enable the GenAI tools, do the following.
- Log on (opens in a new tab) to your Infobip account.
- Go to Exchange > All apps.
- Find the required GenAI elements. You can also use the Search box.
- When the GenAI element is displayed, select it, and then select Add.
The selected elements are now available in your chatbot in the Apps from Exchange section.
(Optional) Learn about LLM
Enroll in an LLM or prompting course to enhance your understanding and skills in using advanced LLMs. Example: ChatGPT Prompt Engineering for Developers (opens in a new tab) course.
GenAI Intent detection
The GenAI intent detection tool uses advanced text classification to analyze messages and works with virtual assistants within Answers to enhance communication. It accurately categorizes the intent of end users' messages, ensuring that your chatbot delivers contextually relevant responses.
In the GenAI intent detection tool, configure the intents that you want the GenAI model to identify. Based on these intents, you can redirect end users to a specific part of the chatbot to provide them with better support with their queries.
These intents are different from Answers intents because you do not need to train the GenAI intents with specific training phrases. You only need to provide examples of user messages that are specific to your use case.
For more information about intents, refer to the Intents documentation.
Key features
- Classifying messages
- Organizing the conversational flow
Configure the element
To add the GenAI intent detection element to your chatbot, drag it from Apps from Exchange. Complete the following fields.
Request
Provide instructions for the chatbot to identify the intent. Complete the following fields.
User message
Specify the message sent by the end user. GenAI identifies the intent of this message.
You can do one of the following:
- Select the text attribute that contains the end user's message. Example: menu_response.
- Select the predefined attribute, lastReceivedTextMessage.
Prompt instruction, System message, Intents
The prompt instruction, system message, and intents work together to identify the intent of the end user's message.
To configure these fields, do one of the following:
- Configure the field manually.
- Save the field value in an attribute and then specify this attribute in the field.
First, configure the prompt instruction and system message. Then, configure the intents. Refer to the following sections.
Prompt instruction and system message
The following table shows the prompt and system message templates that you can use when configuring the request parameters.
Infobip recommends that you keep the prompt and system message template format unchanged, because they will work well in most cases. Replace the capitalized words with terms specific to your use case.
Prompt template | System message template |
---|---|
- Question: **{query_str}** - Help me classify user's question in one of the categories | - CLIENT is a BANK - I need you to classify user question into one of categories [CATEGORY_1, CATEGORY_2, agent] - CATEGORY_1 category refers to the following types of queries: -- [HOW TO APPLY FOR PERSONAL FINANCING, WHO IS ELIGIBLE FOR PERSONAL LOAN, WHAT ARE THE TERMS AND CONDITIONS, WHAT ARE THE PAYMENT TERMS] - CATEGORY_2 category refers to the following types of queries: -- [I LOST MY CARD, PLEASE DISABLE MY STOLEN CARD, I WANT TO REPORT A LOST CARD] - agent category refers to the following types of queries: -- [Let me talk to an agent, I want to talk to a real person, Transfer me to a live agent] - User question will be delimited by **. - Your answer must be in a valid JSON format, with the key: category, and the value is one of the categories defined above. |
Intents
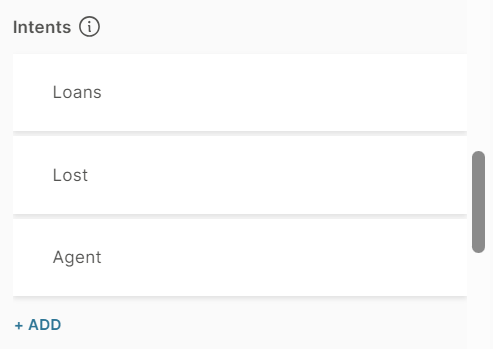
The intents must have the same name as the categories that are specified in the system message.
In the above example, the categories are CATEGORY_1, CATEGORY_2, and agent.
You do not need to add training phrases for these intents.
If none of the specified intents are found, the intent element returns unknown. This usually happens when messages do not fit into any of the defined intents. You do not need to define the unknown intent in the element because it is automatically added.
Output tokens (Optional)
Configure the maximum number of tokens that the tool can use in a response.
If you use a low value in this field, the response is truncated. Usually, the GenAI Intent Detection element returns very small outputs of approximately 50 tokens. You can increase the value if you need longer, customized responses.
Specifications: Minimum of 1 and a maximum of 512 tokens.
Response
Configure the response. For more information, refer to the Response section.
Fallback
Specify the action that the chatbot needs to take if the GenAI intent detection element fails to execute. For more information, refer to the Fallback section.
Tests (Optional)
Create one or more test cases to check whether the intents are identified correctly.
In the test case, do the following.
- In the User message field, specify a sample message from the end user.
- If you have used attributes to configure the fields in the element, specify the values of the attributes.
- In the Expected response field, specify the intent into which the user message needs to be classified.
After you create the test cases, run them, and view the results.
For an example of a test case, refer to the Example section.
For more information about creating and working with test cases, refer to the Test cases section.
Preview the behavior of the element
Enter examples of end user messages and prompts, and check if the response from GenAI is as expected.
Do the following:
- Select Preview behavior.
- In the User message field, enter an example of a message from the end user. Example: How much can I borrow?
- Configure the other fields, if required.
- Select Preview behavior.
The response from GenAI is displayed in the right pane. The response shows the intent that GenAI matched for the end user's message.
If the result is not what you expect, do the following until you get the required output.
- Modify the fields in the Preview screen.
- Select Preview behavior.
If the result is as expected, select Apply changes to parameters to update the fields in the GenAI intent detection element.
For an example of a preview, refer to the Example section.
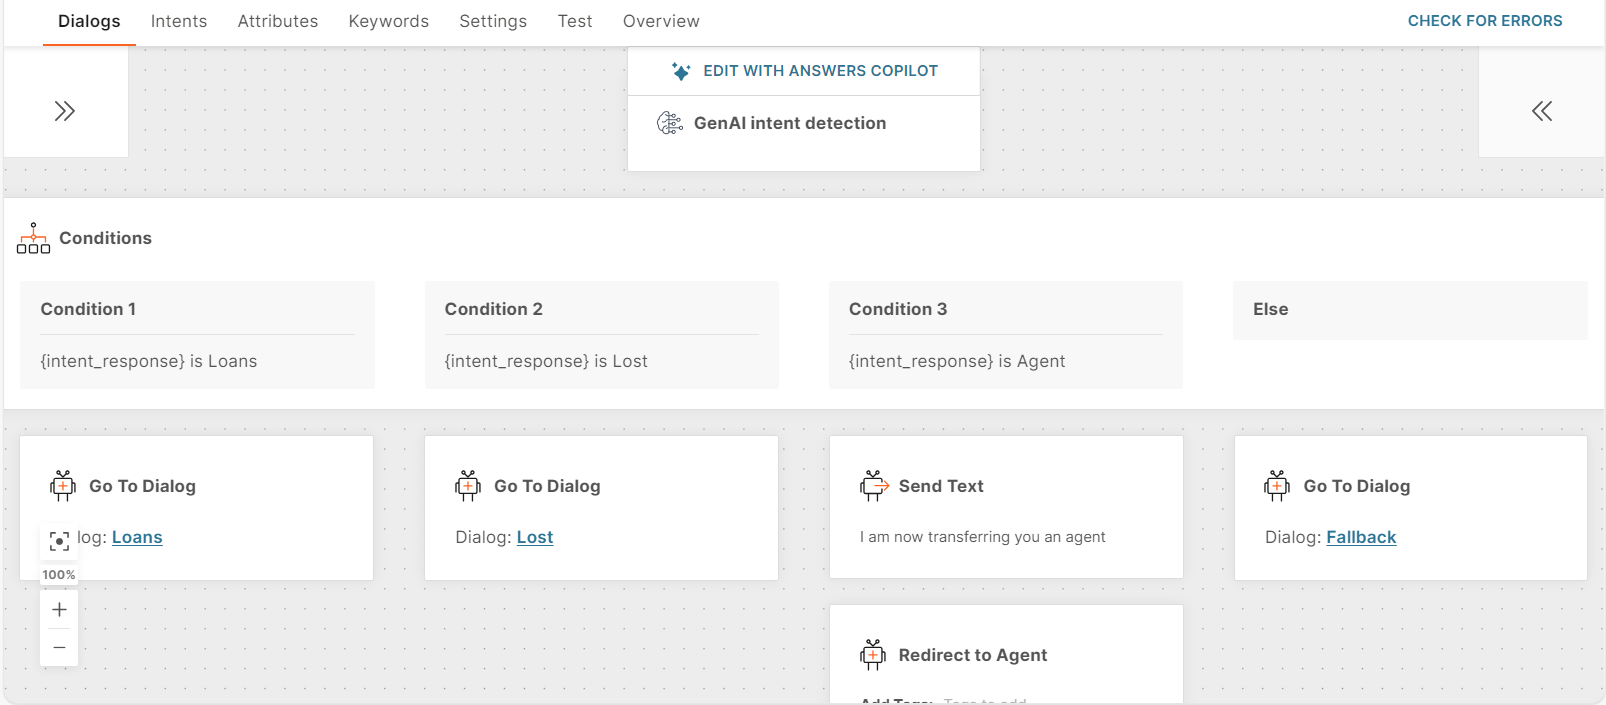
Configure the next steps
After configuring the GenAI Intent detection element, define the next steps for specific intents. Example: Use a Conditions element to route the chatbot flow based on the end user's intent.
Example
In this example, the chatbot is for a bank. When end users ask questions, the GenAI intent detection element identifies the intent associated with the question. You can then redirect the end user to the dialog for that intent.
-
To obtain the question from the end user, add a Text element. Example: How can I help you today?
-
Add the GenAI intent detection element.
-
Pass the response from the end user to the GenAI intent detection element. To do so, specify lastReceivedTextMessage in the User message field in the element.
-
In the prompt instruction field, instruct GenAI to classify the end user's response into one of the configured intents. Use the following prompt.
- Question: **{query_str}** - Help me classify user's question in one of the categories
-
In the System message field, add the following instructions.
- InfoBank is a bank - I need you to classify user question into one of categories [Loans, Lost, Agent] - Loans category refers to the following types of queries: -- [How to apply for personal financing, who is eligible for personal loan, what are the terms and conditions, what are the payment terms] - Lost category refers to the following types of queries: -- [I lost my card, Please disable my stolen card, I want to report a lost card] - Agent category refers to the following types of queries: -- [Let me talk to an agent, I want to talk to a real person, Transfer me to a live agent] - User question will be delimited by **. - Your answer must be in a valid JSON format, with the key: category, and the value is one of the categories defined above.
-
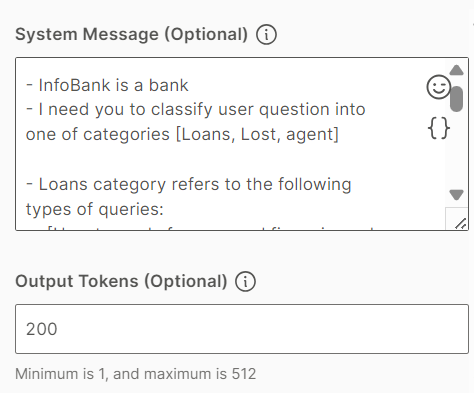
In the Intents field, create intents for each category that you specified in the System message field. So, create the Loans, Lost, and Agent intents.
-
Create an attribute, intent_category, to save the response from the GenAI intent detection element.
-
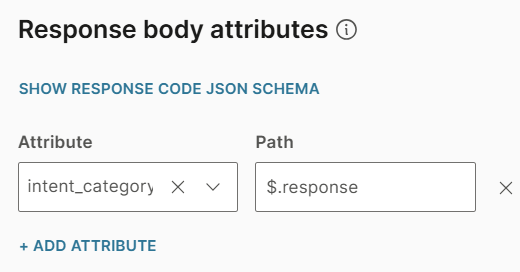
In the GenAI intent detection element > Response tab > Response body field, configure the following.
Attribute: intent_category
Path: $response.category
-
Configure the fields in the Fallback tab.
-
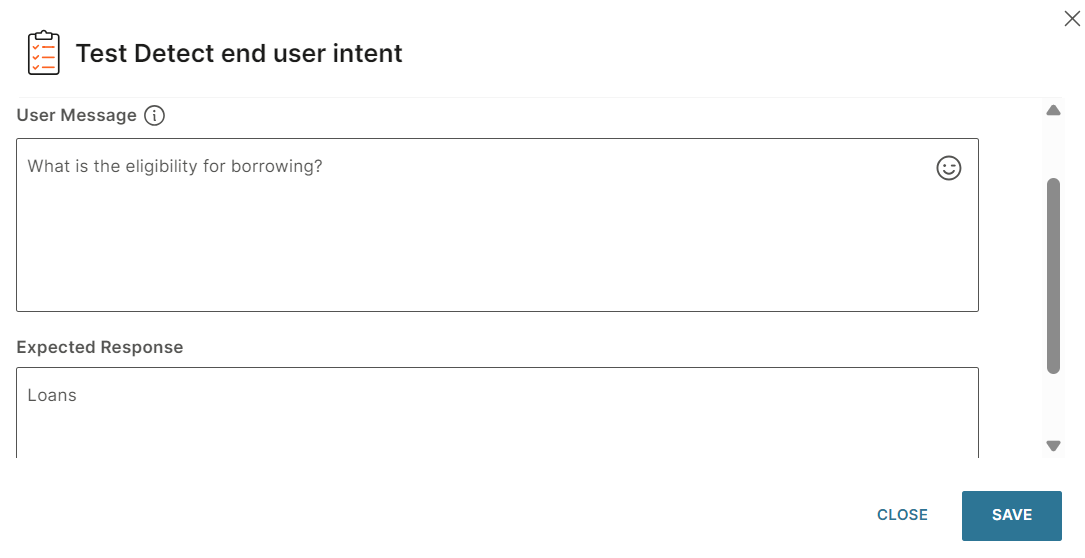
In the Tests tab, create test cases. In each test case, provide a sample end user message and specify the intent to which the message must be classified.
Example:
User message is What is the eligibility for borrowing?
Expected response is the intent, Loans.
-
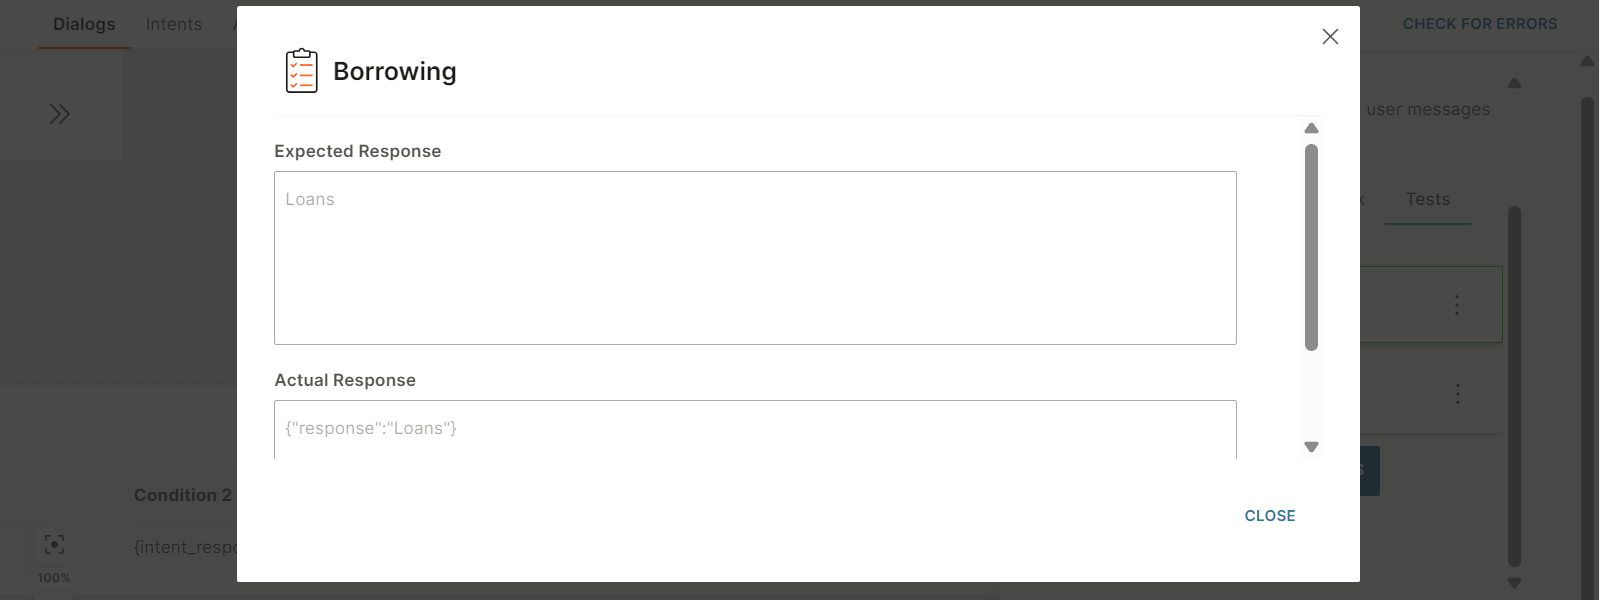
Run the test case and view the result to check whether the intent detected by GenAI matches the intent specified in the test case. Check whether the Actual response matches the Expected response.
-
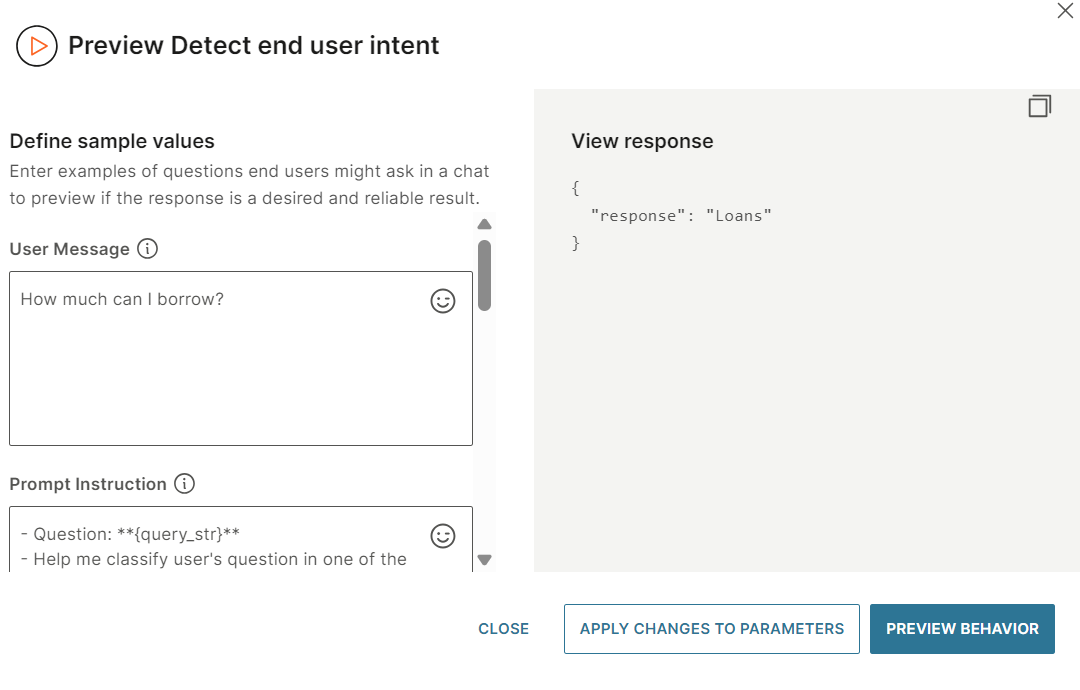
Preview the behavior of the GenAI intent detection element. In the preview screen, enter a sample end user message in the User message field and select Preview behavior. Check whether the response in the right pane is correct.
Example:
User message is How much can I borrow?
Check whether the response in the right pane is Loans.
-
Test the entire chatbot. In the Test tab of the chatbot, enter a message about one of the banking services.
Example: Send the message, My credit card has been stolen, to the chatbot. Check whether GenAI detects the correct intent.
GenAI custom prompt
Use this element to produce custom output based on your instructions.
Example: The following are some examples of what you can ask the element to do.
- Summarize the input text.
- Rewrite or create variations of the input text.
- Translate the input text.
- Obtain information from the end user.
- Generate a JSON file in a specific format based on user input. You can then use the file to interact with an API.
- Create a financial plan based on parameters such as annual income and current savings.
Key features
- Add custom prompts to your chatbot design.
- Define and refine prompts.
- Remember message history.
- Generate variations, translations, or writing styles.
- Extract parameters such as email addresses and telephone numbers.
- Full customization.
Configure the element
To add the GenAI custom prompt element to your chatbot, drag it from Apps from Exchange. Complete the following fields.
Choose function
Select whether the GenAI model will use the conversation history during the chat with the end user.
- Prompt with conversation history: Use this option if you want the GenAI custom prompt element to use the conversation history as context or reference to generate a response.
- Prompt without conversation history: The GenAI model does not remember the conversation history. Select this option for use cases where GenAI needs to provide specific information that does not need the conversation history. Example: Information about legal documents.
Request
Provide instructions for the chatbot to perform the task. Complete the following fields.
User Message
Specify the message sent by the end user. This field is applicable only if the Choose function field is Prompt with conversation history.
You can do one of the following:
- Select the text attribute that contains the end user's message.
- Specify the predefined attribute, lastReceivedTextMessage.
Prompt instruction and System message
The prompt instruction and system message instruct the LLM to generate the required output.
The following table shows the prompt template and an example of the system message template. In the example, the end user is asked to share their email address so that they can be contacted later. The goal for GenAI is to extract the email address in JSON format. You can then extract the required variables through the Code element and store the value.
Use the prompt template as it is.
Prompt template | System message template |
---|---|
- The user message from which you need extract email is: **{query_str}** - Return only the requested data without additional information. - If information is not provided - write null | - Your role is to extract the email from the user message. - The user's query will be delimited with: ** - The result should be in JSON format with the key: email - Do not format the output |
Memory sharing (optional)
Share information, such as conversation context, between multiple GenAI custom prompt elements to improve their performance.
Use a memory key as the identifier for the shared information. In the Memory key field, either create a new memory key or enter an existing one. All elements that use this memory key get access to the shared information.
If you do not add a memory key, the GenAI custom prompt element shares the information with other GenAI custom prompt elements that also do not have a memory key.
The Memory sharing field is applicable only if the Choose function field is set to Prompt with conversation history.
Output tokens (Optional)
Configure the maximum number of tokens that the tool can use in a response.
If you use a low value in this field, the response is truncated. Usually, the GenAI Intent Detection element returns very small outputs of approximately 50 tokens. You can increase the value if you need longer, customized responses.
Specifications: Minimum of 1 and a maximum of 512 tokens.
Temperature (Optional)
Configure the level of randomness in the generated response.
A response that is generated at a lower temperature can be focused, conventional, and predictable, whereas a response that is generated at a higher temperature can be creative, random, and varied.
Avoid a high temperature because the GenAI model might give incorrect and unclear responses.
Response
Configure the response. For more information, refer to the Response section.
Fallback
Specify the action that the chatbot needs to take if the GenAI custom prompt element fails to execute. For more information, refer to the Fallback section.
Tests (Optional)
Create one or more test cases to check whether GenAI follows the instructions correctly and provides the required response.
In the test case, do the following.
- If you have enabled prompt without conversation history: In the Prompt instruction field, specify a sample message from the end user.
- If you have enabled prompt with conversation history: In the User message field, specify a sample message from the end user.
- If you have used attributes to configure the fields in the element, specify the values of the attributes.
- In the Expected response field, specify the response expected from GenAI.
After you create the test cases, run them, and view the results.
For an example of a test case, refer to the Example section.
For more information about creating and working with test cases, refer to the Test cases section.
Preview the behavior of the element
Enter examples of end user messages and check if the response from GenAI is as expected.
Do the following.
- Select Preview behavior.
- If the Function field is Prompt with conversation history, in the User message field, enter an example of a message from the end user.
- Configure the other fields, if required.
- Select Preview behavior.
The response from GenAI is displayed in the right pane.
If the result is not what you expect, do the following until you get the required output.
- Modify the fields in the Preview section.
- Select Preview behavior.
If the result is as expected, select Apply changes to parameters to update the fields in the GenAI custom prompt element.
For an example of a preview, refer to the Example section.
Example
In this example, the end user is asked to share their email address so that they can be contacted later. The goal for GenAI is to extract the email address in JSON format. You can then extract the required variables through the Code element and store the value.
-
To obtain the email address from the end user and save this information in an attribute, use the Attribute element. In this element, do the following:
- Ask the end user for their email address.
- Store the end user's response in the user_message attribute.
-
Add the GenAI custom prompt element.
-
In the Choose function field, select Prompt with conversation history to enable conversation history.
-
To pass the response from the end user to the GenAI custom prompt element, specify the user_message attribute in the User message field.
-
In the Prompt instruction field, instruct GenAI to obtain information from the end user's message and provide a response.
Use the following prompt.
- The user message from which you need to extract email is: **{query_str}** - Return only the requested data without additional information. - If information is not provided - write null
-
In the System message field, use the following content.
- Your role is to extract the email from the user message. - The user's message will be delimited with: ** - The result should be in JSON format with the key: email - Do not format the output
-
In the Response tab > Response body attributes section, specify the attribute in which GenAI needs to save its response and the associated path.
Example:
Create the attribute, prompt_response, and specify this in the Attribute field.
In the Path field, specify $.response
-
Configure the fields in the Fallback tab.
-
In the Tests tab, create test cases. In each test case, provide a sample end user message, sample email address, and the response expected from GenAI. Example:
User message is That would be great. Yes, please contact me at john.doe@infobip.com
Sample data is john.doe@infobip.com
Expected response is john.doe@infobip.com
-
Run the test case and view the result to check whether GenAI provides the correct response. Check whether the Actual response matches the Expected response.
-
Preview the behavior of the GenAI custom prompt element. In the preview screen, enter a sample end user message in the User message field and select Preview behavior. Check whether the response in the right pane is correct.
Example:
User message is That would be great. Yes, please contact me at john.doe@infobip.com.
Check whether the response in the right pane is as follows.
{"response":": "{\"email\":\"[email protected]\"}"}
-
Create an attribute to save the information extracted from the end user's message. Create the email_address attribute.
-
Add the Code element after the GenAI custom prompt element to parse the attributes from the end user's message. Save the extracted information into the attribute that you created - email_address.
Example: Use the following code.
let data = attributeApi.get('prompt_response'); let parsedData = JSON.parse(data); attributeApi.set('email_address', parsedData["email"]);
-
Add a Text element to return the response from GenAI. Enter the following information in the element.
Thank you for sharing your email address: {{parsed_data}}
-
Test the entire chatbot. In the Test tab of the chatbot, enter the booking information.
Example: Send the message, That would be great. Yes, please contact me at john.doe@infobip.com, to the chatbot. Check whether GenAI returns the correct response.
AI assistant
An artificial intelligence (AI) assistant is an AI model that performs tasks based on the training data and instructions that you specify. Example: Answer FAQ based on the uploaded training documentation.
Use the AI assistant element to add an AI assistant to your chatbot. You can do one of the following.
- Use an existing assistant.
- Create and train an assistant. Upload the training documentation to the model and give it instructions on how to respond to end user's questions.
Configure the element
To add the AI assistant element to your chatbot, drag it from Apps from Exchange. Complete the following fields.
Request
Provide instructions for the chatbot to AI assistant. Complete the following fields.
Select AI assistant
Do one of the following:
- Use an existing assistant: Select an AI assistant from the list.
- Create a new assistant: Select Create AI assistant. The AI assistants section on the web interface opens. Create the AI Assistant and then return to the AI assistant element.
You can add only one AI assistant to the AI assistant element.
User message
Specify the message sent by the end user.
You can do one of the following:
- Select the text attribute that contains the end user's message.
- Select the predefined attribute, lastReceivedTextMessage.
External content source (Optional)
Use this option if you want the AI assistant to use an external content source instead of using its own knowledgebase. You can use this option in scenarios where you want GenAI to ignore the training documentation and generate responses based on real-time data, such as the end user's personal information, through an API.
Prompt variable (Optional)
Use this field to specify the following.
- Configure instructions for the AI Assistant.
- Use variables to pass information from the chatbot to the AI assistant. Example: Name of the end user.
If the Prompt template section in the selected AI assistant contains {prompt_var}, the value from the Prompt variable field is passed to {prompt_var}. This helps you personalize chats or give context to the AI assistant.
Example: In the Prompt variable field, add Refer to the end user as {{name}}.
Response
Configure the response. For more information, refer to the Response section.
Fallback
Specify the action that the chatbot needs to take if the AI assistant element fails to execute. For more information, refer to the Fallback section.
Preview the behavior of the element
Enter examples of end user messages and check if the response from GenAI is as expected.
Do the following.
- Select Preview behavior.
- In the User message field, enter an example of a message from the end user.
- Configure the other fields, if required.
- Select Preview behavior.
The response from GenAI is displayed in the right pane.
If the result is not what you expect, do the following until you get the required output.
- Modify the fields in the Preview section.
- Select Preview behavior.
If the result is as expected, select Apply changes to parameters to update the fields in the AI assistant element.
For an example of a preview, refer to the Example section.
Example
In this example, the purpose of the AI assistant element is to answer questions about dialogs in Answers. The expectation is that the end user's message would contain a question about dialogs. The AI assistant element would provide a response based on the content uploaded to the AI assistant within the element.
-
Create an AI assistant, Answers - dialogs.
-
In the assistant, add the Dialogs page as the training documentation. Enter the following link. https:///www.infobip.com/docs/answers/chatbot-structure/dialogs
-
In your chatbot, add the Save user response element to obtain the question from the end user and save this information in an attribute. In this element, do the following.
- Prompt the end user to ask a question.
- Store the end user's question in the end_user_question_assistant attribute.
-
Add the AI assistant element.
-
In the Select AI assistant field, select the Answers - dialogs assistant.
-
Pass the question from the end user to the AI assistant element. To do so, specify the end_user_question_assistant attribute in the User message field.
-
In the Prompt variable field, instruct GenAI to address the end user by their name.
Use the following prompt.
Refer to the end user as: {{firstname}}
-
In the Response tab > Response body attributes section, specify the attribute in which GenAI needs to save its response and the associated path.
Example:
Create the attribute, assistant_response, and specify this in the Attribute field.
In the Path field, specify $.response.
-
Configure the fields in the Fallback tab.
-
Preview the behavior of the AI assistant element. In the preview screen, enter a sample end user message in the User message field and select Preview behavior. Check whether the response in the right pane is correct.
Example:
User message is What is a dialog?
Check whether the response in the right pane is similar to the following.
{"response":"A dialog is a component of a chatbot that performs a specific task or set of tasks. Dialogs divide a chatbot into manageable parts. The entire communication between the chatbot and the end user happens through dialogs. Each dialog contains a set of chatbot elements that work together to perform the task. There are different types of dialogs, such as standard dialogs, default dialogs, and authentication dialogs. Standard dialogs are the dialogs that you create for performing various tasks. These dialogs contain most of the actions of a chatbot. The default dialog is added by default when you create a chatbot. This is always the first dialog. Use this dialog to send a welcome message and identify what the end user wants. The authentication dialog is used to verify the identity of end users."}
-
Test the entire chatbot. In the Test tab of the chatbot, enter a question about dialogs.
Example: Send the message, What is a dialog, to the chatbot. Check whether GenAI returns the correct response.
How to
Configure the response
Configure the following fields in the Response tab of the GenAI element.
Save response code to attribute (Optional)
Select the attribute in which to save the response code.
Response body attributes
Select the attribute in which to save the body of the response, and the related path.
You can also view and copy the response code JSON schema.
If you need to manipulate the data received in the response, ensure that you use a JSON attribute type.
Work with test cases
Use the Test tab in the element to test the functionality of the element without testing the entire chatbot.
The Test tab is available in the following elements.
- GenAI Intent detection
- GenAI Custom prompt
To test the element, do the following.
- Create test cases. Infobip recommends that you create the test cases in a .csv file and import it. Refer to the Import test cases documentation in the following sections.
- Run the test cases.
- View the results of the test cases.
- If the results are not as expected, update the fields in the GenAI element, and run the test cases again.
For more information, refer to the following sections.
Import test cases
You can import saved test cases. Select Import and select the required file.
Supported file format is .csv.
Create a test case manually
To create a new test case, do the following.
- Select Add test case.
- Name the test case.
- Configure the fields as required.
- Select Save.
Example of using attributes in a test case
The system instruction is to repeat the end user's message through role play.
Act like a {{Role}}
In the test case, do the following.
- Specify the end user's message in the Prompt instruction field.
- Specify the value of the Role attribute as Pirate.
- Specify the Expected response as Ahoy.
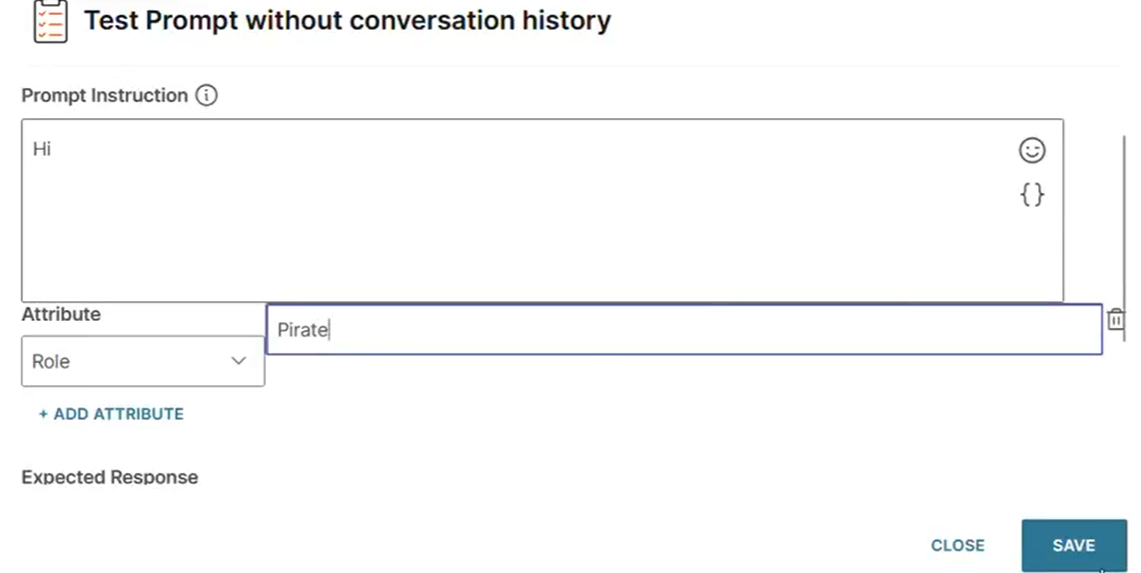
The following image shows the results of the test case.
Run test cases
After you create the required test cases, run them.
- To run a specific test case, select the three dots next to the test case and select Run.
- To run all the test cases, select Run all tests.
You get a message that tells you whether the tests succeeded.
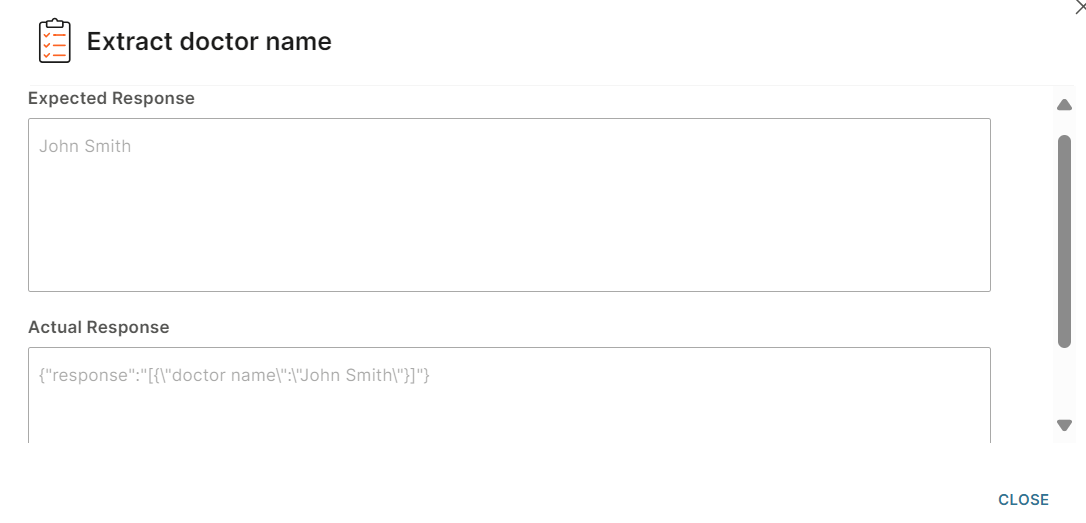
View results of test cases
Check whether the response from GenAI is as expected.
Select the three dots next to a test case and select View result.
Edit test cases
Select the three dots next to the test case that you want to edit and select Edit.
Delete test cases
- To delete a specific test case, select the three dots next to the test case and select Delete.
- To delete all the test cases, select Delete all tests.
Export test cases
You can export the test cases that you create. Select Export.
All the test cases are saved in a .csv file.