Message types
Text
Send text messages to customers. These messages can contain emojis.
Text messages are limited to 3,000 characters.
Rich link
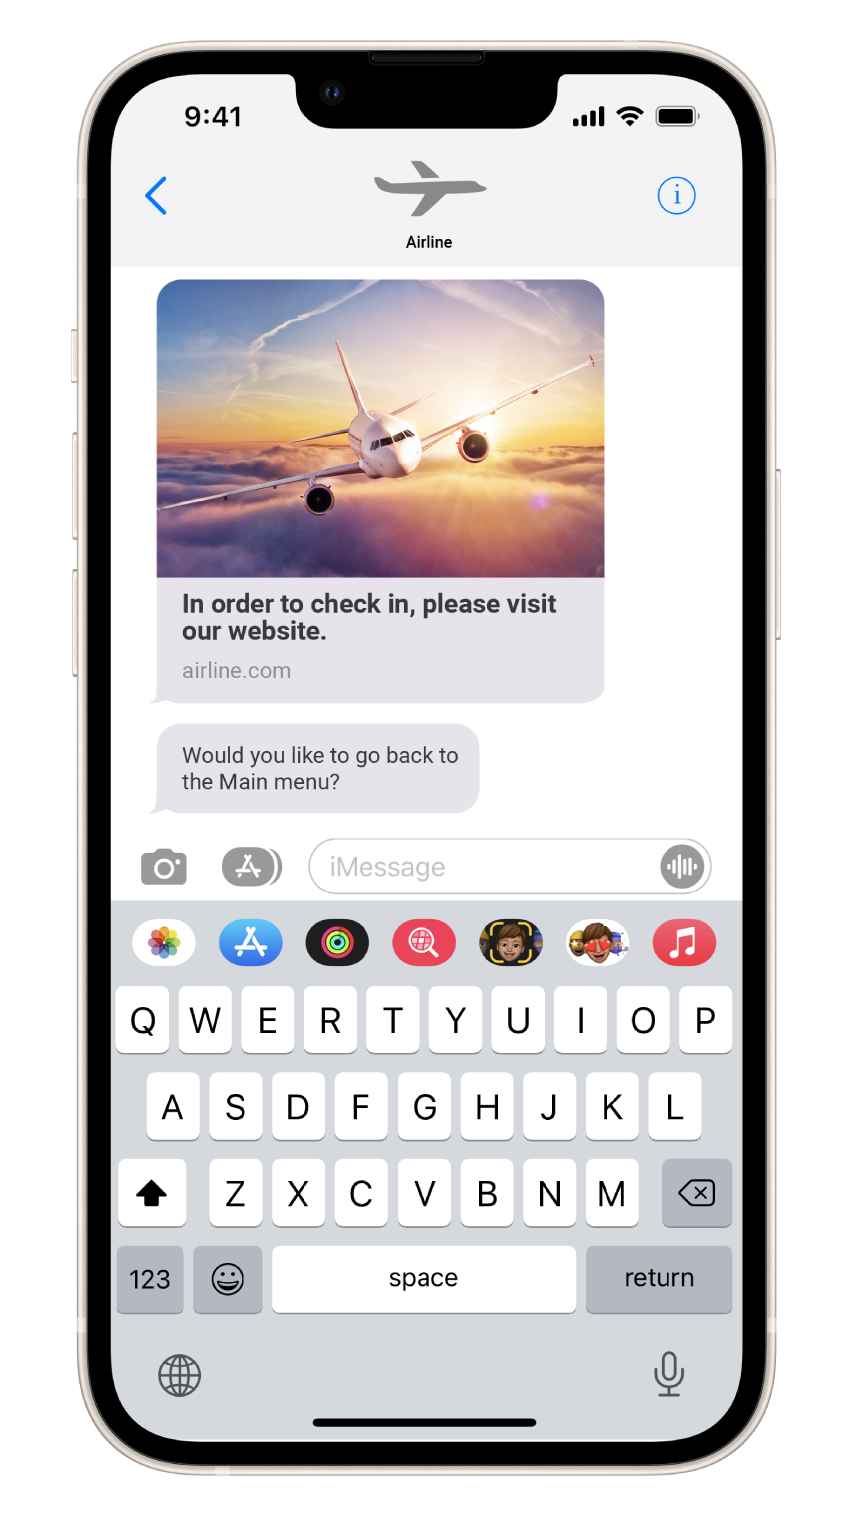
Include URLs in images or videos to enable customers to preview products within the Messages app. When customers tap the image or video, the linked page opens in their browser. After viewing the content, they can return to the conversation.
When sending a rich link message (RICH_LINK) using Apple Messages for Business (AMB) or the Messages API, metadata is automatically fetched from the specified linkUrl if the imageUrl and linkTitle parameters are not provided in your request.
This behavior uses Open Graph metadata (if available on the linked page) to generate the rich link preview with a title and image. This ensures proper formatting without manual configuration.
If you define linkTitle or imageUrl in your API request, those values will override the fetched metadata, giving you full control over the preview's appearance.
Apple Maps support
Infobip automatically detects and processes Apple Maps URLs, fetching the required metadata and generating a fully structured rich link. This eliminates the need for developer-side configuration or additional backend logic.
Apple Maps location sharing through AMB is now seamless, as metadata is applied automatically, with no extra effort required from the user.
Attachment
Send images, PDF files, or other file types as attachments to customers.
The maximum file size is 100 MB.
Quick reply
Enable customers to choose from multiple options inline without leaving the ongoing conversation.
You can add 2–5 options. Customers can choose only one of these options.
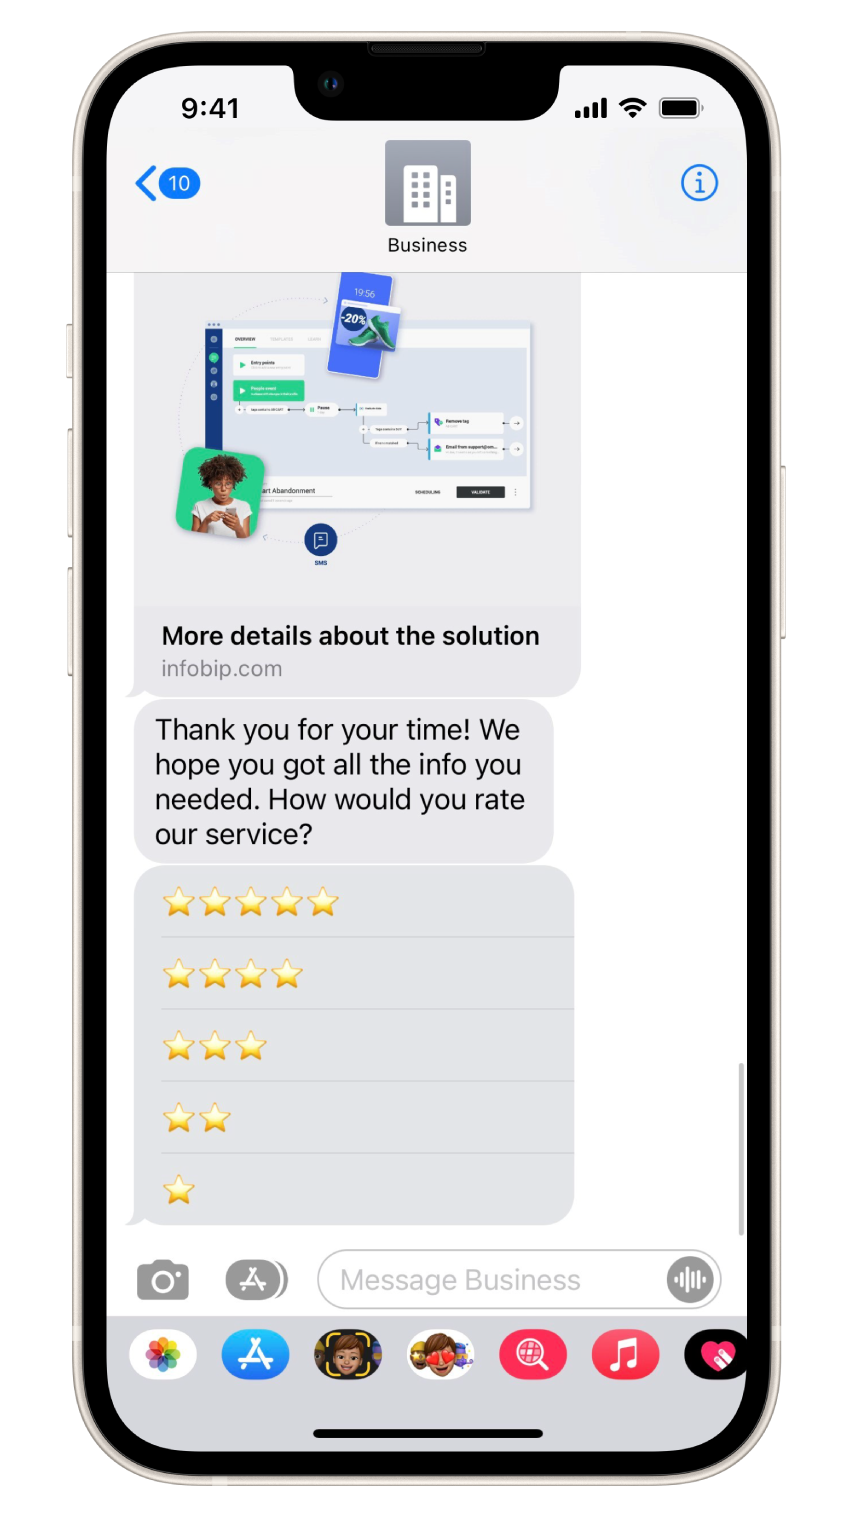
List picker
Provide visually organized choices to your customer. Example: A list of items that they can purchase or a list of questions that directs them to the relevant support option.
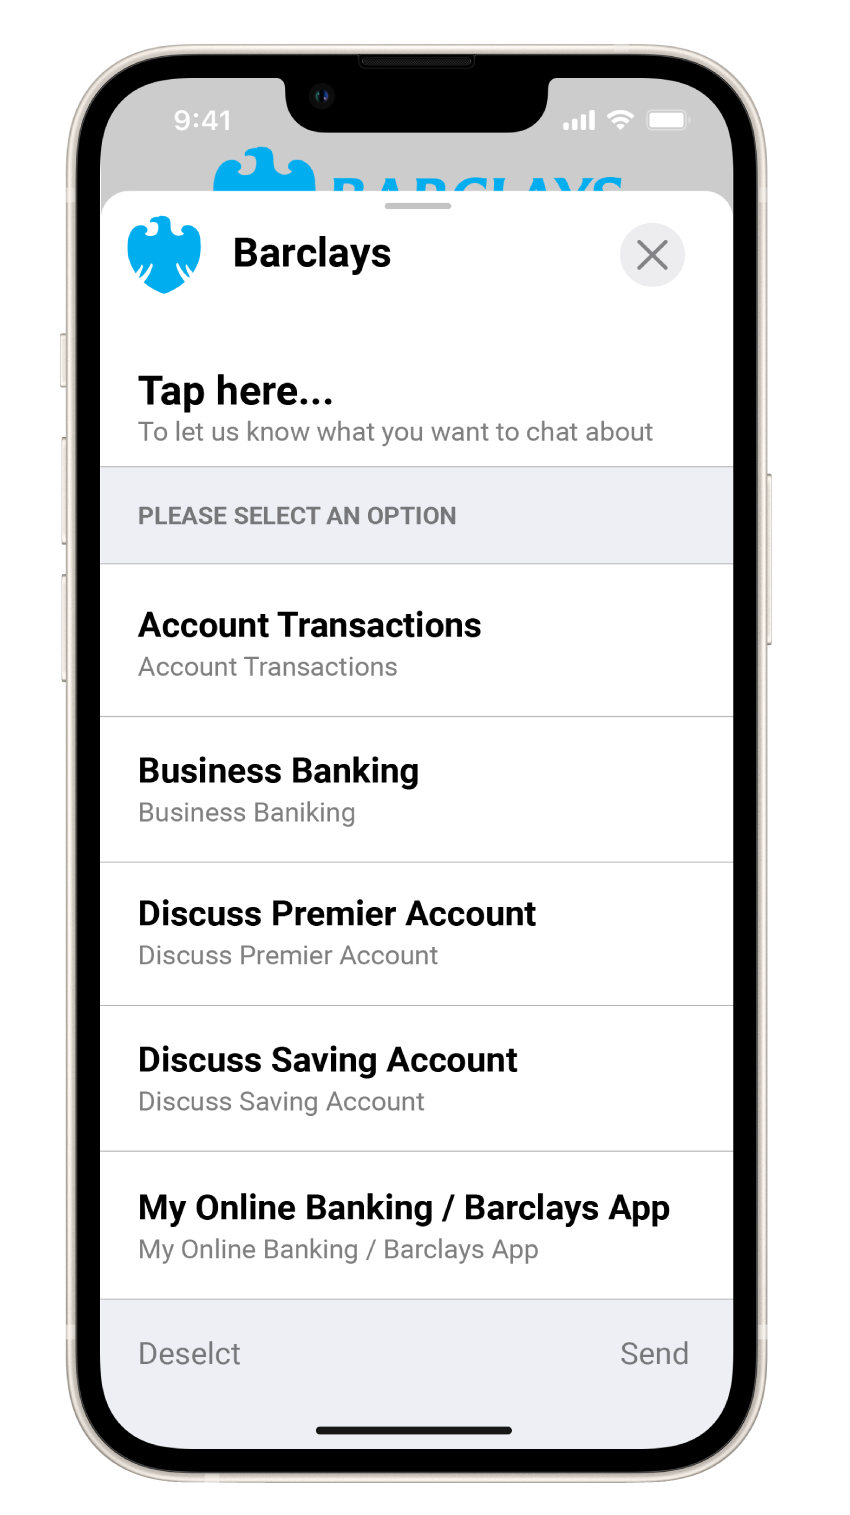
List pickers contain the following mandatory components:
- Received message
- List
- Reply message
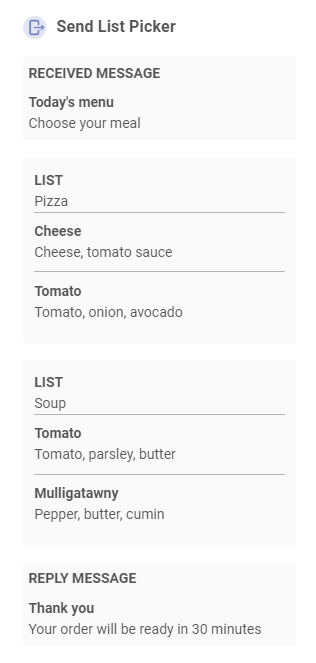
Received message
This is the message that you send to your customers.
Received messages contain the following components:
- Title: Name of the list. The default value is 'Select an option'
- Message text: Description or message. You can include emojis and placeholders to personalize the message
- Image(optional): Image to be displayed
- Supported formats are .jpg, .png, .gif.
- You can either upload an image or add a link to an image.
- You can set the style of the image. The default value is icon.
List
This is the list of items from which customers can select options.
Lists contain the following components:
- Section title: Title of the list. You can include placeholders to personalize the title
- List items: Items in the list. List Items contain the following components:
- Item Title: Name of the list item. You can include placeholders to personalize the title
- Image(optional): Image to be displayed.
- Supported formats are .jpg, .png, .gif.
- You can either upload an image or add a link to an image.
- You can set the style of the image. The default value is icon.
- Item Subtitle (optional): Description of the list item
You can implement the following optional features:
- Multiple item selection: Enable this option so that customers can choose more than one item from the list.
- Add from list attribute: Add list items that are saved in predefined attributes.
- Add new list section: Add multiple list sections to categorize the list items into groups.
- Save selection: Save the customer's input to an attribute.
- Repeat: Choose the number of times to repeat the message if the customer enters an invalid input.
- Fallback: Add a fallback message if the customer enters an invalid input. Example of fallback message: Connect to agent.
Reply message
This is the predefined message that you send to the end user when they choose one or more items from the list.
Reply messages contain the following components:
- Title: Name of the list
- Message text: Description or message. You can include emojis and placeholders to personalize the message
- Image(optional): Image to be displayed
- Supported formats are .jpg, .png, .gif.
- You can either upload an image or add a link to an image.
- You can set the style of the image. The default value is icon.
- If you add an image to the Received message, but not to the Reply message, the image from the Received message is used in the Reply message.
Time picker
Prompt customers to choose a suitable time slot, for example when scheduling an appointment.
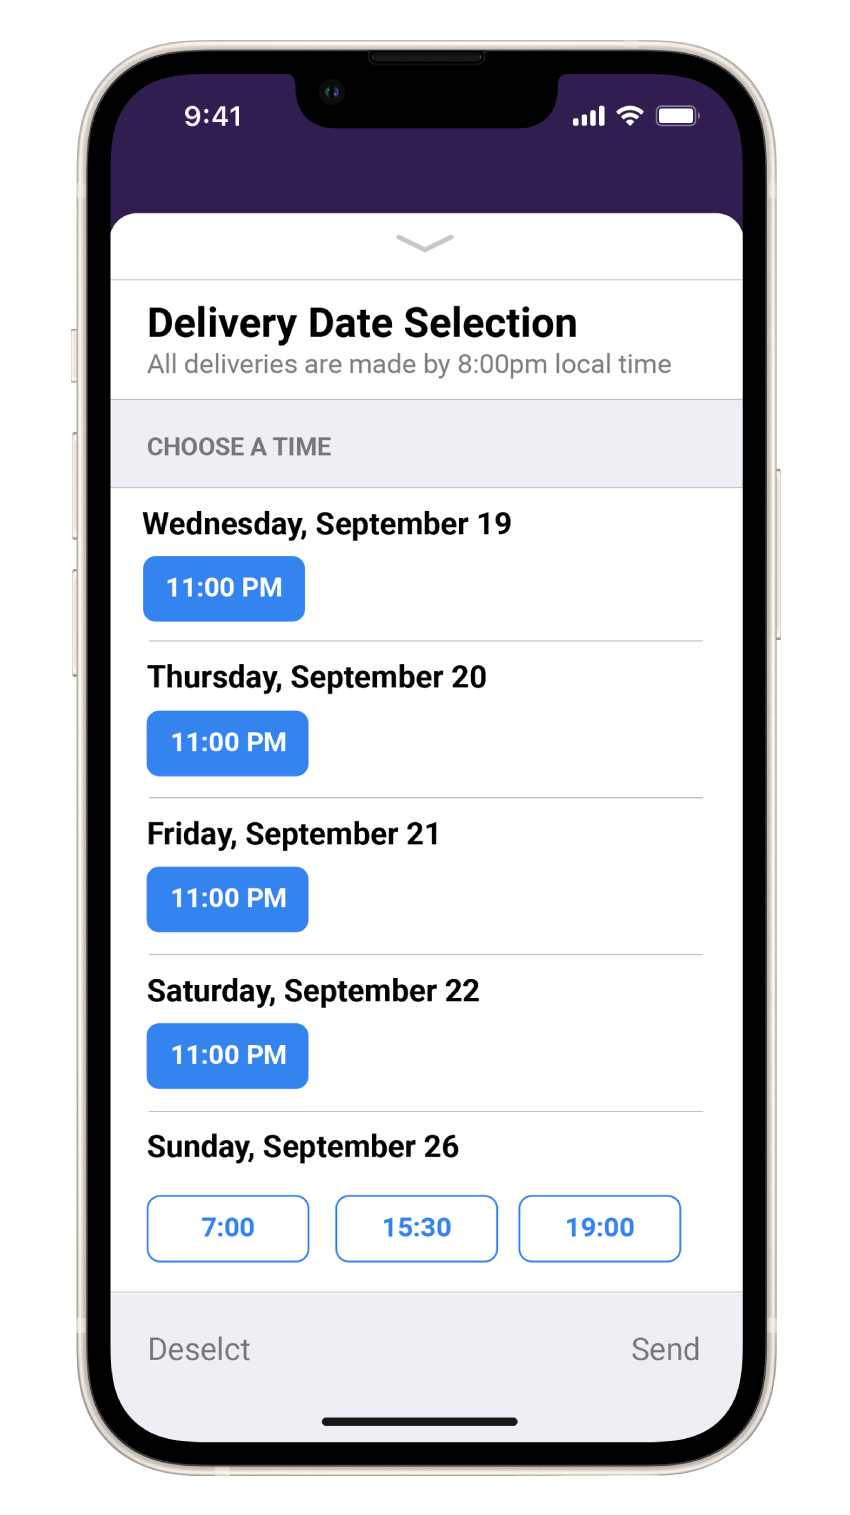
Customers can view time pickers in calendar view, which helps them view any meeting conflicts. If you include information such as addresses, directions, or contact details, customers can view this information in calendar applications, and get directions in map applications.
Time pickers also support push notifications to remind customers about upcoming appointments.
You must obtain opt-in from customers to send them push notifications.
Time pickers contain the following mandatory components:
- Received message
- Time slots
- Reply message
Received message
This is the message that you send to your customers.
Received messages contain the following components:
- Title: Name of the list. The default value is 'Select an option'.
- Message text: Description or message. You can include emojis and placeholders to personalize the message.
- Image(optional): Image to be displayed.
- Supported formats are .jpg, .png, .gif.
- You can either upload an image or add a link to an image.
- You can set the style of the image. The default value is icon.
Time slots
This is the list to which you add available time slots. Customers can select an option from the list.
Time slots contain the following components:
- Title: Title of the list. You can include placeholders to personalize the title
- Time zone: A list of time zones from which the customer can choose an option
- Location details (optional): Name of the location. You can include placeholders to personalize this field.
- Longitude and Latitude (optional): Coordinates of the location. You can include placeholders to personalize these fields.
- Time Slots: Start date, start time, and duration of the time slot. You can set this field either as free form or include predefined values
You can implement the following optional features:
- Add time slots from list attribute: Add list items that are saved in predefined attributes.
- Save selection: Save the customer input to an attribute.
- Repeat: Choose the number of times to repeat the message if the customer enters an invalid input.
- Fallback: Add a fallback message if the customer enters an invalid input. Example of fallback message: Connect to agent.
Reply message
This is the predefined message that you receive when customers choose an option from the available time slots.
Reply messages contain the following components:
- Title: Name of the list
- Text: Description or message. You can include emojis and placeholders to personalize the message.
- Image: Image to be displayed.
- Supported formats are .jpg, .png, .gif.
- You can either upload an image or add a link to an image.
- You can set the style of the image. The default value is icon.
- If you add an image to the Received message, but not to the Reply message, the image from the Received message is used in the Reply message.
Form
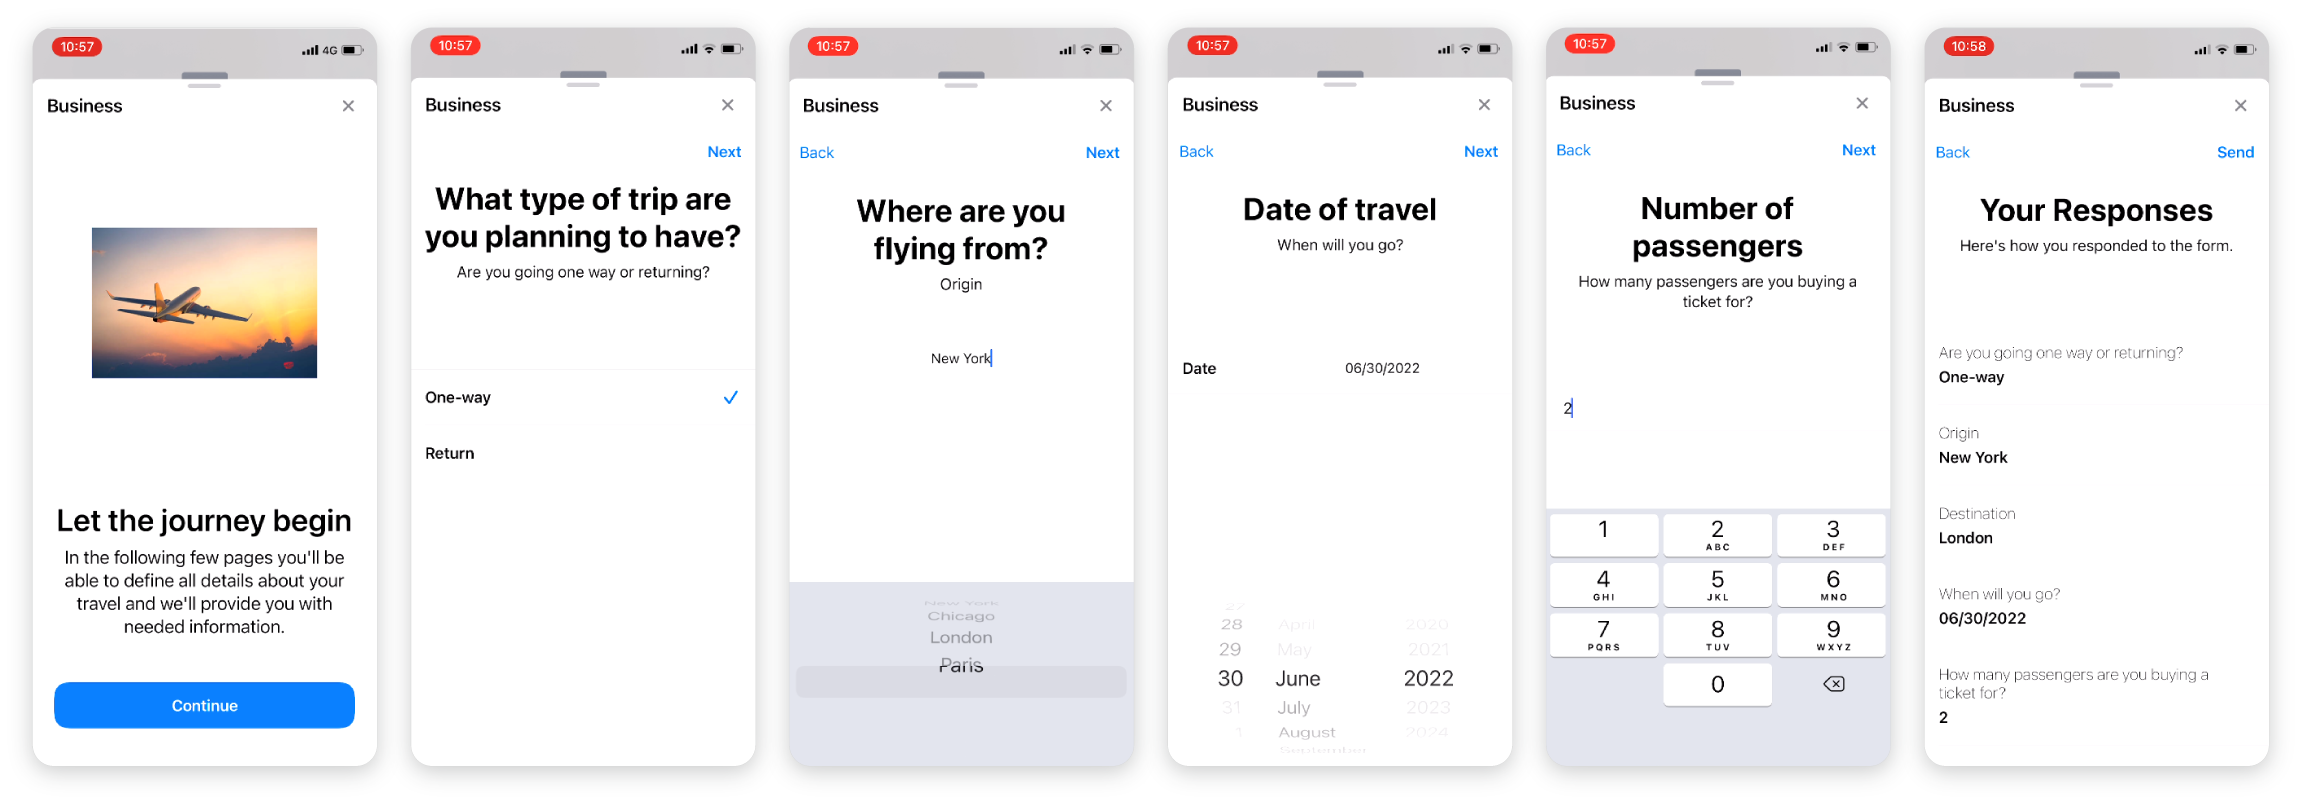
Send multipage, interactive forms to collect information from end users within a single message. The forms can contain menus and questions with different visual appearances and functionalities. Example: triage flows, CSAT survey, and account creation. End users can complete the form without leaving the Messages app.
If an end user switches to another app before submitting the form, the form closes. When the user opens the form again, the form resets and the end user may need to enter the information again. Therefore, Apple recommends that you use a simple menu and add questions to which the end user can provide answers easily.
App Clips
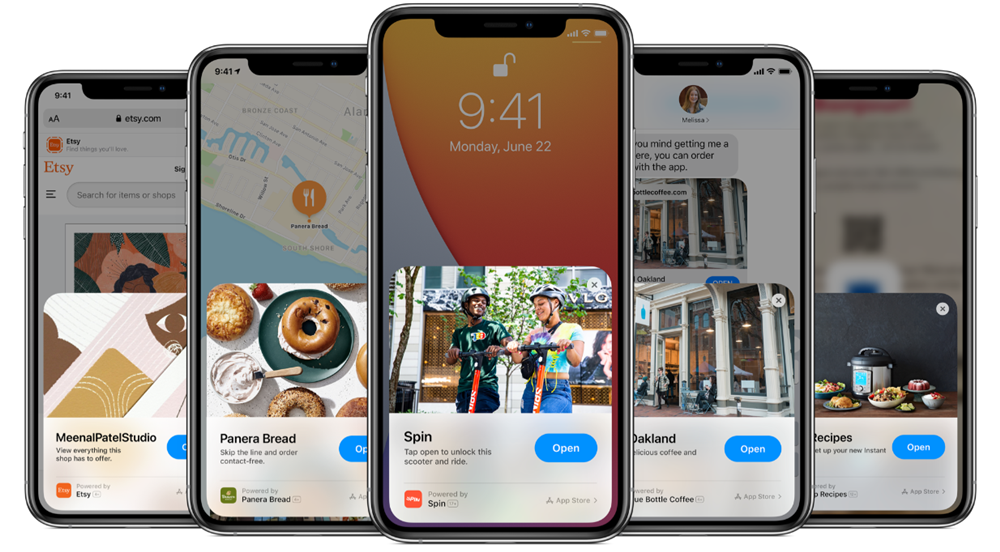
An App Clip is a small, lightweight version of an app that lets customers complete specific tasks immediately, such as ordering food or paying a bill, without the need to install the full app. App Clips offer a fast, convenient way for users to engage your business directly within the Messages app.
Businesses can create an App Clip and send it through Apple Messages for Business to customers, who can then open it instantly, bypassing the need for a full app download.
Binary choice templates
Apple Messages for Business supports business update messages, which are predefined messages that allow businesses to request opt-in from users before initiating a conversation.
This message type uses a binary choice template to prompt users to accept or decline communication. If the user selects Yes, the business can continue messaging for up to 12 months, subject to Apple's messaging policy (opens in a new tab) and approval for each use case. If the user selects No, the user is added to a blocklist and cannot be contacted again unless they explicitly opt in.
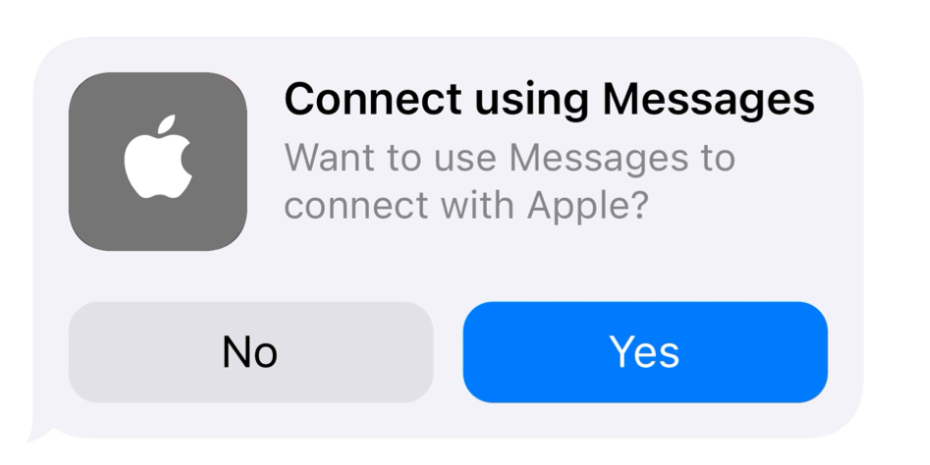
Binary choice templates are fully managed by Apple. The message contains two predefined response buttons: Yes and No. The template is required and cannot be edited or replaced. However, it does allow limited branding options:
- Text only: A standard opt-in prompt with binary buttons
- Text and image: Same structure with an optional PNG image.
- Logo: Businesses can include their own logo. The Apple logo is not required.
The message text and button labels cannot be changed. These templates are available exclusively for opt-in flows.
Optional integrations
Apple Pay
Apple Pay provides an easy and secure way for customers to buy products and services through Messages for Business. Customers can pay without leaving the Messages for Business conversation. When a customer clicks the payment request, the payment sheet opens. After the customer authorizes payment, the payment request chat message updates to reflect that the payment is complete. You can include other information such as order confirmation and order tracking.
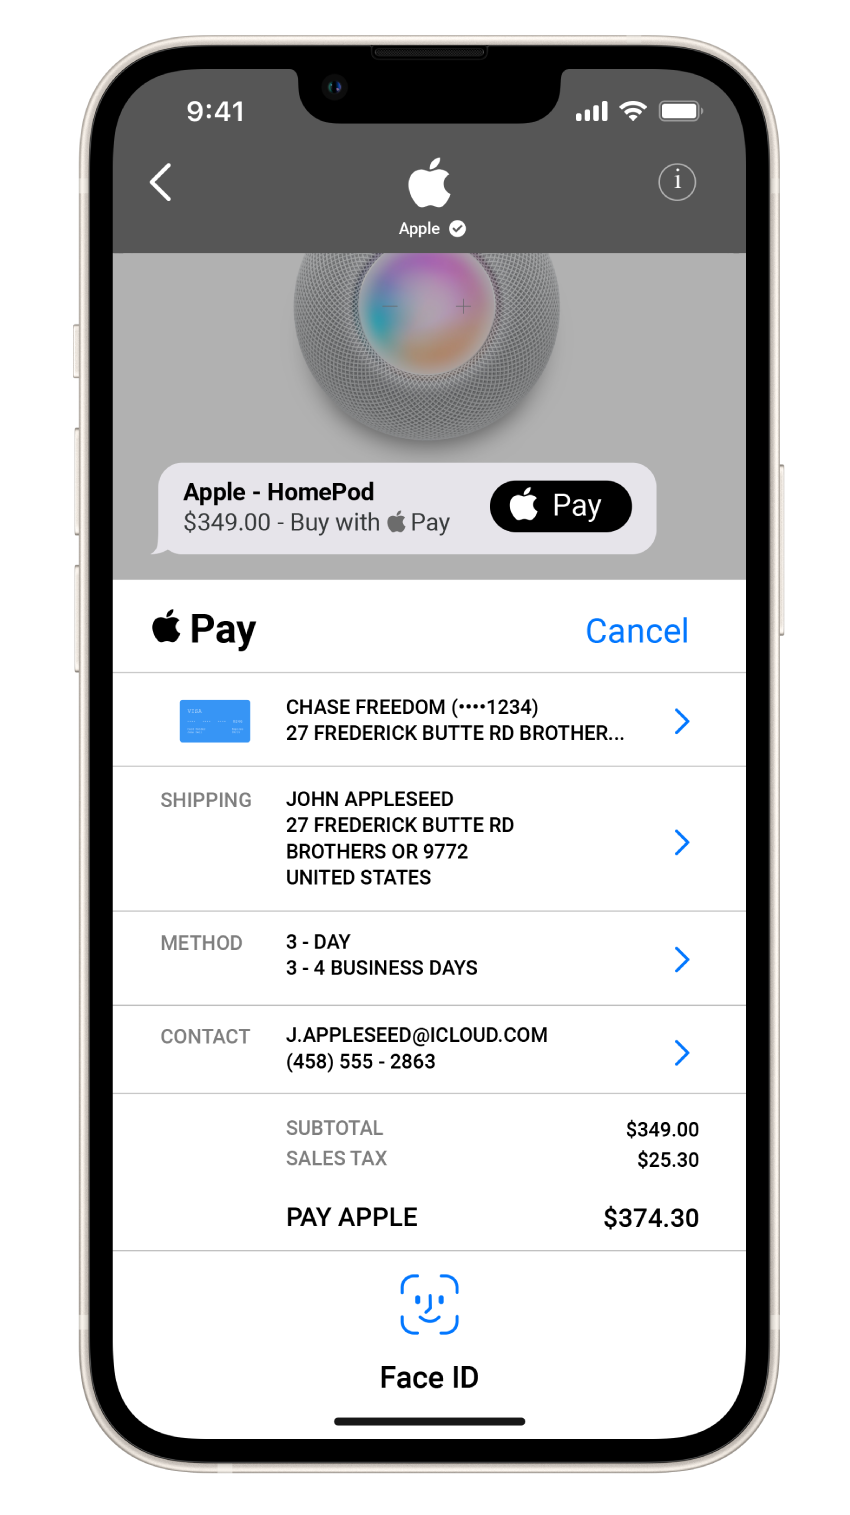
To create an Apple Pay configuration, you must create an Apple Pay Merchant ID in the Apple Business Register. This ID identifies your business as a merchant able to accept payments. The ID is unique to your Apple Pay service and does not expire. You can use this ID in multiple websites and apps.
For more information, refer to the Apple support documentation (opens in a new tab).
To configure Apple Pay, refer to the Apple Pay configuration section.
Authentication
Messages for Business enables authentication data to pass between the Infobip platform and the customer's device by using an authentication endpoint. After the customer is authorized, the system sends an OAuth response and the customer’s device receives a login form. The customer can enter the login credentials to continue the authorization process.
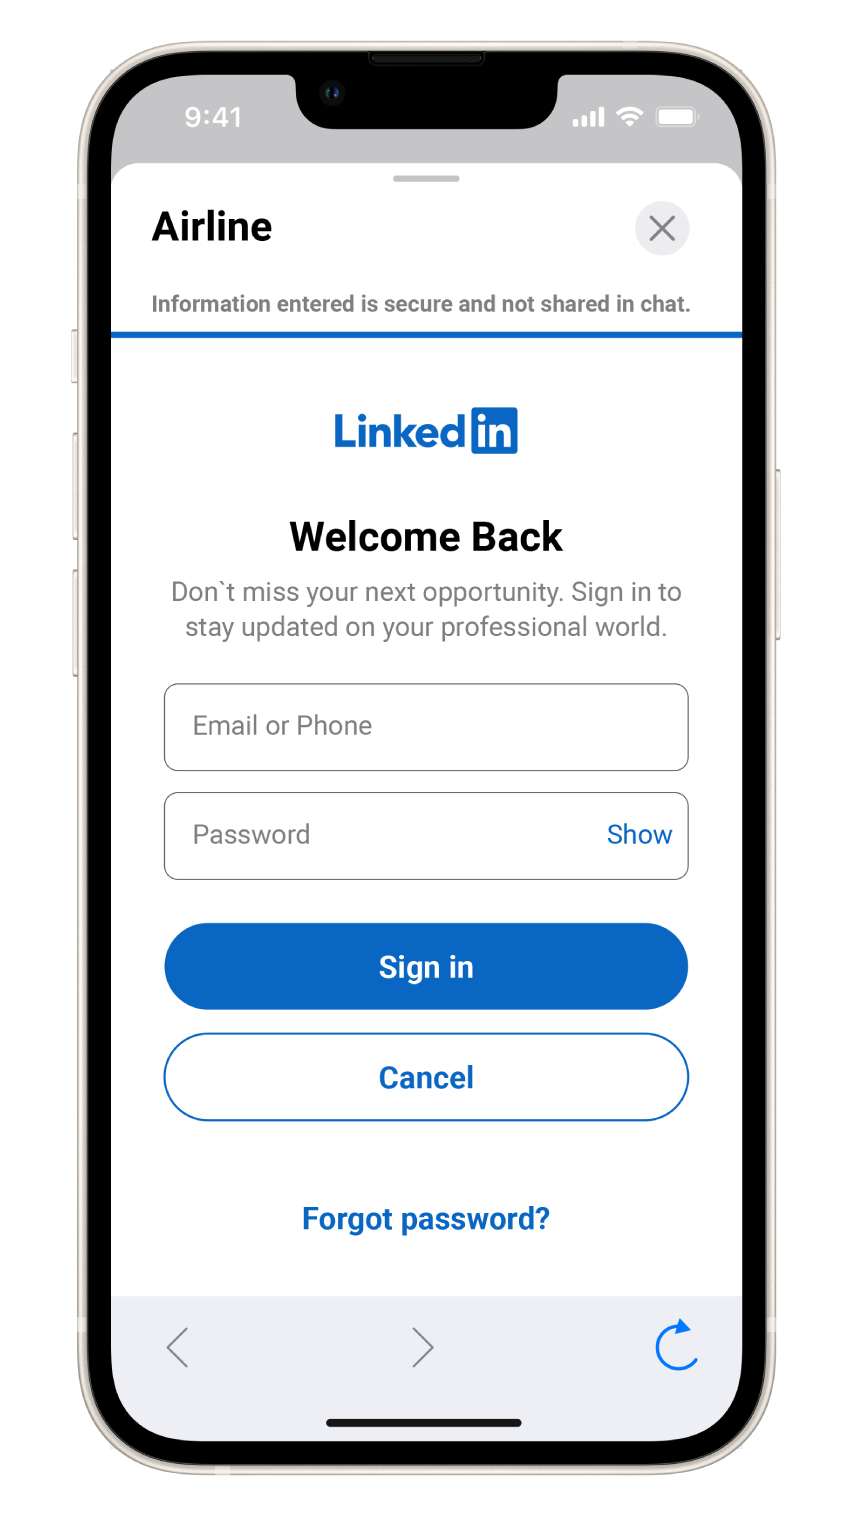
To create an Authentication configuration, define the following parameters in the Apple Business Register (opens in a new tab): OAuth URL, Token URL, and Client identifier.
To configure Authentication, refer to the Authentication configuration section.
iMessage app
iMessages is a framework that enables you to create apps that contain additional functionality. Apps that are created by using the iMessages framework are called iMessage apps.
Each iMessage app must enable a single, specific task. Example: Choose a seat, view a flight’s progress on a map, or view in-store maps.
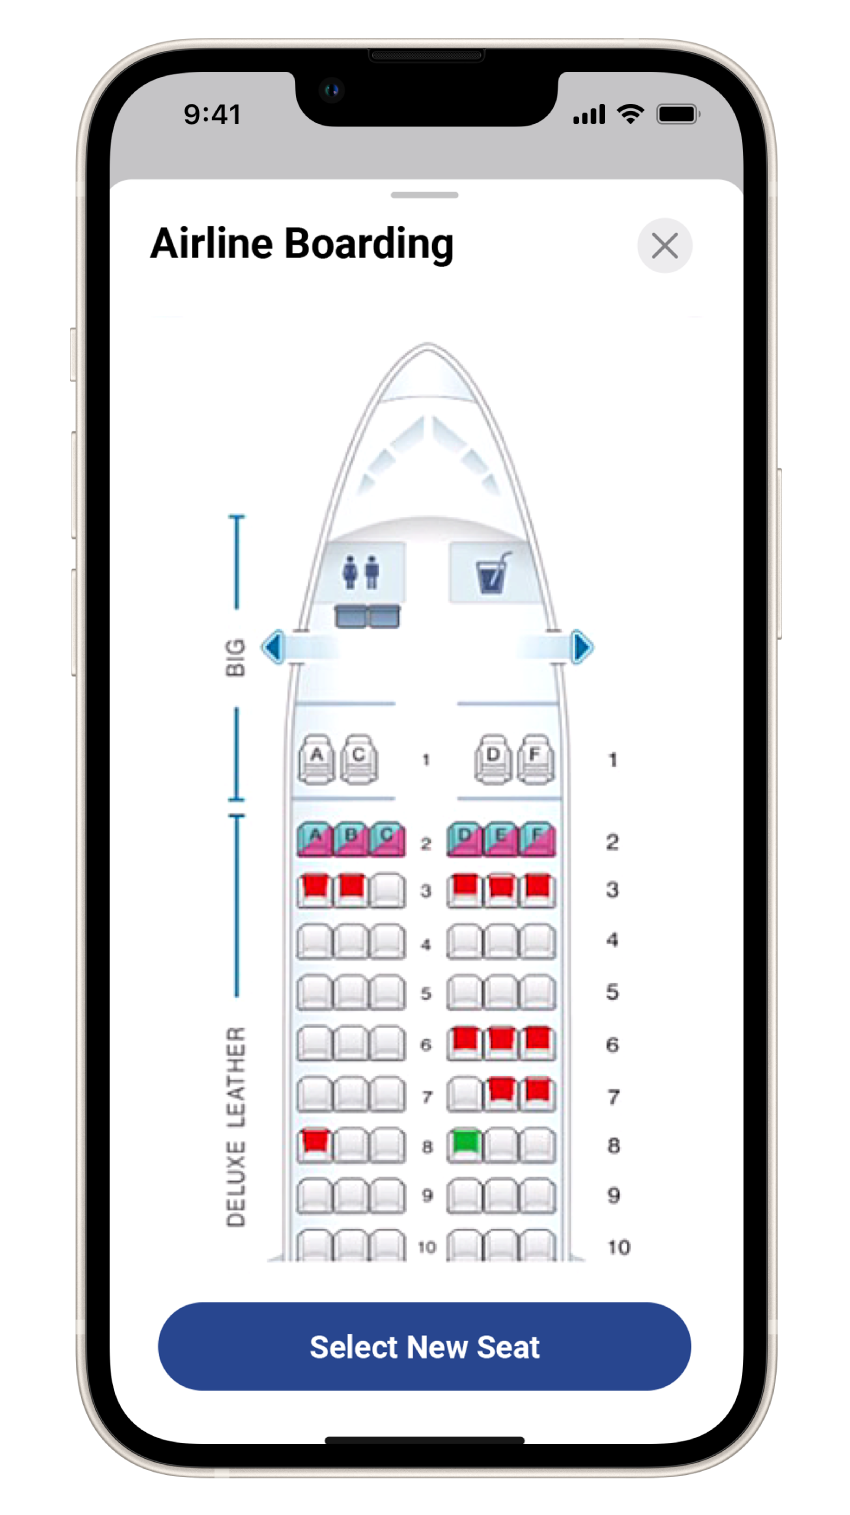
You can create the following types of iMessage apps:
- Standalone iMessage app: A standalone app redirects the customer to your iOS app, which resides outside the Messages app.
- iMessage app extension: An iMessage app extension is hosted inside your iOS app. The extension enables customers to interact with your app from within a Messages for Business conversation.
For more information, refer to the Apple support documentation (opens in a new tab).
To configure your iMessage app, refer to the iMessage app configuration section.
Satellite messaging
Satellite Messaging is an optional feature within Apple Messages for Business (AMB) that allows users to send and receive messages using a satellite when they do not have access to a cellular or Wi-Fi connection. This feature is supported on iPhone 14 and newer models and is primarily used in emergency or off-grid scenarios.
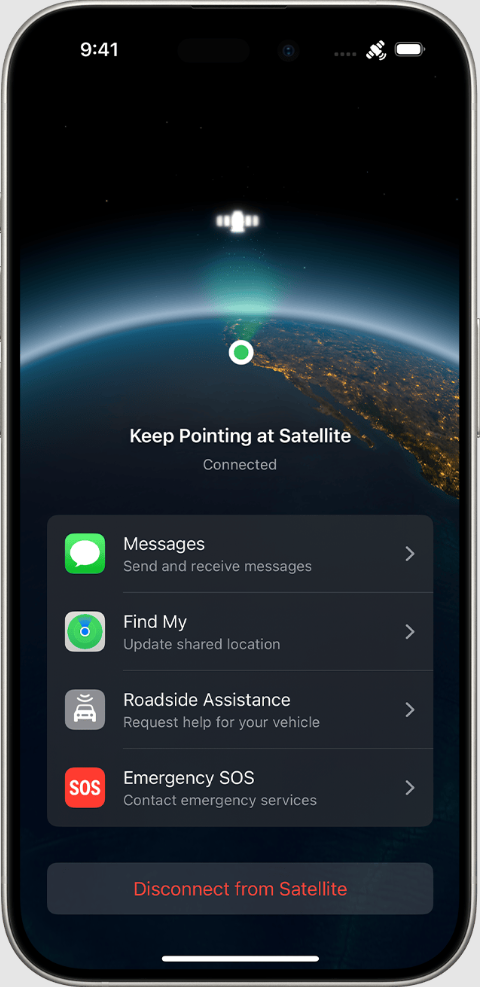
Satellite Messaging enables users to:
- Request roadside assistance from supported providers.
- Share real-time location updates through Conversations.
- Send and receive pure text messages (media is not supported).
- Communicate within a limited session window of up to 10 hours.
Satellite Messaging is intended for emergency use. Apple mandates that all satellite inquiries must be handled by live agents using the Conversations interface.
Messaging capabilities
- Request help: User starts a roadside assistance request on their iPhone using satellite connectivity and opts into AMB.
- Location sharing: GPS coordinates are sent automatically, within 15-minute update if the user moves.
- Text-only messages: Attachments and media are not supported
- Maximum size: 500 characters per message.
- Session window: Up to 10 hours after the user's last message, or until the user closes the session.
- After session closure: Businesses can follow up for up to 365 days through the standard AMB channel.
Integration
To enable Satellite Messaging for your business, follow these steps:
-
Onboard to AMB channel Complete the standard onboarding process (opens in a new tab) for Apple Messages for Business.
-
Establish a legal agreement with Apple You must enter into a direct agreement with Apple specifically for Satellite Messaging (RAA – Roadside Assistance Agreement). Infobip is not involved in this step.
-
Apple approval After reviewing your RAA, Apple will enable Satellite Messaging for your business.
-
Setup with Infobip Once approved, Infobip configures the necessary settings in the Conversations interface.
-
Testing Apple will coordinate physical field testing in the region(s) you serve.
Use of the Conversations interface is required. Satellite messages are always routed to live agents due to the critical nature of the use case.
To find out more about Satellite Messaging in Conversations, refer to Apple Messages for Business section in Messaging channels.