Message templates (India only)
When you send messages to your customers in India, you must use the RCS message templates. This feature is designed to prevent the abuse of anti-spam policies where users are flooded with promotional RCS messages, but enables you to continue using RCS to send messages to your customers.
When using RCS in India, you cannot use RCS directly via Google. You must direct traffic through a single gateway carrier (Vodafone India) when using RCS.
The following restrictions are also in place for the use of RCS in India:
- Promotional traffic is limited to 4 per month
- A2P traffic must use a registered template rather than a free-form message
Registered templates
You can only use registered templates to send RCS messages. To use a registered template, you need to obtain the VIL template identifier.
Contact your account management team to register new templates and obtain the template identifier (ID). You will need to manually enter this ID, along with any parameter fields.
Templates support the following message types:
- Text: Send a simple text message template.
- Text with PDF: Send a text message template with an attached PDF document, ideal for sharing brochures, policy documents, or catalogs.
- Card: Send a visual message template containing an image, title, description, and call-to-action button.
- An image can have a maximum file size of 2 MB and must have a 2:1 aspect ratio.
- A video can have a maximum file size of 10 MB.
- Carousel: Send multiple rich cards in a single message template, allowing users to scroll through various options.
- An image can have a maximum file size of 1 MB and must have a 4:3 aspect ratio.
- A video can have a maximum file size of 5 MB.
Send RCS message templates over API
To send RCS (Rich Communication Services) messages using the API, you will utilize a single endpoint capable of handling both single and bulk message transmissions through templates. You must provide the following details to ensure the correct formatting and dispatch of messages:
Content type:
- Value:
INDIA_TEMPLATES - This is a fixed value that specifies the type of content being sent.
Template ID:
- Description: A unique identifier for the message template.
- Source: Provided by your account management team or visible within the Broadcast section of the portal. Ensure that is correctly obtained to avoid any dispatch issues.
Parameters (Optional):
- Purpose: To personalize the messaging content.
- Structure:
name: The name of the parameter.value: The value corresponding to the parameter name.
You can use optional parameters to personalize messages for each recipient. By adhering to these guidelines, you can efficiently send single and bulk RCS messages tailored to your specific requirements.
For more information about sending RCS over API, see here (opens in a new tab).
Send RCS message templates over Broadcast
To send RCS messages using the message templates:
-
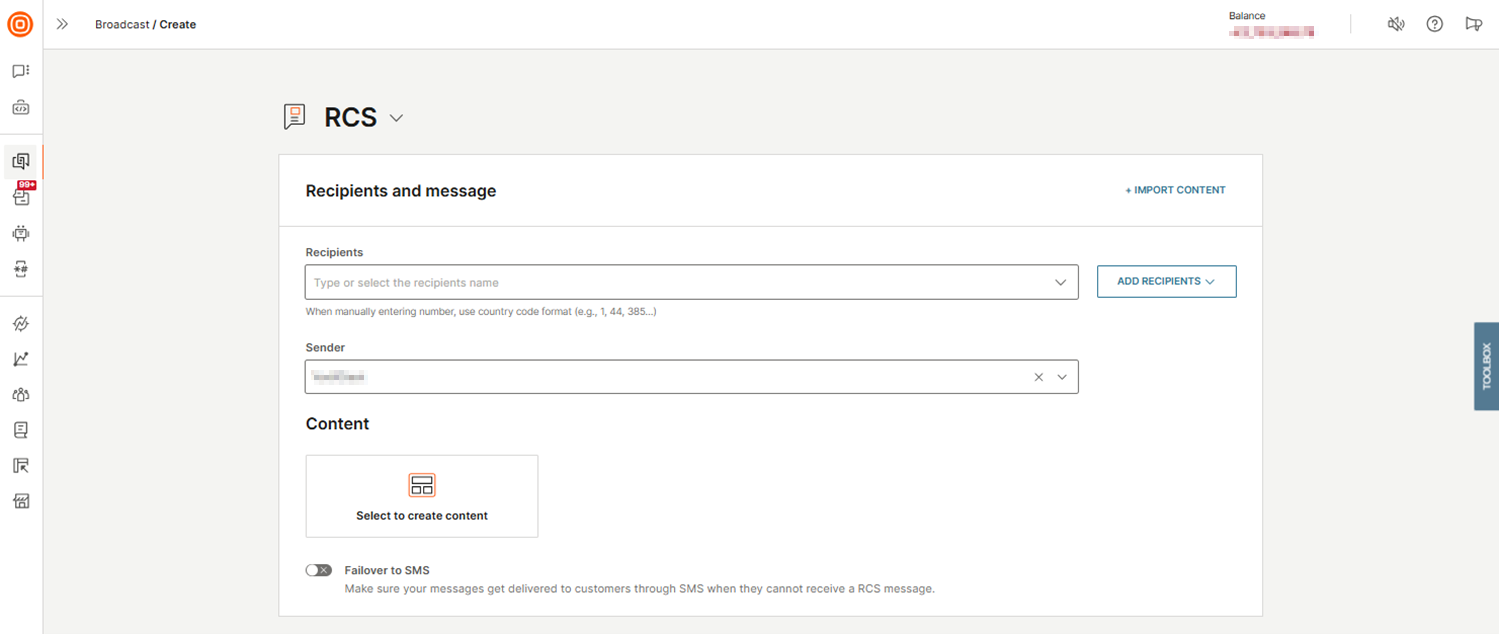
Log in to Infobip and navigate to Moments > Broadcasts > Create Broadcast.
-
Set your channel to RCS and type or select Recipients names. You can also upload recipients from a file or add them from People by selecting the Add recipients button.
-
Select the RCS Sender from the dropdown menu.
-
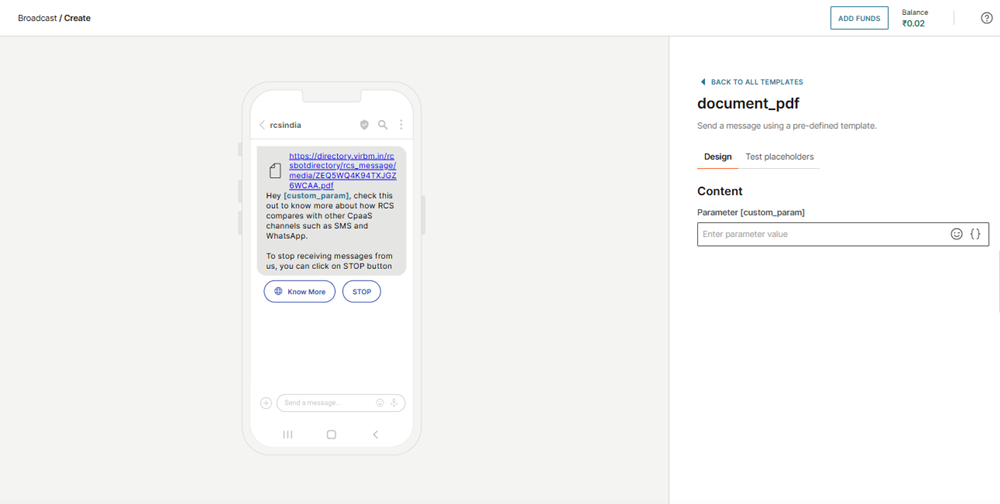
Under Content, click Select to create content to open the content editor. On the right side, choose a template you want and select Use to see the preview.
-
Once ready, select Done designing. As needed, set up additional options and select Continue to preview.
-
If everything looks good, launch the broadcast.
Send RCS message templates over Flow
To send RCS message templates using Flow, follow these steps:
-
Log in (opens in a new tab) to Infobip and navigate to Flow. Go to Moments > Flows > Create flow.
-
Select Start from scratch or an existing predefined template and set up your initial flow design.
-
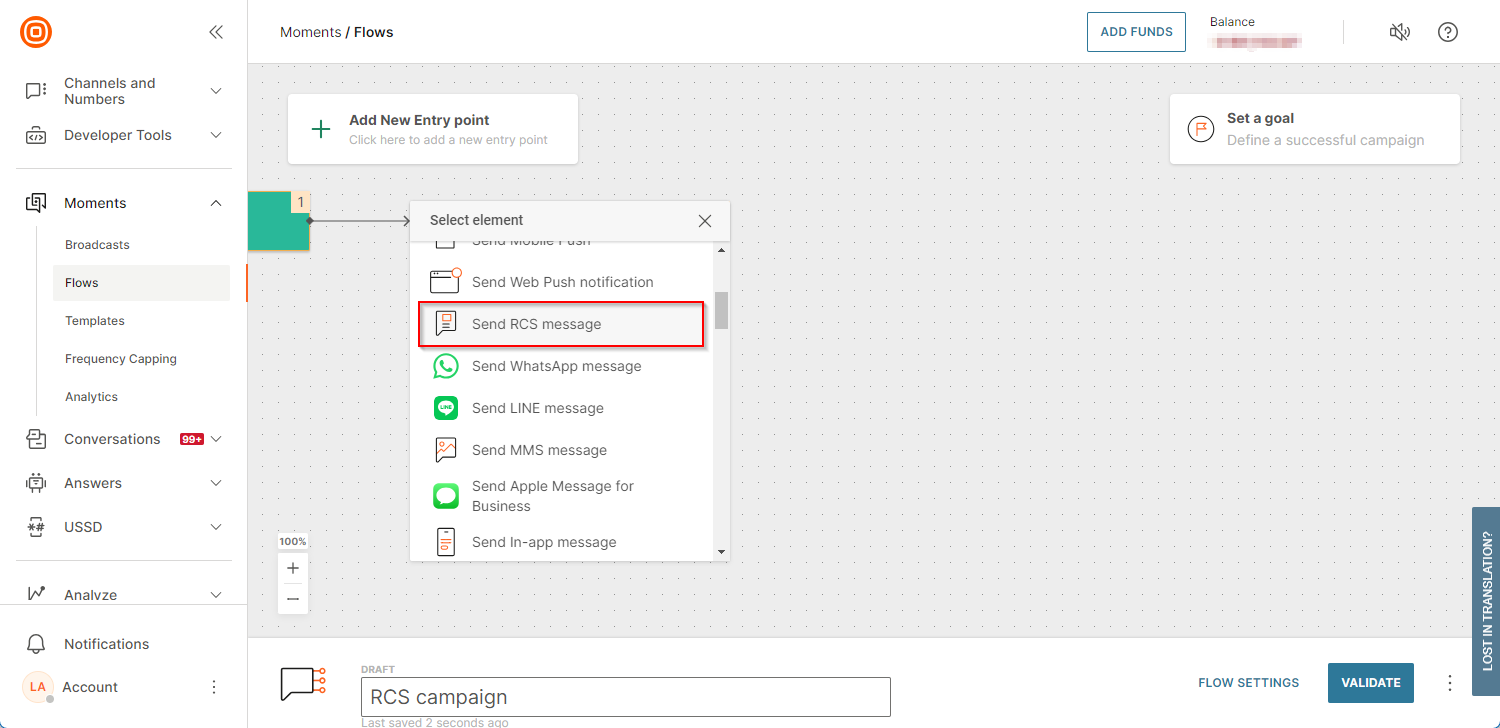
Add the RCS message element by selecting Send RCS message.
-
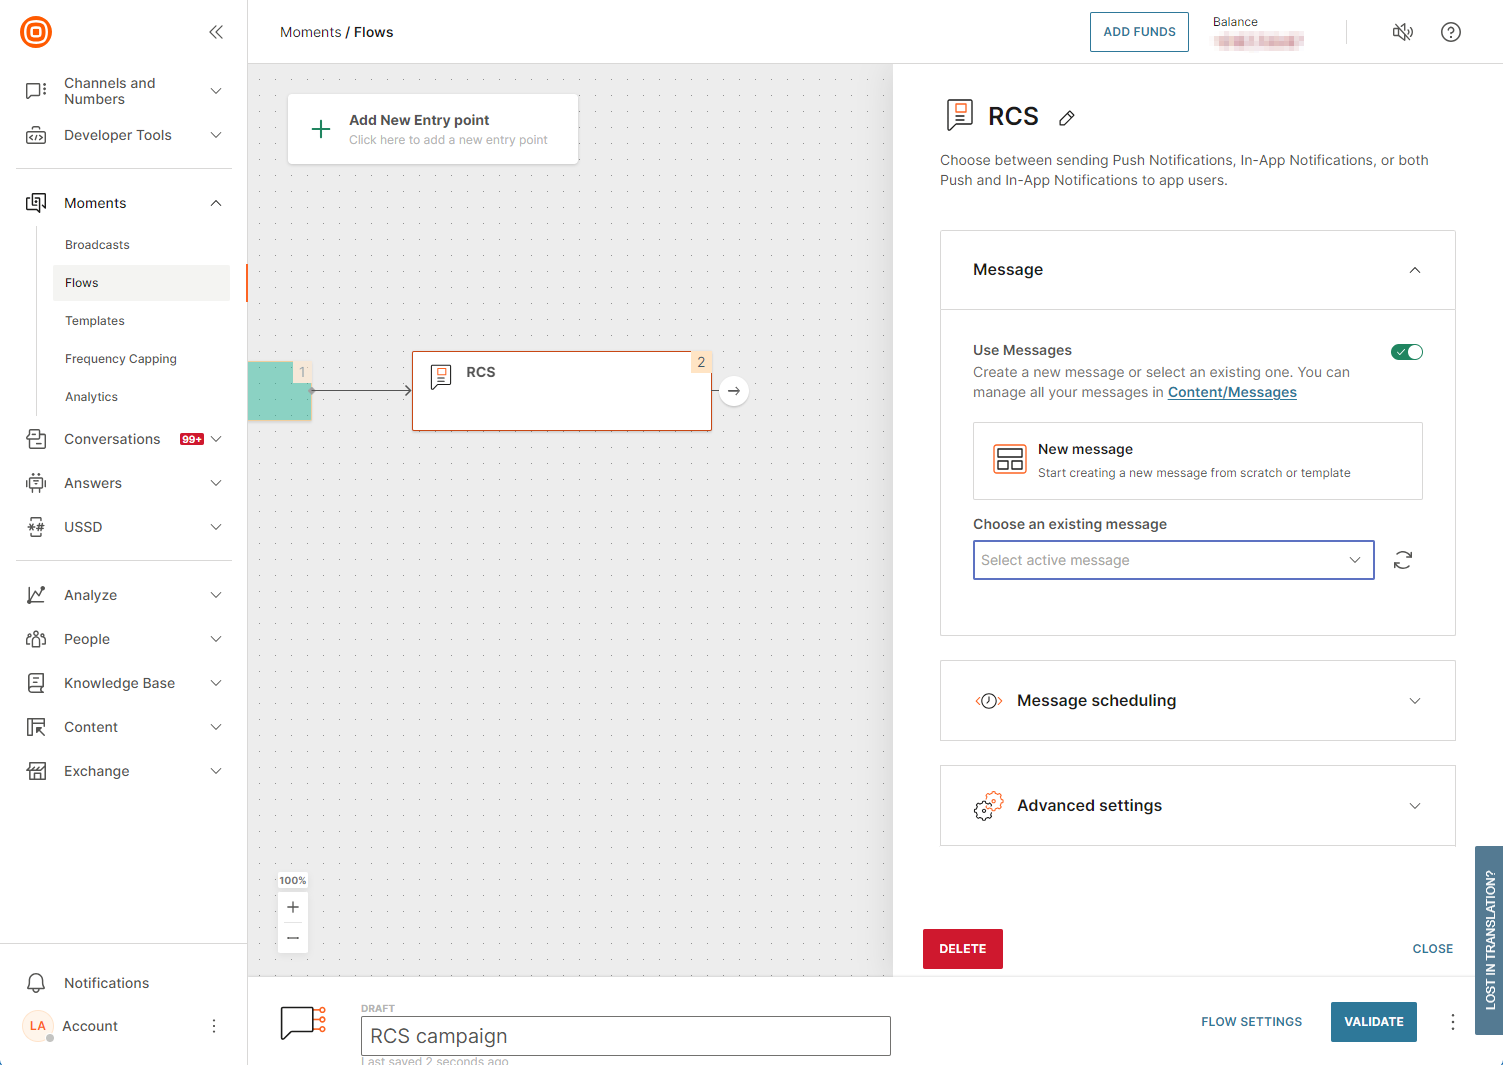
Create or select a predefined message:
- Select New message.
- If you have a pre-created message, select it under Choose an existing message and skip to Step 8.
-
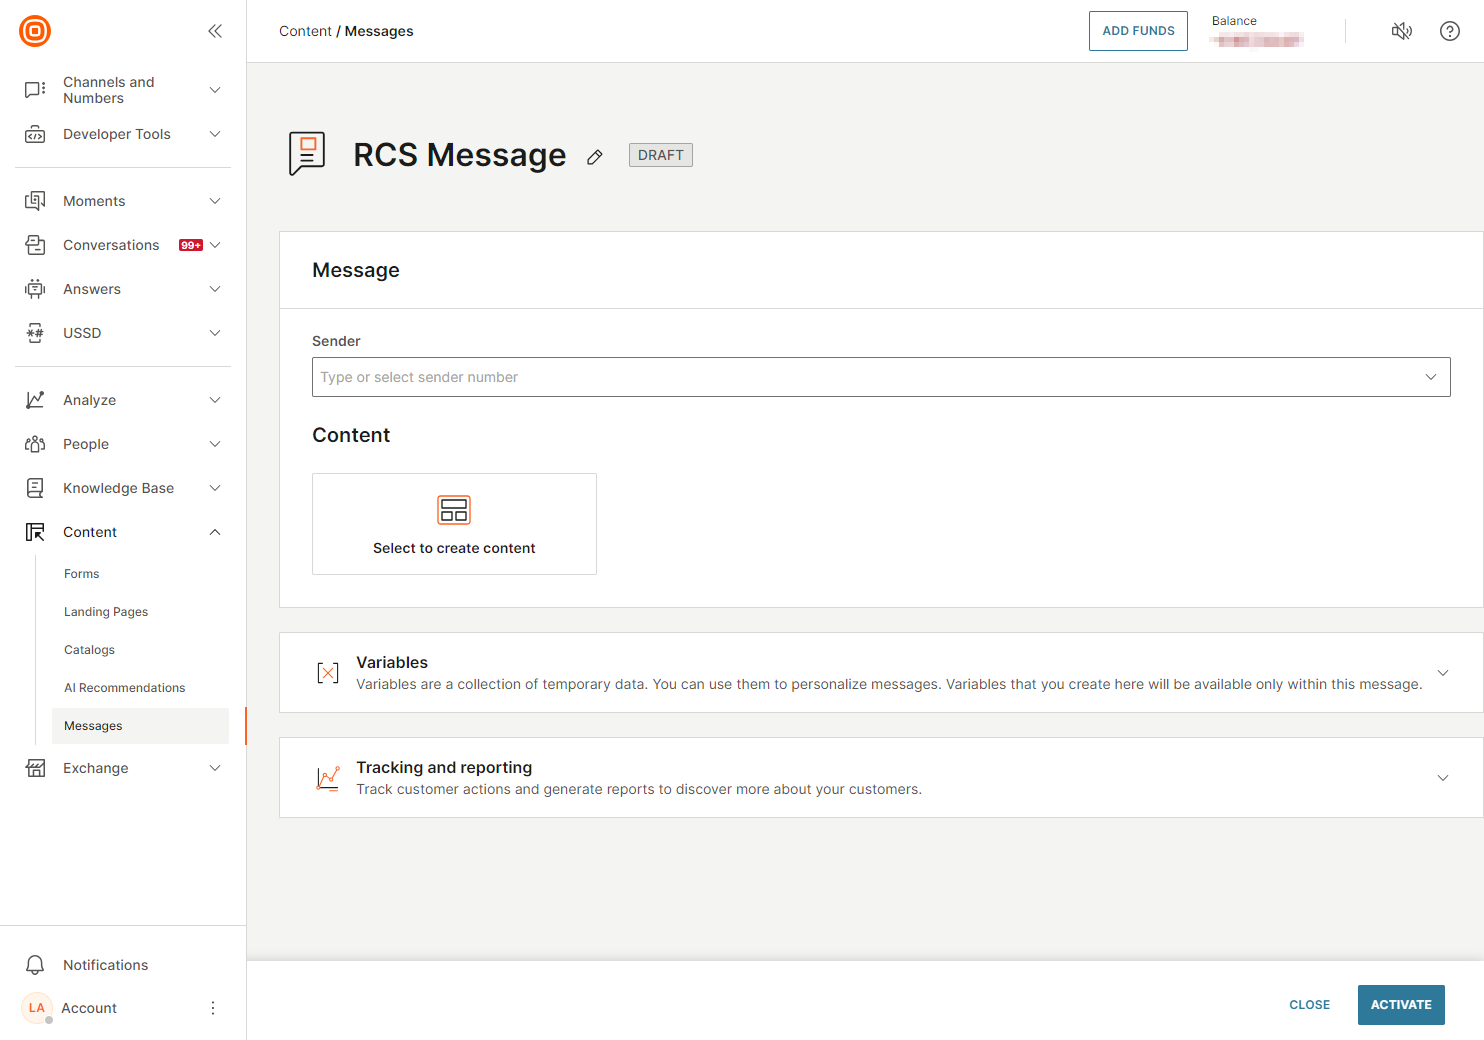
Enter the message name, choose your sender, and click Select to create content.
-
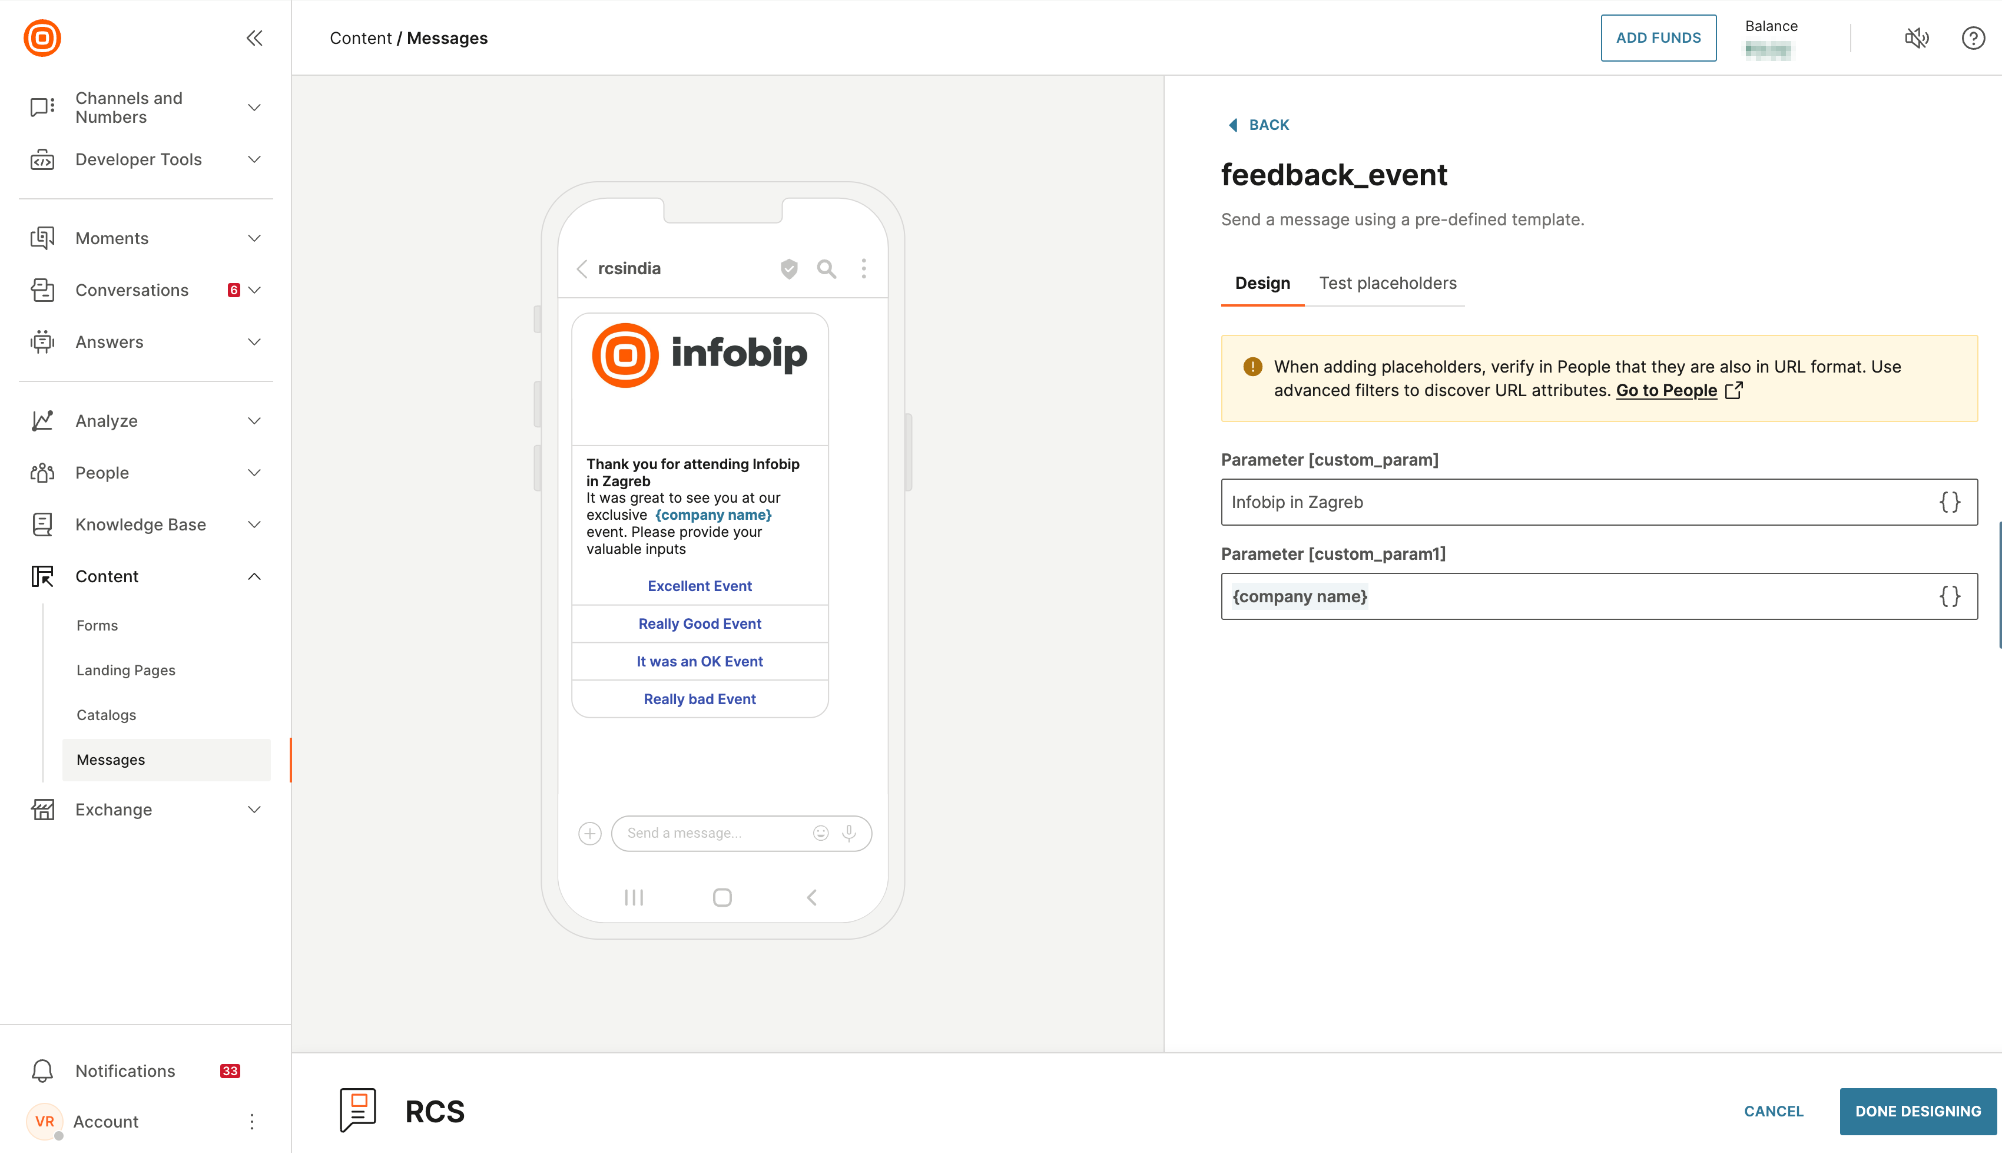
Select Template as the content type. Choose the one you wish to use from the list of available templates and customize your message. If the template includes custom parameters, fill them in to personalize the message. Review your message and when you are done, select Done designing.
-
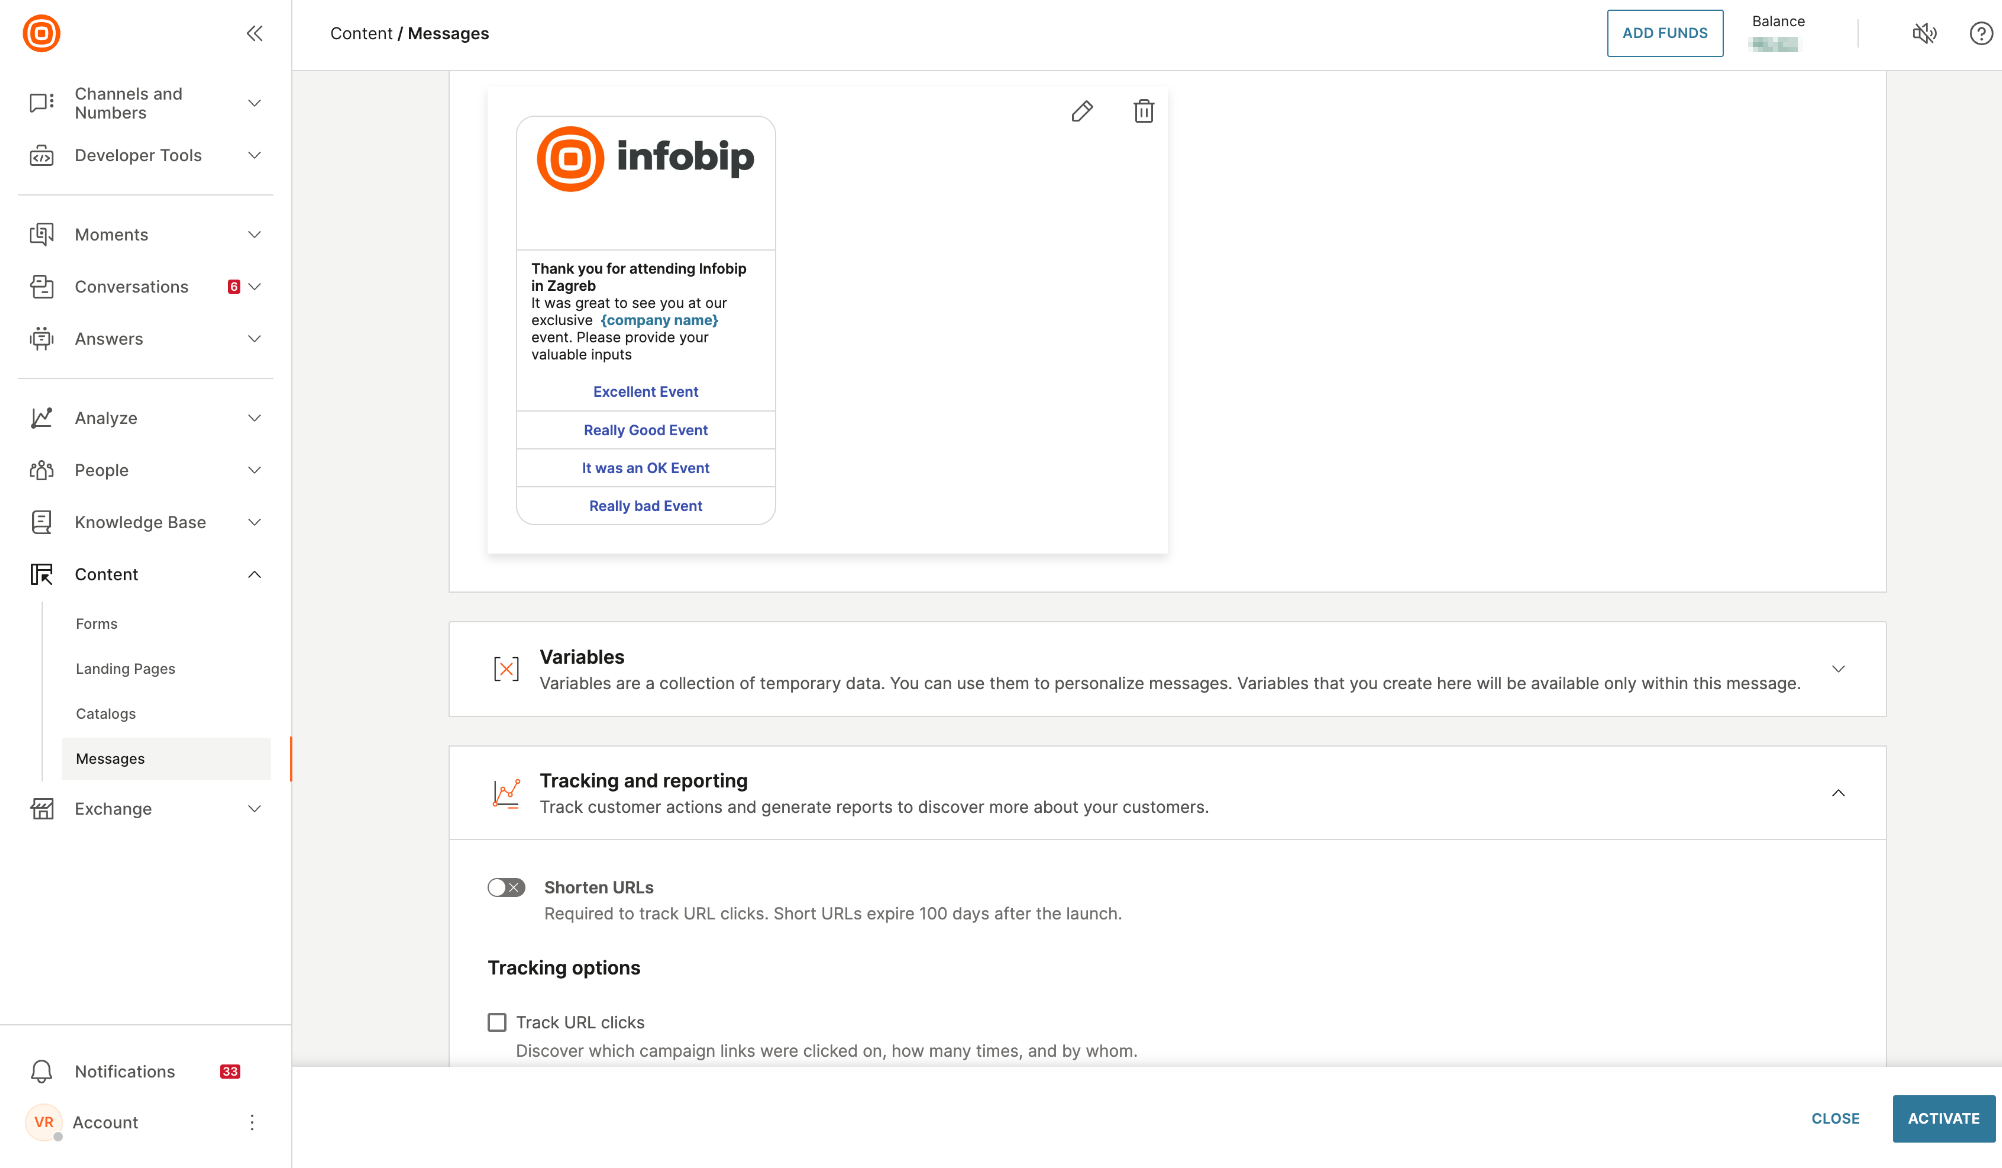
If needed, enable tracking options and click Activate to finalize the message setup.
-
Return to the flow and ensure the selected message is validated. Once everything is set, launch the flow.
This process allows you to efficiently send personalized RCS message templates as part of your automated customer communication flows, leveraging rich media and interactivity capabilities of RCS.
Additional options
You can also edit optional features and add them to your message.
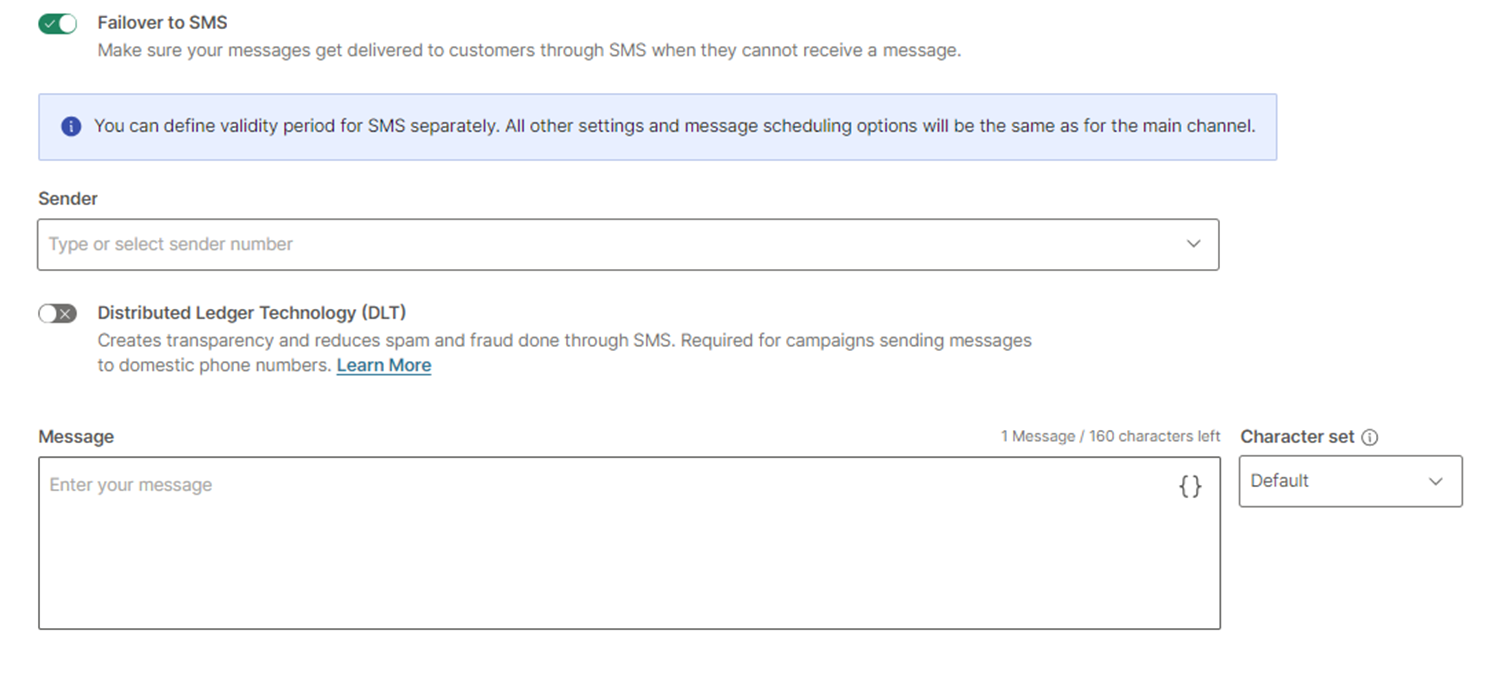
Failover to SMS
Enable this field to add SMS as the fallback option if message sending fails over RCS. Settings and scheduling options from RCS will apply to the SMS failover. Enter the following information:
- Sender: Choose from a list of senders or type the sender's phone number.
- Message: Type the message to send to the recipients.
- Character set: Choose from the list to add special characters from selected languages.
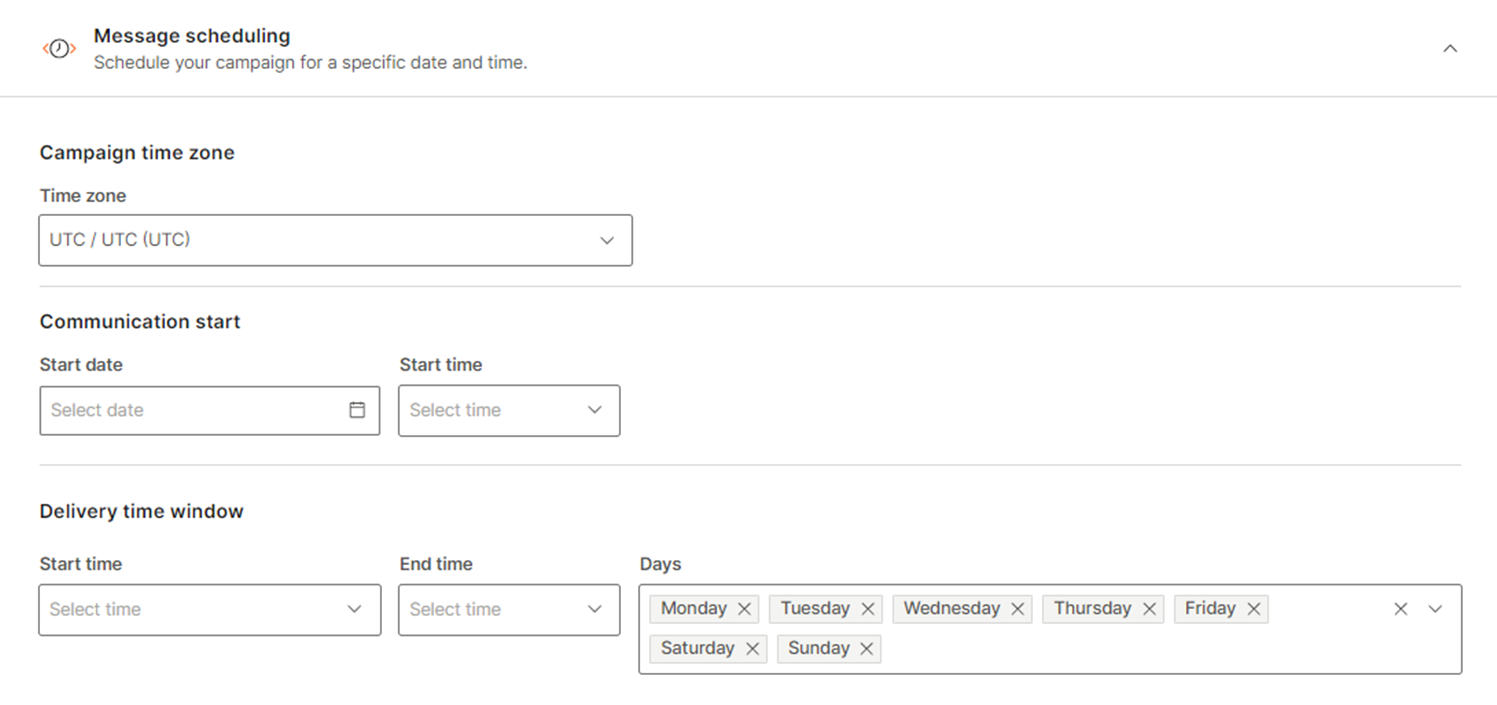
Message scheduling
Schedule your message.
- Time zone: Choose the time zone for the communication and message delivery times
- Communication start: Choose the date and time when the communication process should start.
- Delivery time window: Choose the days when the message should be sent and the start and end times to send the messages.
Tracking and reporting
Monitor campaign performance by tracking URL clicks and receiving delivery reports through API or webhooks.
- Shorten URLs: Enable this field to reduce the length of URLs.
- Track URL clicks: Enable this field to identify which campaign links were clicked, how often, and by whom. If you enable URL tracking, URL shortening is enabled automatically. If you deactivate URL shortening, URL tracking is disabled automatically.
- Enable delivery reports over API pull: Enable this field to forward delivery reports to a defined endpoint.
- Push delivery reports to webhook: Choose this option to have delivery reports pushed directly to a specified webhook.
- Data payload: Add additional information such as name and address. Choose from the available data.
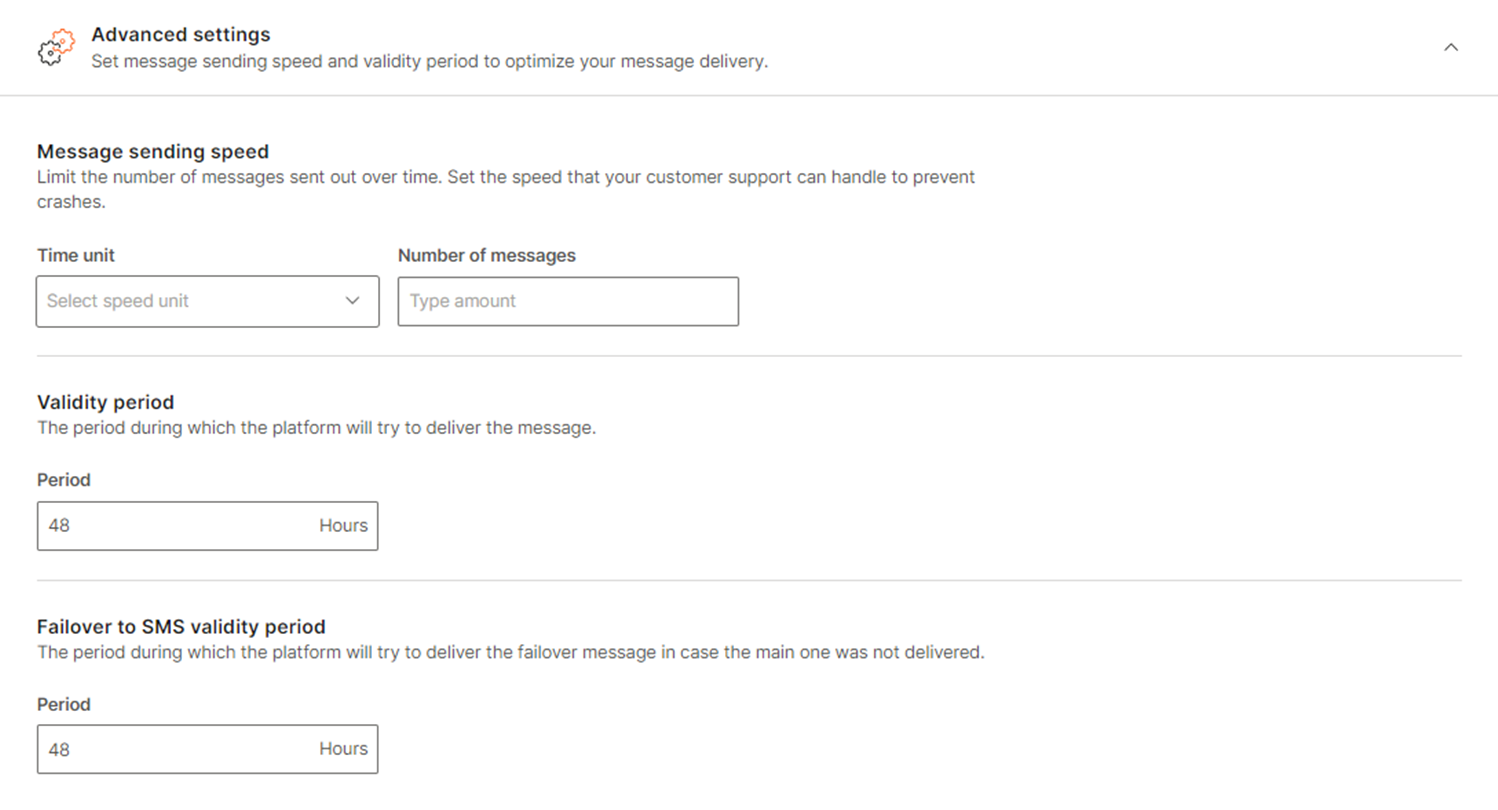
Advanced settings
- Message sending speed: Specify the rate at which messages are sent, choosing the number of messages to be delivered per second, minute, hour, or day.
- Validity period: Define how long the broadcast remains valid by entering the duration in hours. Messages will only be sent within this timeframe.
- Failover to SMS validity period: Set the validity period for the SMS failover option, specifying how long the system should attempt to send SMS messages if RCS delivery fails.
