Quick start
Prerequisites to use Forms
To use Forms on the Infobip platform, you must have the following:
-
Infobip account.
If you do not have an account, create a free account (opens in a new tab). For more information, refer to the Essentials documentation.
-
At least one of the following products enabled in the account.
Design your first form
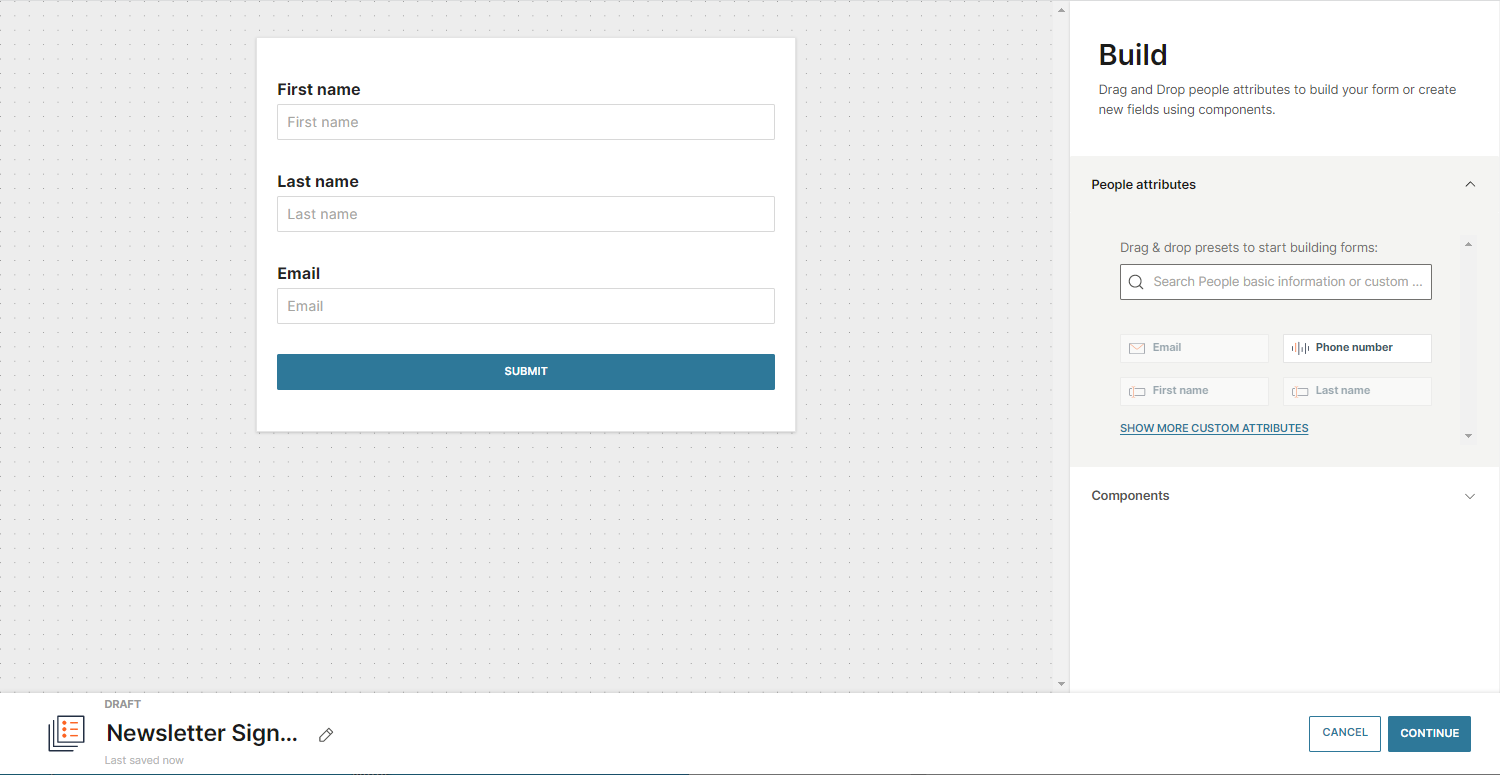
Start by establishing what type of form you need and what information you want to collect, save, and act upon. For the sake of an example, we will build a newsletter sign-up form.
On the Forms home page, begin creating the form: add Contact information and any standard or custom Person attributes to create fields that the form submitter will need to populate. In this scenario: first and last name, and email. The names of the fields can be changed.
The Contact information for opt-out forms is predefined. The only thing you need to do is to design a questionnaire using the elements in the Components section. Opt-out forms are connected to the opt-out landing pages.

Field properties inside the editor will let you further specify field characteristics and simplify embedding. This is where you can assign required or hidden fields, select placeholder text for each, connect fields to person attributes in People and more.
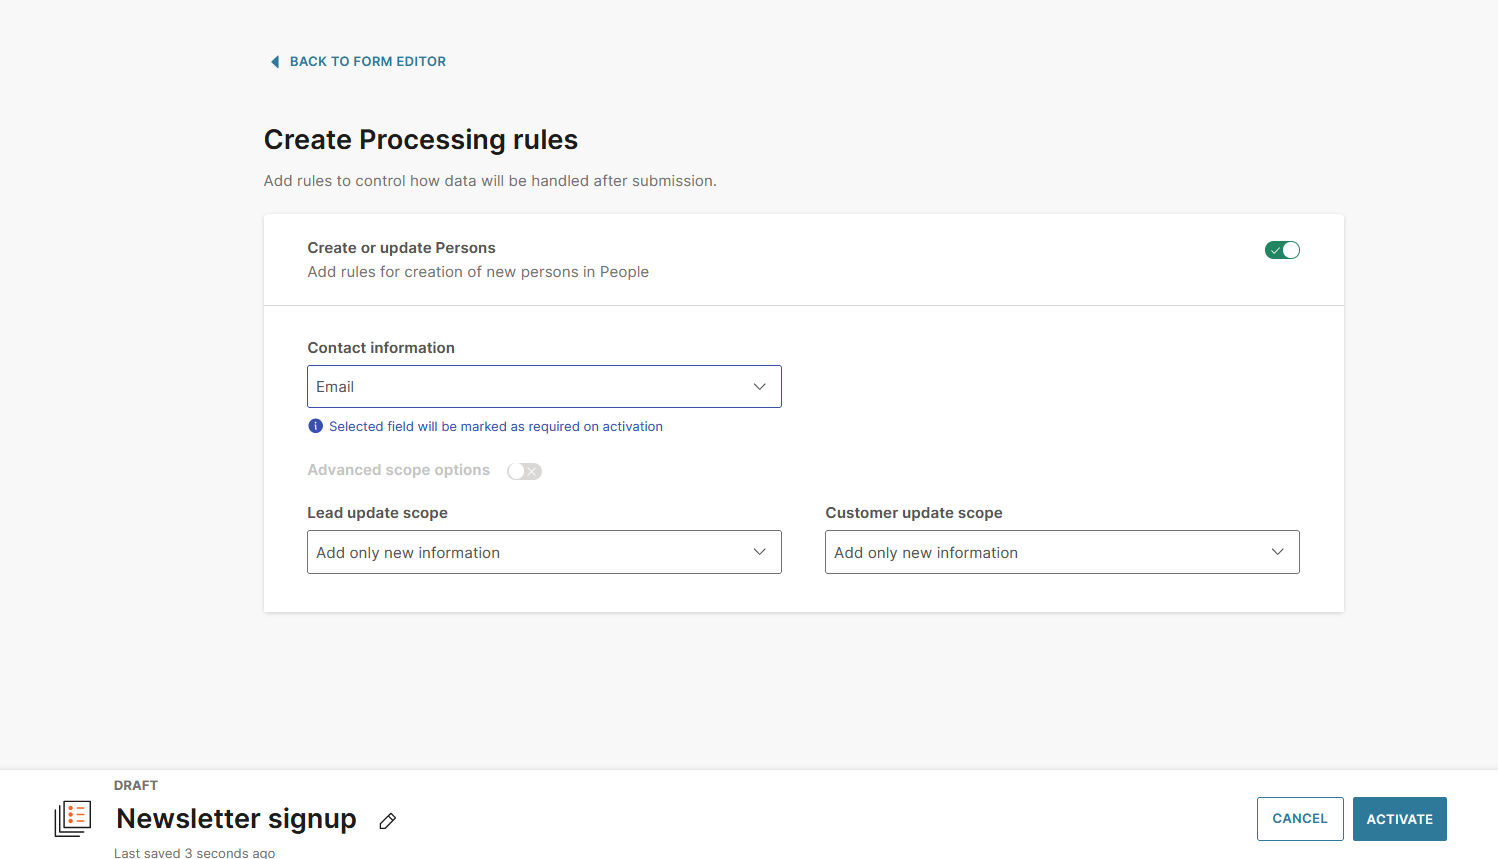
Rules for data collection
Once you decide what your form will look like, think about what you would like to do with the data that will be gathered through the form, including the user's profile information and activity (events such as form submission).
If you enable these rules, everything will be saved in People. If not, the information collected will be available on the Raw data dashboard and can be exported for your convenience.

Connect form to your website
Upon activating the form, an automatically generated code will appear that needs to be embedded into your web page so that the form becomes active. Thanks to this integration, whenever someone signs up for a newsletter, we will save the information about the submitter.
You are now ready to start receiving information coming from the embedded forms!
Use Forms API to get even more detailed information related to specific form fields.
Performance
Your form is live and people are clicking that submit button! Now is the time to check the performance information and maybe adapt your form accordingly. There are two performance dashboards:
- Overview – Shows the number of form views and submissions, including by timeframe, person type, and source.
- Raw data – Data is saved whether or not the form has been connected to People. It helps collect some basic feedback and can be exported as an Excel file.
Engagement and segmentation
What else can you do with Forms and all the data you receive from them?
Forms events go a long way when it comes to segmentation, automated communication, and analytics. The only requirements are to enable Product Events in People, and activate Data processing rules when creating a form. All the activity will be recorded and you will be able to do the following:
- Track activity – Check out the profile activity feed for information about when and how different profile types interact with the form.
- Trigger an automated communication – Use events to engage leads automatically, right after they submit a form, or build a segment-based communication in Moments.
- Audience segmentation – Create the audience segments in People by selecting a form event and any properties that would describe both the event and segment more closely.
- Analytics – Use People analytics to combine segments and events and analyze funnels.
Next steps
Learn more about each Forms feature: options and actions on the main page, how to work with the editor, how to manage forms and data, what metrics are available, and more.