Create Catalogs
This section explains how to create a catalog and add items to it.
Create a catalog
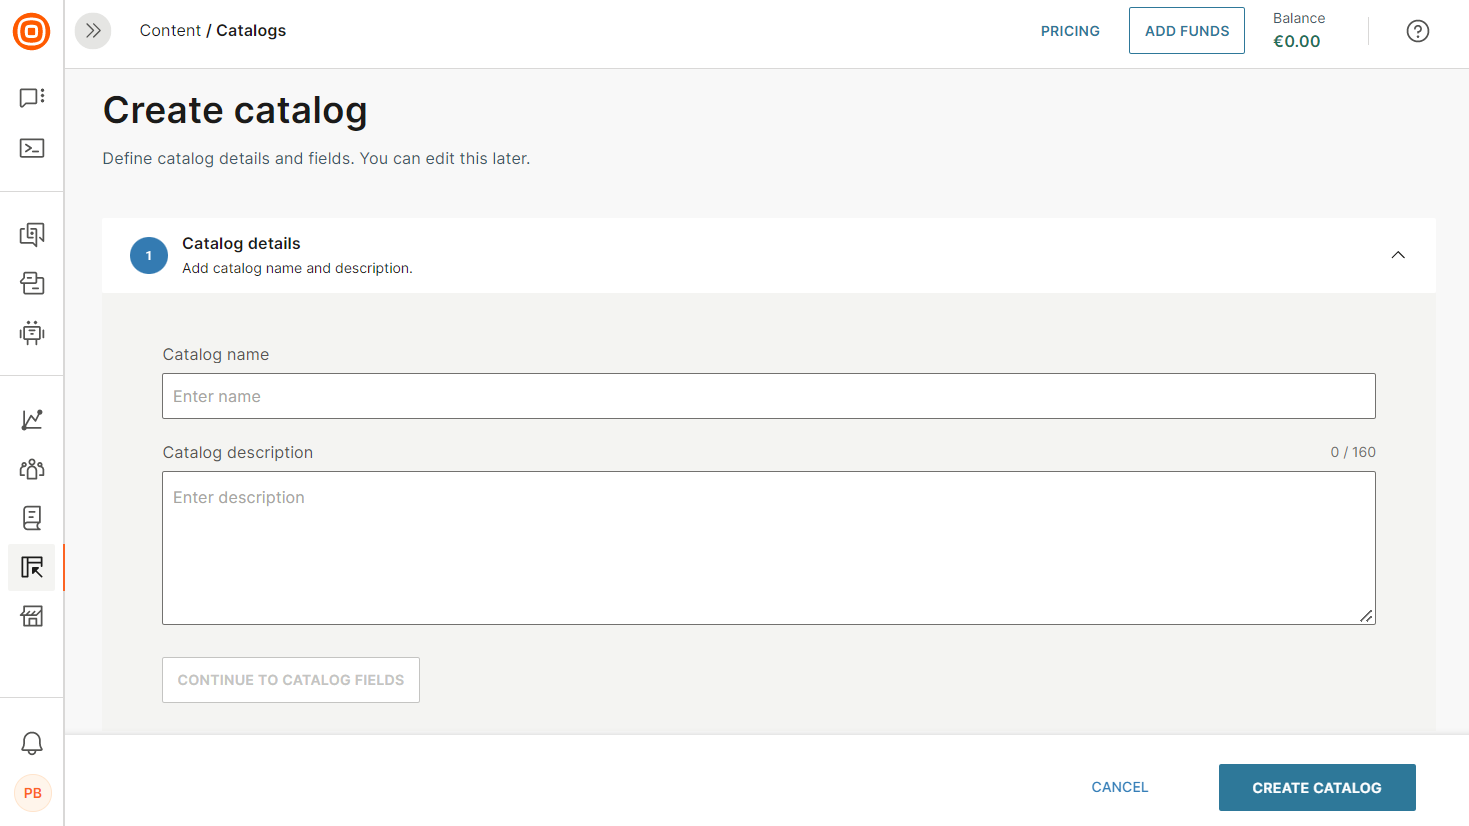
1. Log in (opens in a new tab) to Infobip and go to Content > Catalogs.
2. Click Create Catalog.
3. Add the name of the catalog. If you want to add multiple similar data sets, consider sequential naming.

4.(Optional) Add a description of the catalog. The description can be a maximum of 160 characters including spaces, special characters, and new line.
5. Click Continue to Catalog Fields.
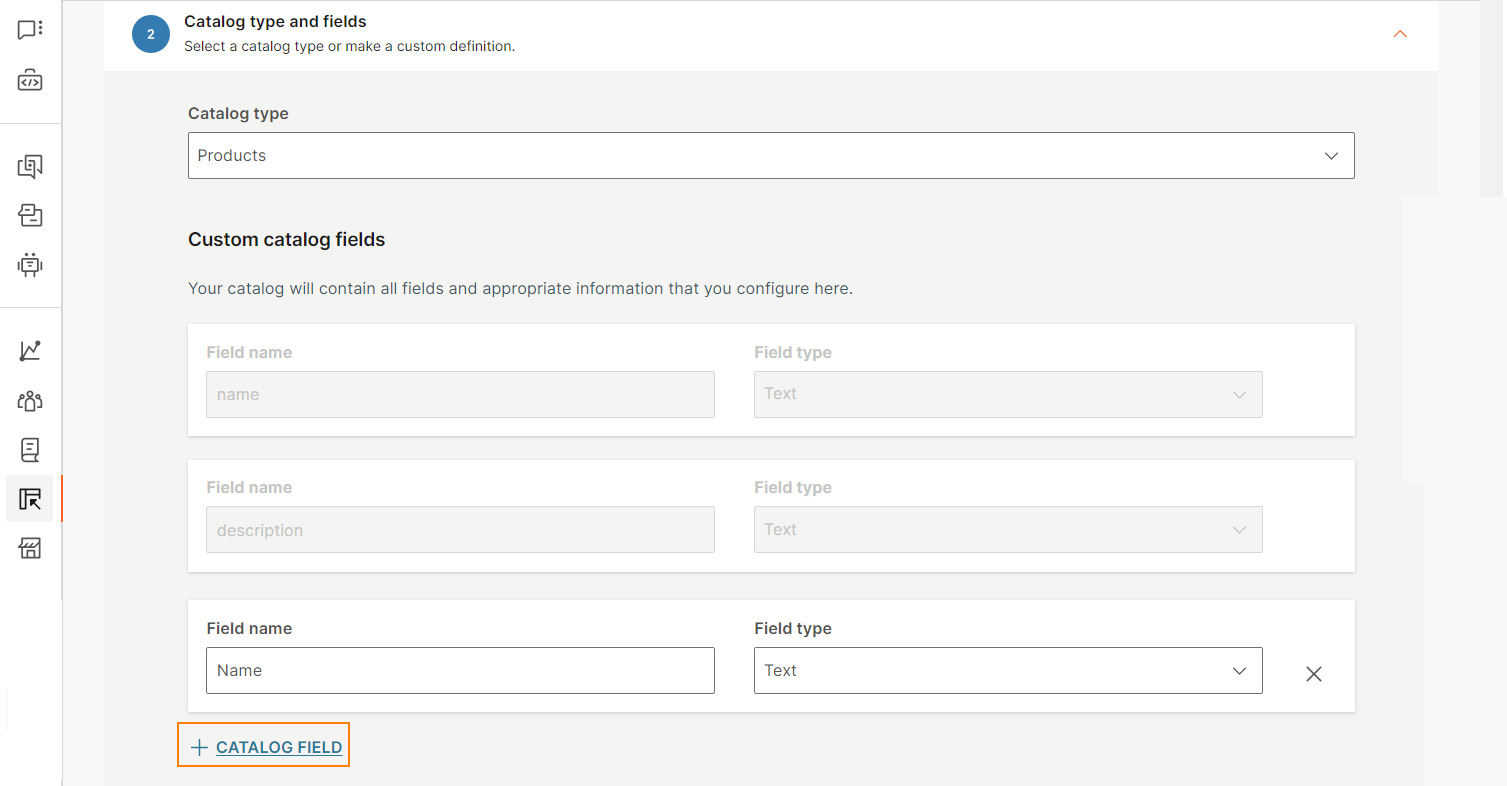
6. In the Catalog type section, do one of the following:
- To create a catalog with a predefined set of fields, choose Products, Articles, or Stores. The catalog fields get created automatically. You can specify additional custom fields.
- To create a catalog with only custom fields, choose Blank.
7. In the Custom catalog fields section, click + Catalog Field and add custom fields for your catalog items. You can add custom fields regardless of catalog type.

8. Click Create Catalog.
Add items to catalog
You can add an unlimited number of items to the catalog.
For each item, you must specify the value for at least one field. You can choose to update only the relevant fields and leave the other predefined and custom fields blank.
When you add an item to the catalog, the system automatically generates an ID for that item.
You can either add catalog items manually or import the items from a file.
Add items manually
Follow these steps for each item:
1. Log in (opens in a new tab) to Infobip and go to Content > Catalogs.
2. Clickthe catalog to which you want to add items.
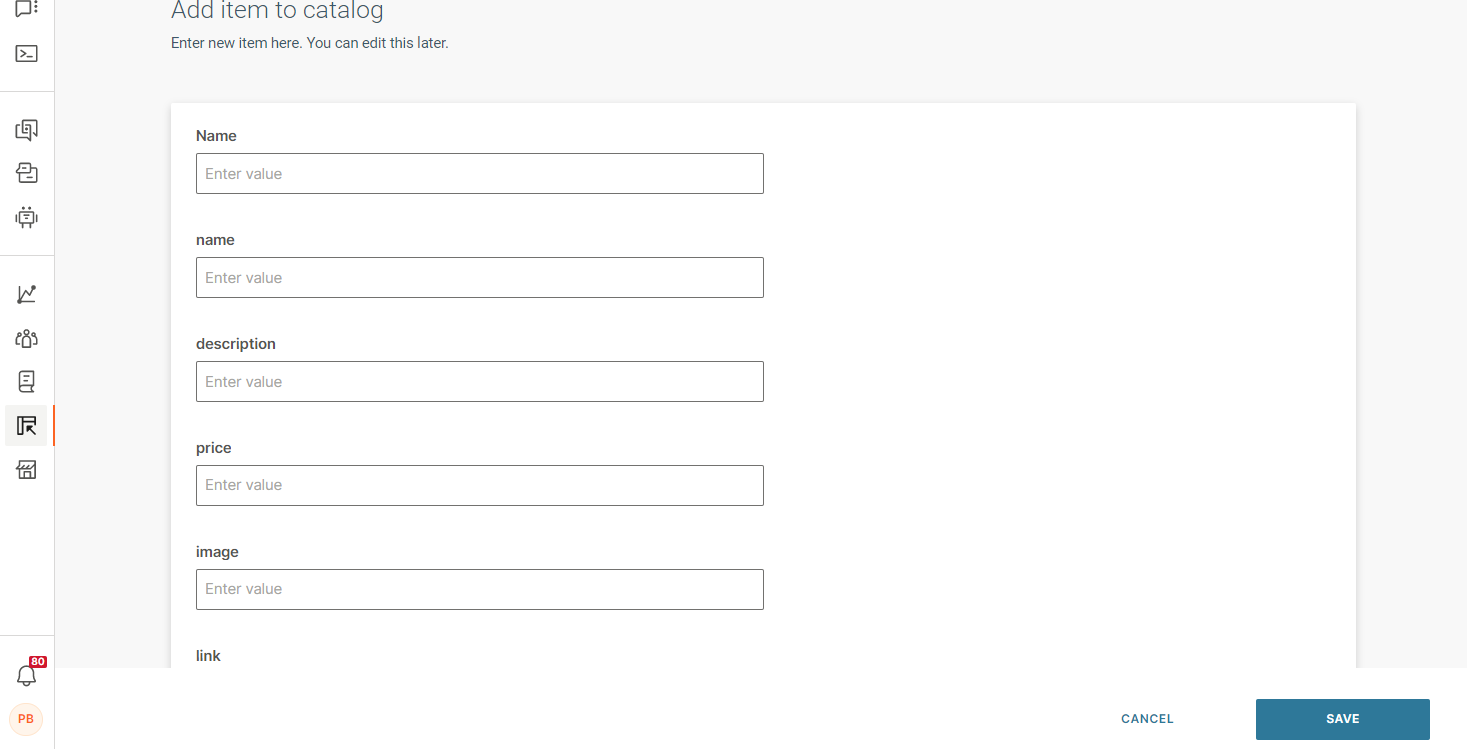
3. Click Add Item.
4. Enter the information in the fields.

Import items from file
Instead of manually adding items one by one to your catalog, you can import items from a file. You must use .csv file with predefined format with fields that are already present in the catalog.
Download .csv template
1. Log in (opens in a new tab) to Infobip and go to Content > Catalogs.
2. Click the catalog to which you want to add items.
3. Click Import Items.
4. Click Download template.
5. Add items and associated details to the template.
Upload .csv file
1. Log in (opens in a new tab) to Infobip and go to Content > Catalogs.
2. Click the catalog to which you want to add items.
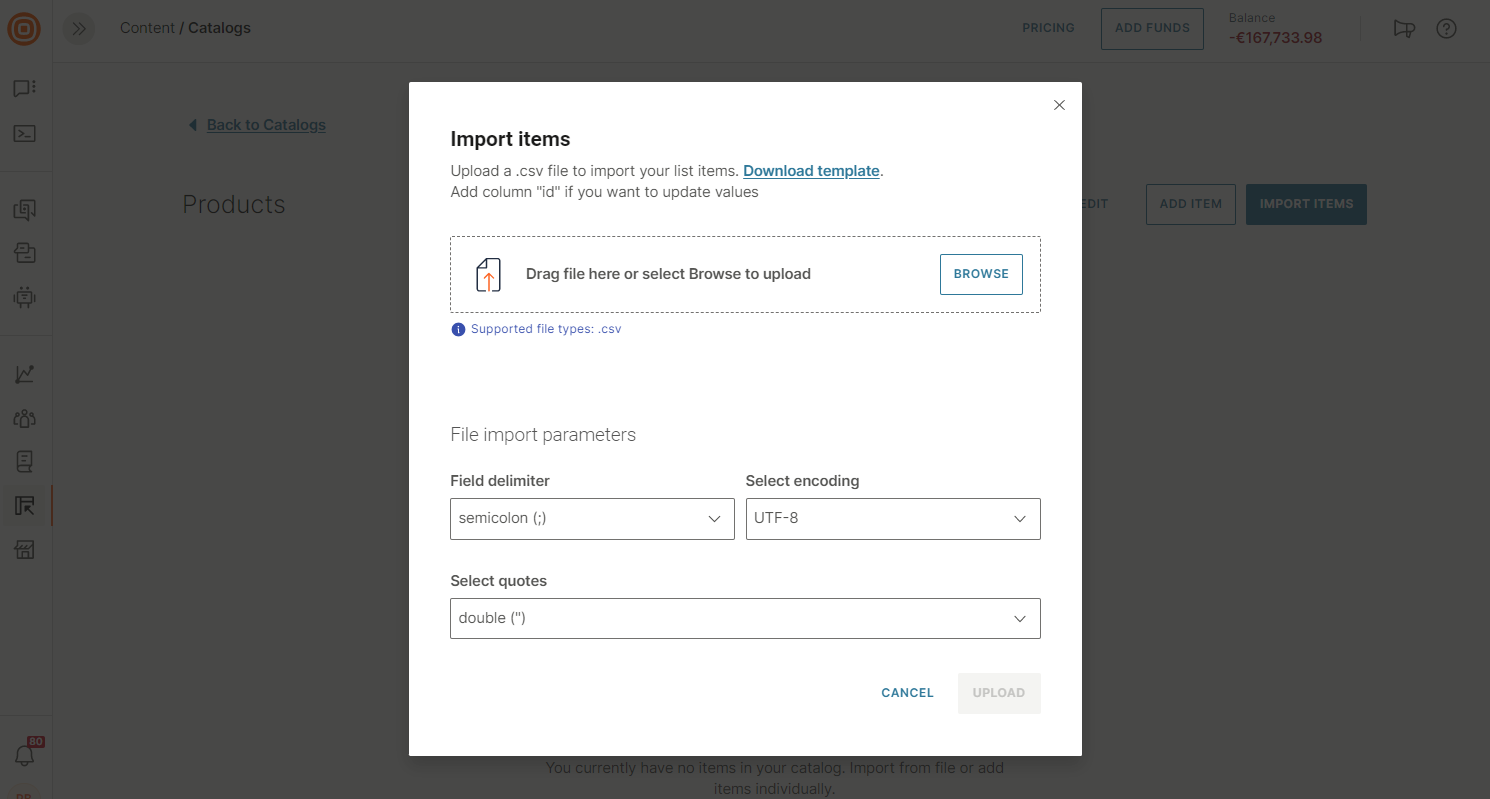
3. Click Import Items.
4. Upload the .csv file. The system prevents you from uploading any invalid file types or files that contain invalid formatting.
5. Specify the file delimiter, encoding, and quotation parameters that are used in the file.
6. Click Upload.

You can upload items with empty fields. You can edit the items later if required.
You can now view the items in your catalog.