Data export
Exporting reports allows you to consolidate, enrich, and analyze data within your systems for deeper insights. Infobip enables secure data exchange between its platform and your systems through the Export option. Once configured, reports are automatically uploaded to your specified destination after generation, including scheduled recurring reports.
Configuring data export
-
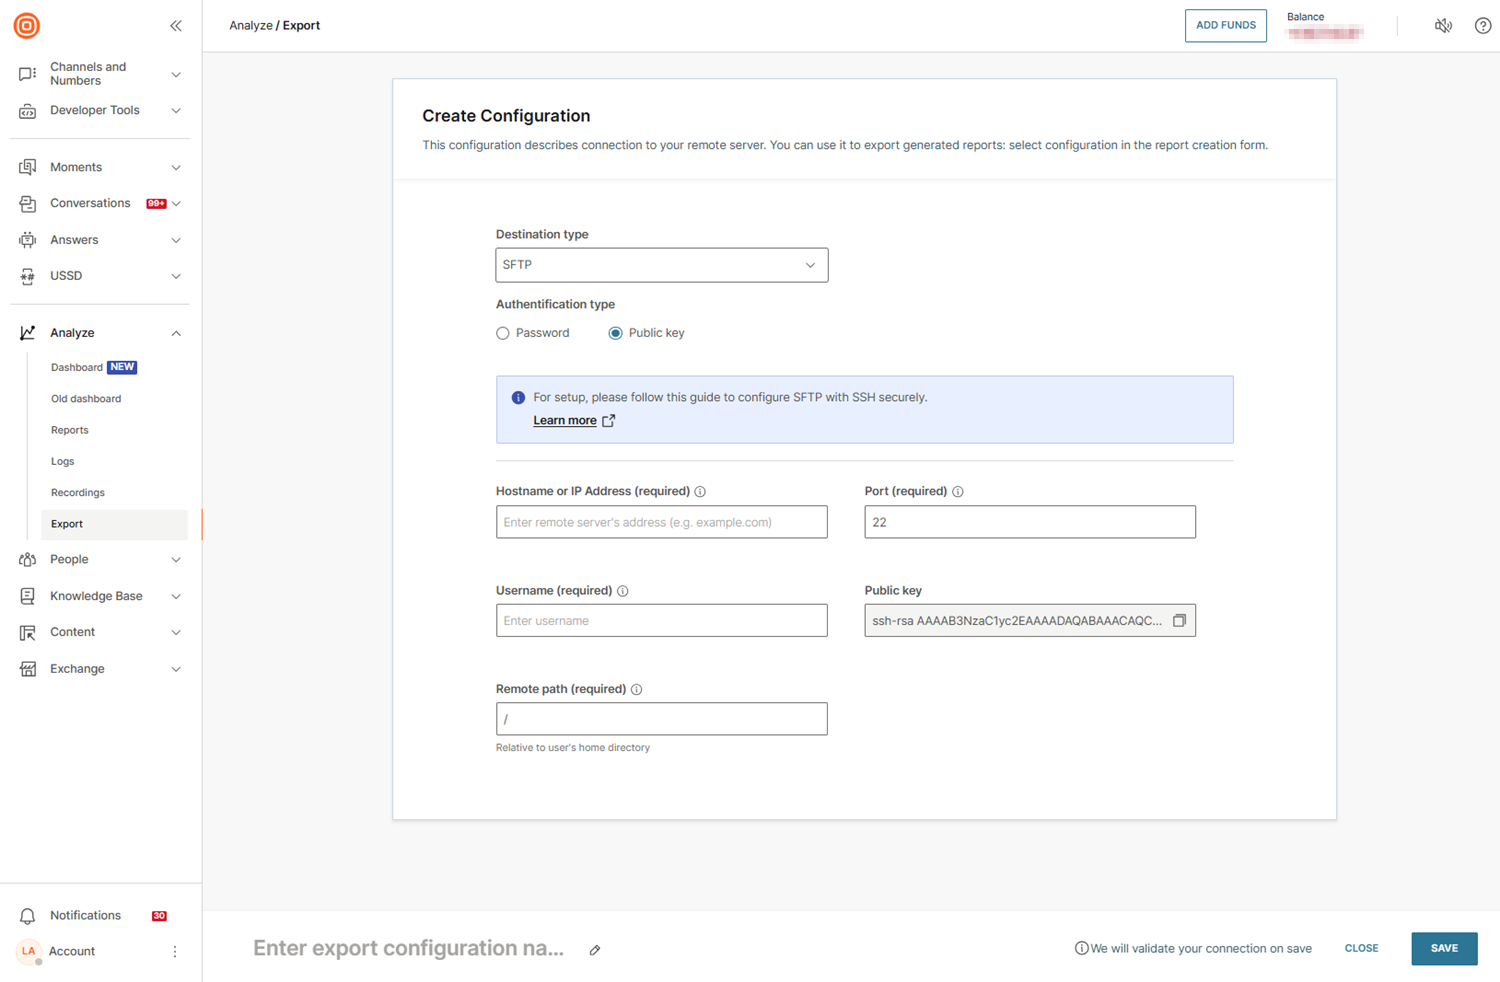
In the web interface (opens in a new tab), navigate to Analyze > Export.
-
Select Create configuration.
-
Choose the destination type:
- SFTP: Infobip strongly recommends using SFTP to ensure a high standard of security.
- FTP: While FTP is supported, the FTP active mode is not available because it must pass through NAT and proxy.
NOTERestrict the IP addresses allowed to connect to your FTP/SFTP server to enhance security. Infobip recommends configuring your firewall to block all connections by default and permit only the following IP addresses:
- 193.105.74.4
- 62.140.31.104
-
Select the authentication type:
- Password: Use this method for simplicity or when supporting legacy systems that do not accommodate more secure authentication methods like public keys.
- Public key: Use this authentication method to eliminate password-based access, providing stronger security.
Setting up public key authentication
Public key authentication provides a more secure alternative to password-based access by using cryptographic key pairs. This method enhances authentication strength and resists brute force attacks, as it eliminates the need for passwords entirely. By setting up public key authentication, you can safeguard your system with stronger, more reliable security measures.
To set up public key authentication for data export, follow these steps:
-
Select public key authentication.
- When creating your configuration, choose Public key as the authentication type. Infobip provides a shared public key for secure communication.

-
Copy the public key displayed in the interface.
-
Configure your server to accept the public key:
- Log into your server where the reports will be received.
- Navigate to the
.sshdirectory. - Open (or create) the
authorized_keysfile. - Paste Infobip's public key into the
authorized_keysfile and save it. - Ensure correct permissions on the
.sshdirectory and theauthorized_keysfile.
-
Enter the required destination details.
- In the web interface, provide the required information such as hostname or IP address, port, username, and remote path.
-
Name the configuration.
- Assign a name to the configuration and select Save.
-
Validate the connection.
- If the connection is successful, a green OK status will appear next to your configuration on the All export configurations (opens in a new tab) page.
- If there is an error, a red ERROR status will appear. Hover over the error for more details.
Automating report export
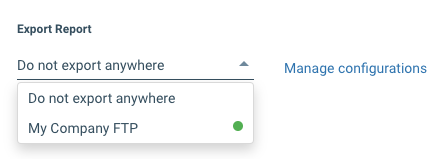
To enable automated export, assign the configuration during report creation:
- On the Create report (opens in a new tab) page, navigate to the Options section.
- Select your configuration from the drop-down menu under Export Report.

Once configured, reports are automatically uploaded to your server after generation. This includes both one-time and recurring reports. After the upload, you can import the reports into your system or process them further as machine-friendly data.
For more details about creating and managing reports, refer to the Reports page.