Engage and Onboard New Customers
When new users or customers sign up for your services or buy your product, you want to engage with them right away. You can do this using Moments and the communication channel your customers perfer, such as WhatsApp.
Solutions to combine:
- Moments
- People
- Channels (in this tutorial, we've used WhatsApp but you could use other messaging channels)
Please ensure that you check message template and creation rules depending on the messaging channel you want to use.
Every channel is different so the message creation process may not always be the same.
This tutorial shows how to welcome your new customers by sending them a message to announce enticing new products that are in store for them. You could also repurpose this tutorial for other industry needs i.e. engaging customers about their insurance policy, banking, and e-commerce to name a few.
Before Getting Started
To get started with this tutorial, you must have an Infobip account. Log in (opens in a new tab) or sign up (opens in a new tab) for an account.
Process Workflow
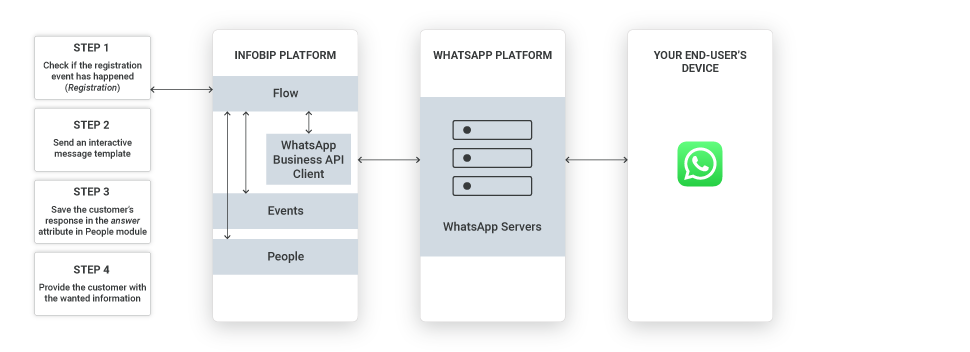
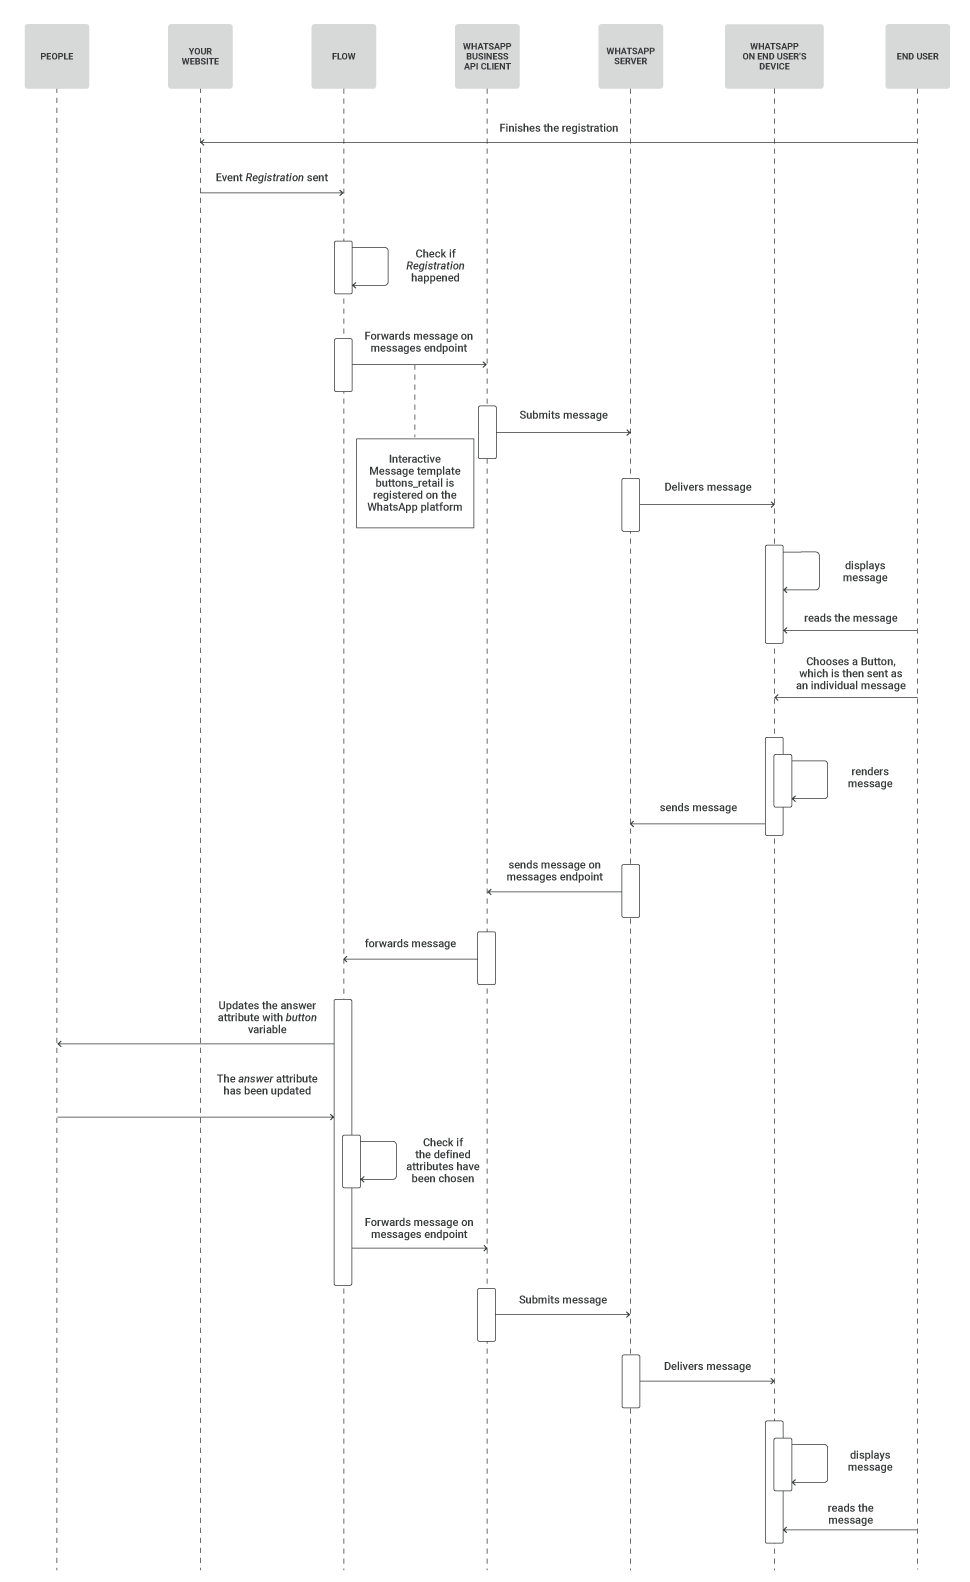
The following workflow shows the registration flow for WhatsApp including template checks and interaction with WhatsApp Business API client .
The flow may differ if you use other messaging channels to engage and onboard customers.
Prerequisites
There are a number of prerequisites to be addressed before you implement this tutorial
-
Channel dependent - Ensure that your message template is approved (if necessary) by the appropriate channel provider.
For example, WhatsApp must approve the button_retail template and then you can reuse it and personalize it for each customer to receive the notification -
Decide the most appropriate method to track customer actions/events:
- Web SDK - In this particular use case, we need to track events with Web SDK. For detailed instructions, refer to the Web SDK articles on our Documentation Hub. (Or get started immediately. Navigate to the People platform > Events > WebSDK (opens in a new tab)).
- MobileSDK
- API
-
Create an event that will be the trigger for the other actions in the communication flow. Start by creating a new event that will be the trigger. In Peopl e, click Events > Custom Events > NEW EVENT DEFINITION. In this case, you could use Registrationas an event that will trigger other actions in the communication flow. (You will need to do the same for every event you plan to add to your communication.)
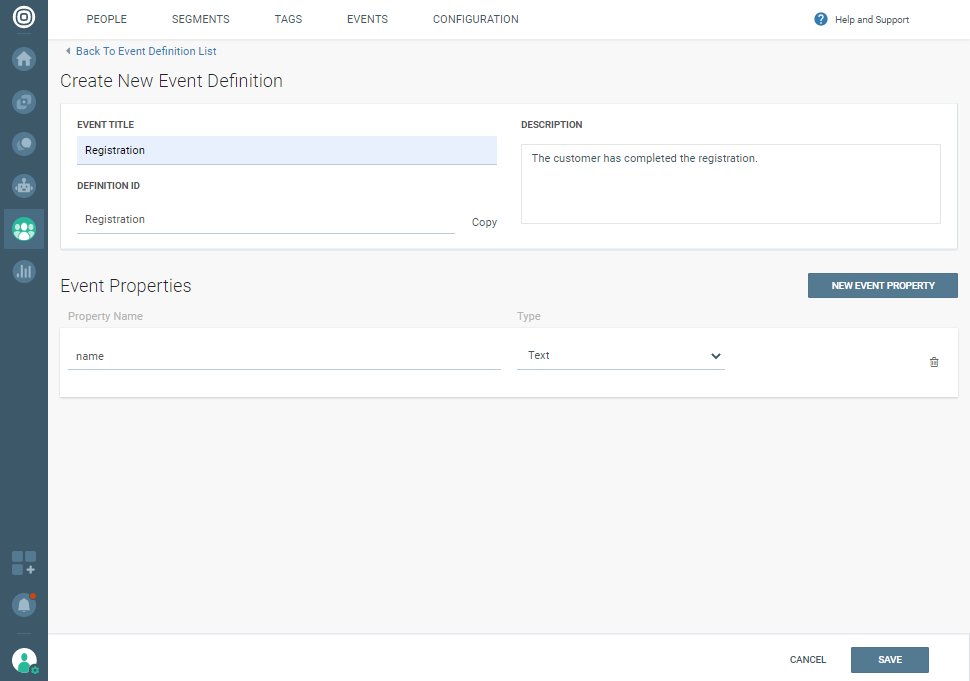
Once you have created a New Event Definition obtained your definition ID, go back to the Web SDK library and copy the tracking method code to the body of your website.
Event tracking is possible when customers are logged into your website.
Implementation Steps
Steps over Web Interface
-
In the Moments module (on the navigation bar), click CREATE FLOW and then Start from Scratch.
-
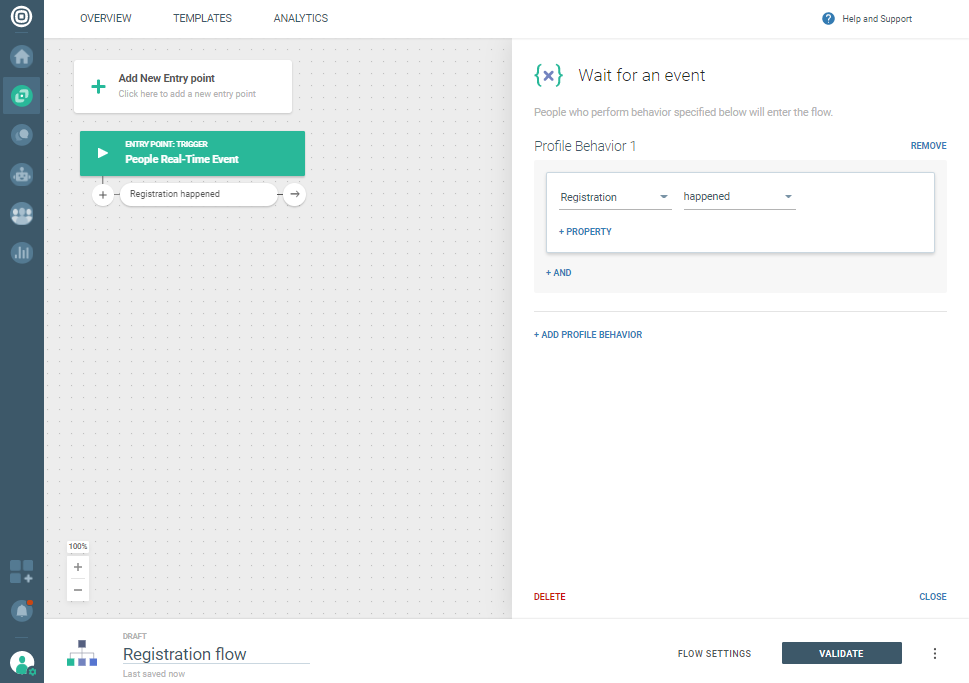
As your starting point, select Trigger> People Real-Time Event.
-
Select (previously set) Registration as the profile behavior the flow will wait for as an event.
-
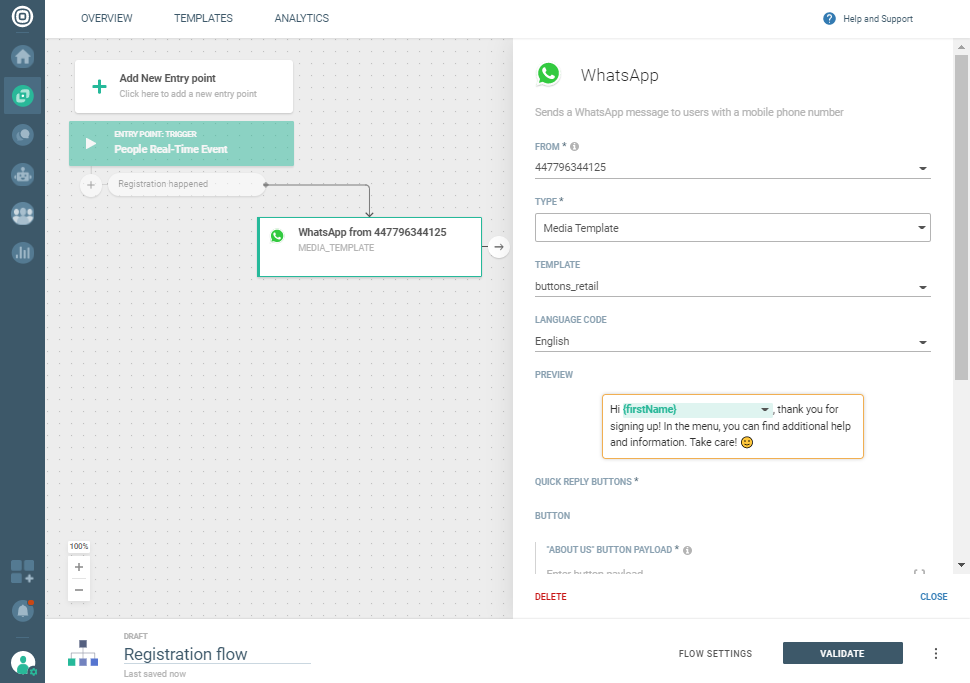
Add the Send WhatsApp message element and choose the buttons_retail template. Remember if you want to send your message over a different channel i.e. RCS, Viber, or LINE then select the appropriate channel for your target audience at this step.
-
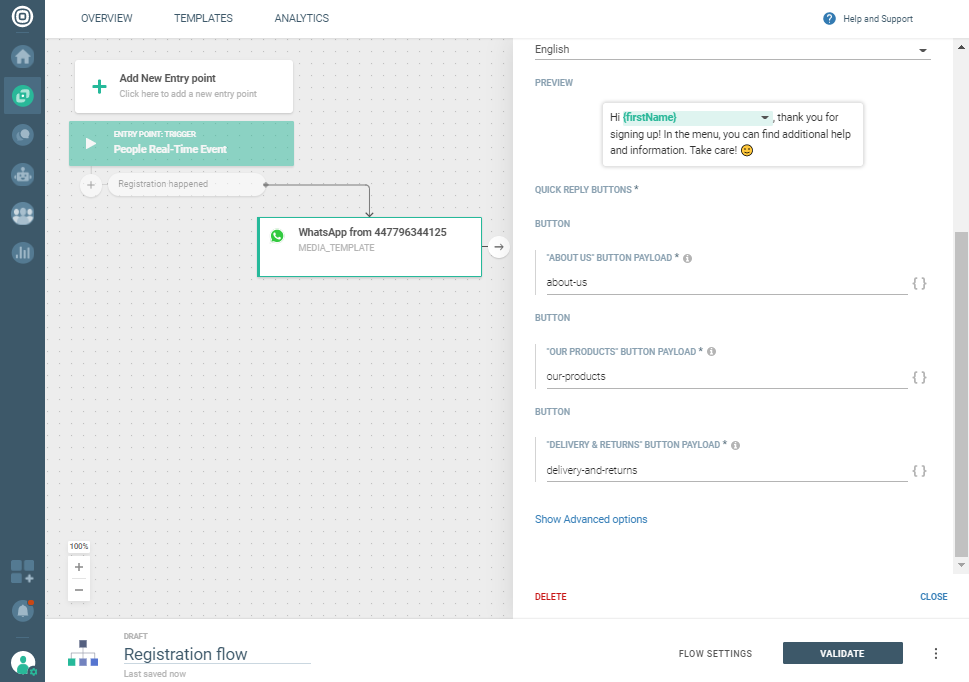
Now you need to define the payload for each button.
-
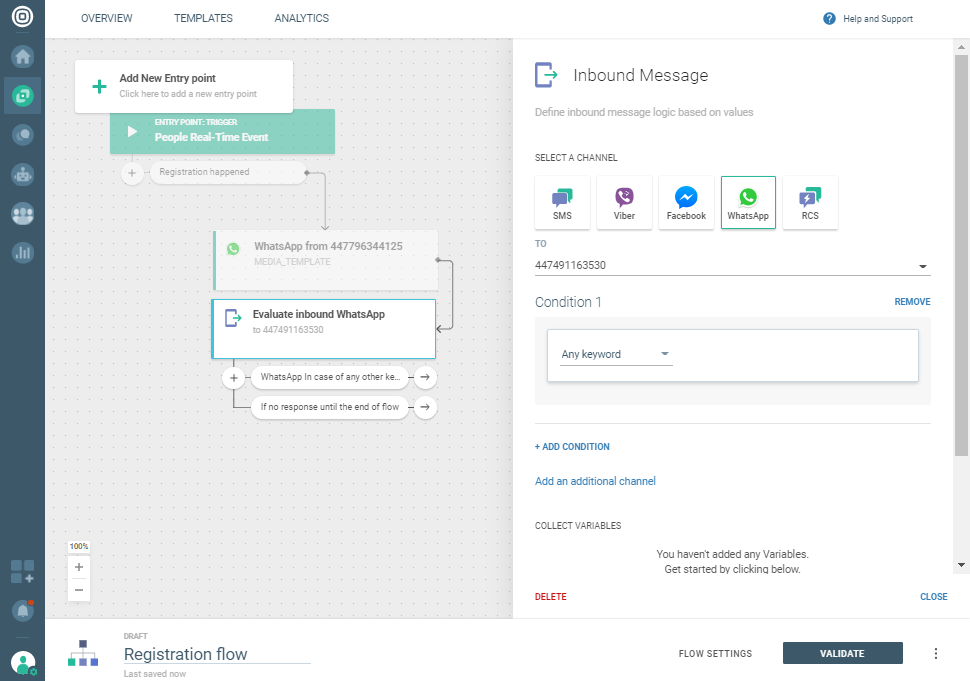
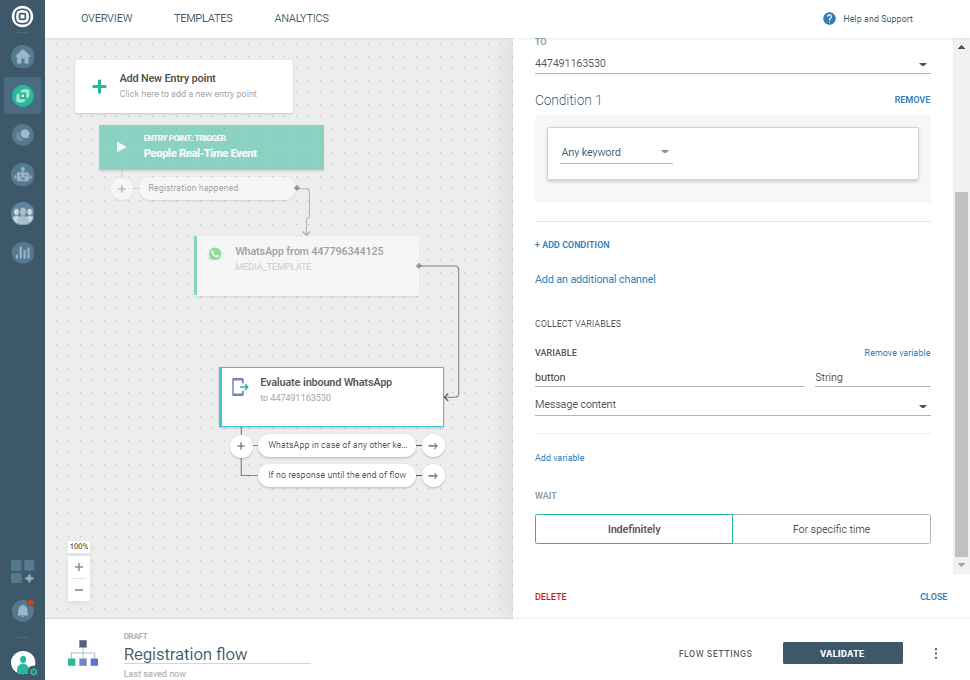
Add theEvaluate Inbound element and choose WhatsApp as the communication channel.
-
Create the button variable which will save your customer’s response.
-
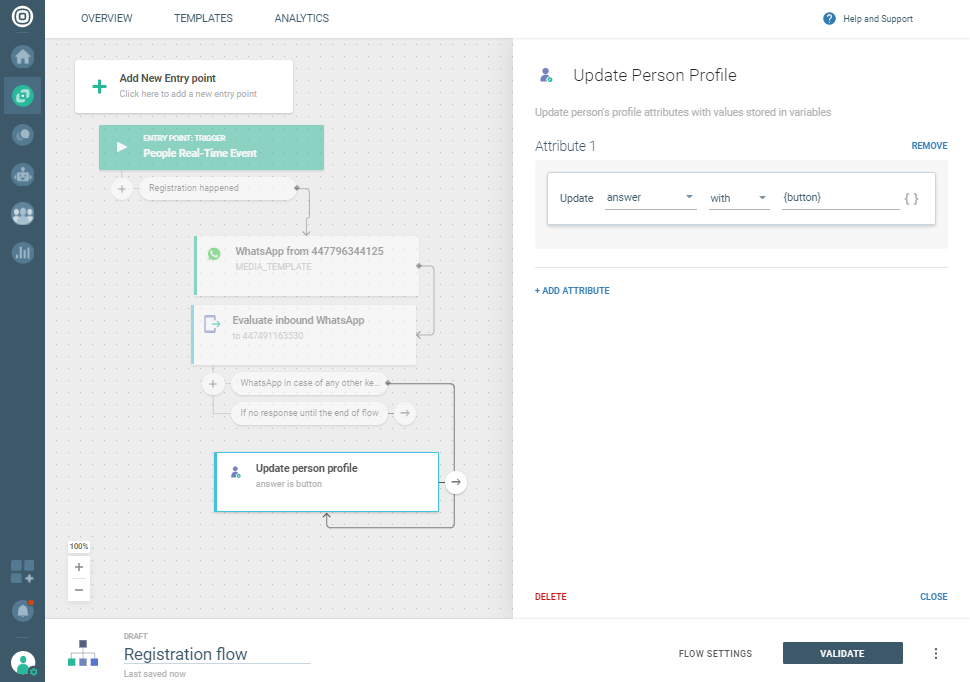
Update the person profile’s already defined answer attribute with the newly created button variable.
-
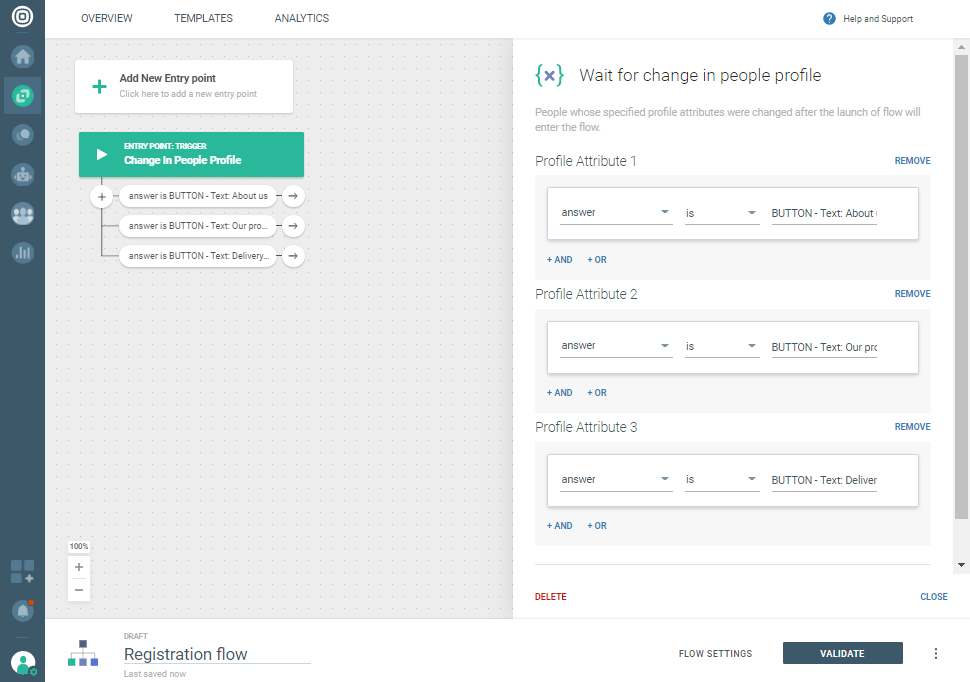
Create a new entry point called Change in People Profile and evaluate which button the customer has clicked on. To be evaluated successfully, the attribute must be in the following form:
- BUTTON - Text: Button text, Payload:Payload text
-
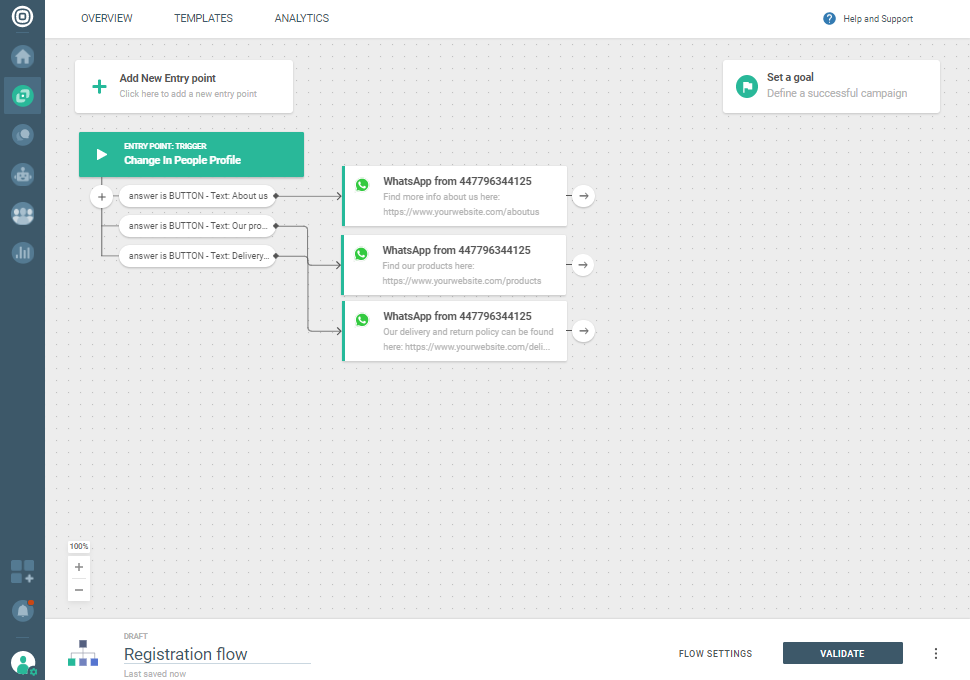
Finally, based on the button your customers have chosen, send them the required information.
-
Select Validate(the flow won't launch when you click this) or schedule the Flow to be launched in the future by clicking Schedule.
-
If you did everything correctly, you will see a summary screen with the LAUNCH NOWbutton (if scheduling is not set) or LAUNCH LATER (if scheduling is se
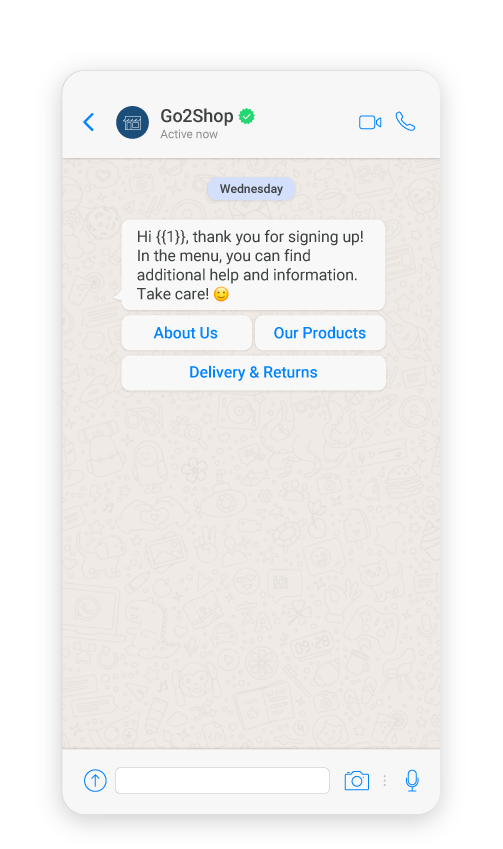
The preview below shows what the message looks like on your end user's device:
