Keep a Recording of Customer Communication
If you have Voice as a communication set up, with Recording as an add-on, any voice communication can be recorded.
This tutorial explains how to set up a simple Flowto call, record the entire conversations, and remind your end users of an obligation they have. For example, about a debt they need to pay. Afterwards, you can download the audio file of the recorded communication so you have a local copy whenever you need it.
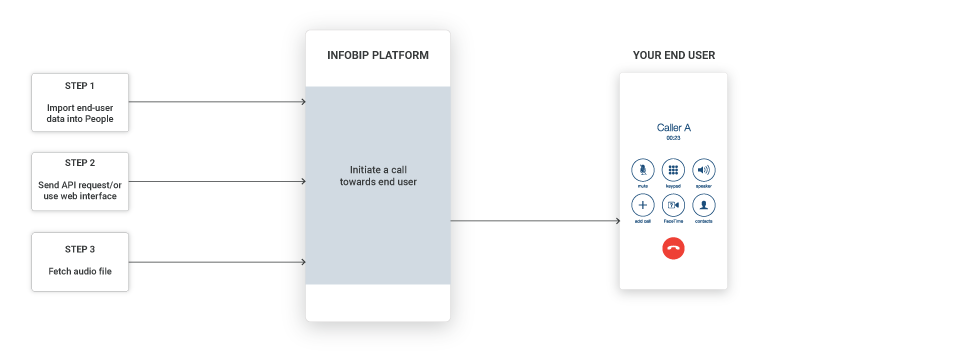
Process Workflow
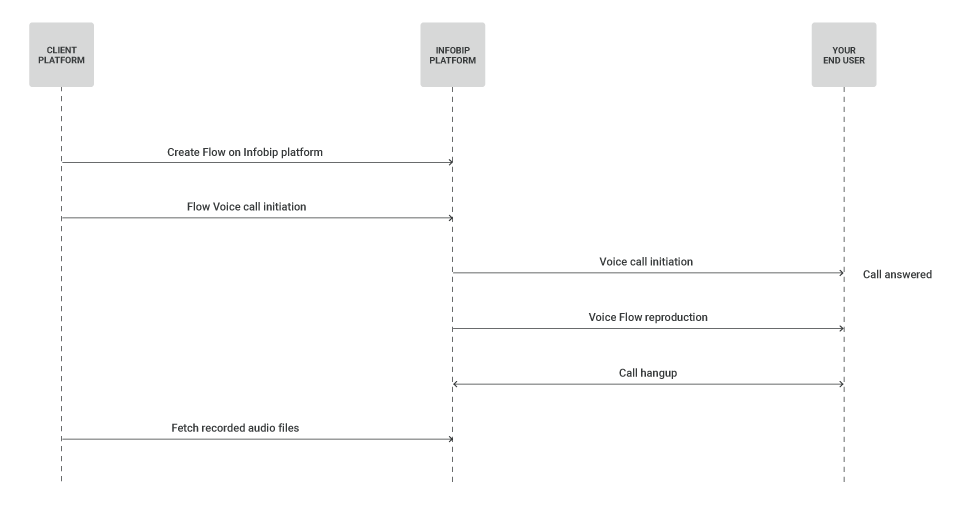
Recordingis in Early Access. Make sure that your account has the Recording feature turned ON. If you don’t have it, contact your Account Manager to enable this feature for you.
IMPLEMENTATION STEPS
Steps over Web Interface
-
Log in (opens in a new tab) to the Infobip web interface and navigate to the Moments tab. Click CREATE FLOW, select Start from Scratch, then select Predefined audience and click START BUILDING.
-
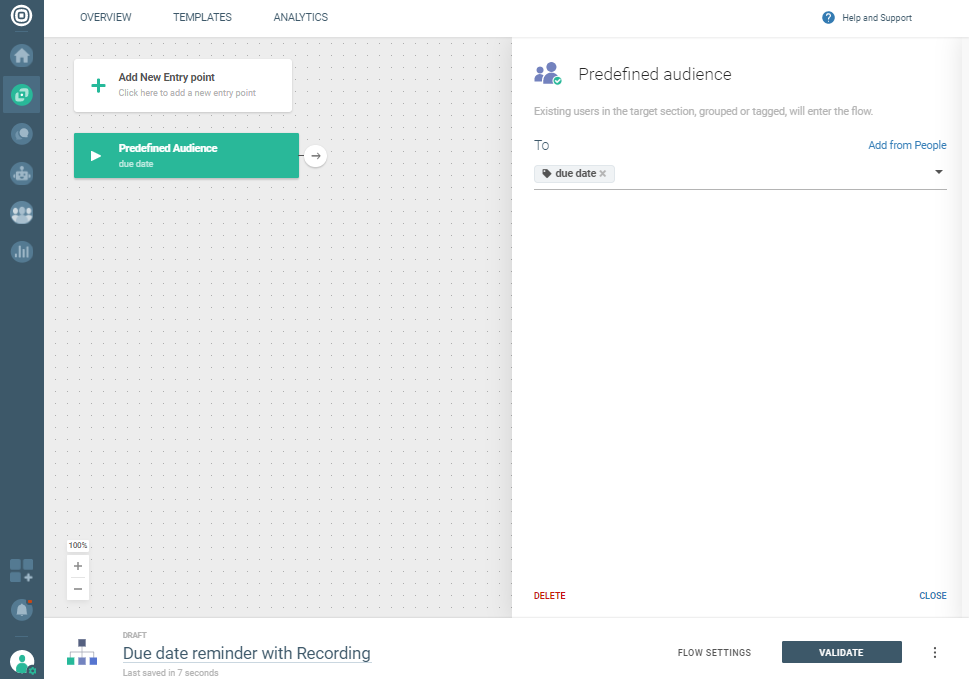
Enter your Flow name (in this case we used ''Due date reminder with Recording''). On the side panel of the Predefined audience entry point, select the audience you want to call (should be selected from People). You can choose from previously created tags (e.g., due date, by name, etc.)
-
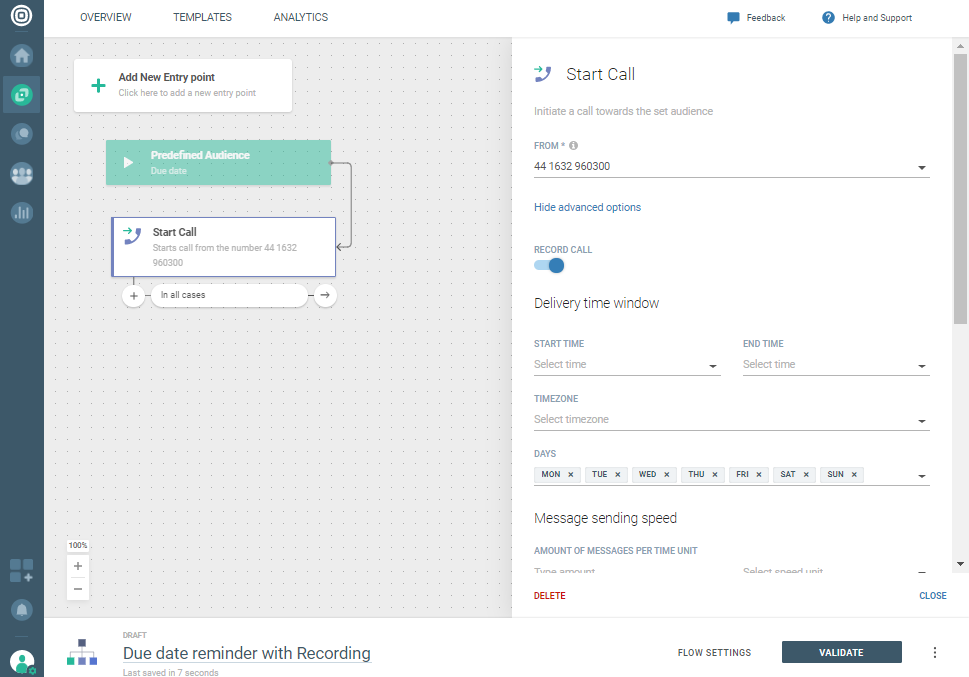
Choose Start outgoing call to set off on the journey of building your Flow. Then select or type the sender you would like to use. This will be your caller ID displayed on the end-user's phone when they receive the call.
-
Enable the Recording toggle in Advanced options. Note that all answered calls will be recorded.
-
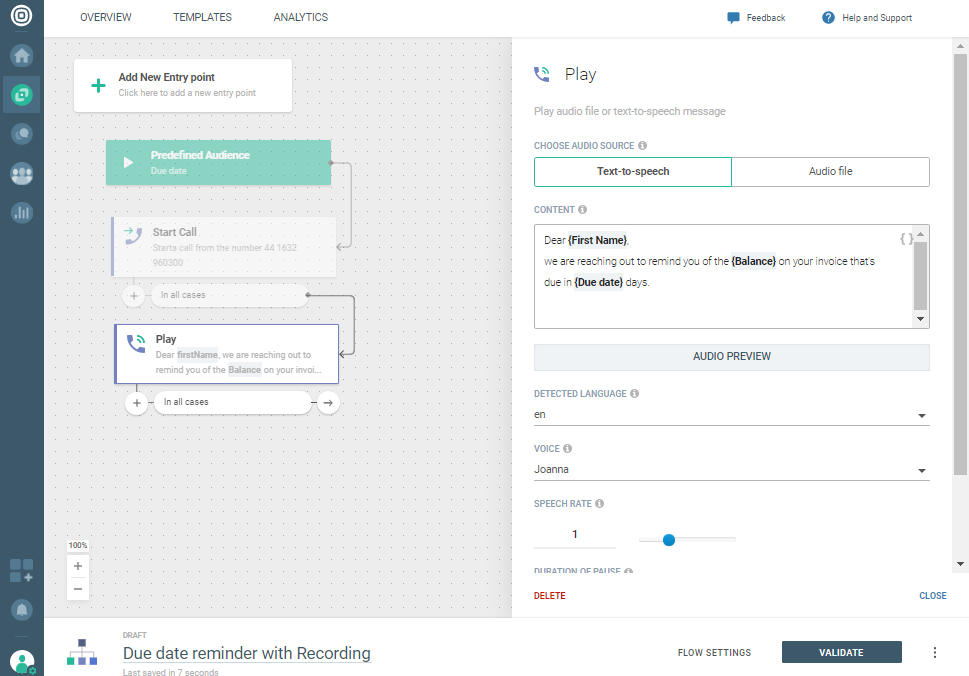
Select Play from available elements and choose an audio source: Text-to-speech where you enter the message you want to play to your end users, or Audio file to use pre-recorded audio files from your computer (File Upload). In this example, we will use Text-to-speech. You can enter your desired message text into the Content field.
-
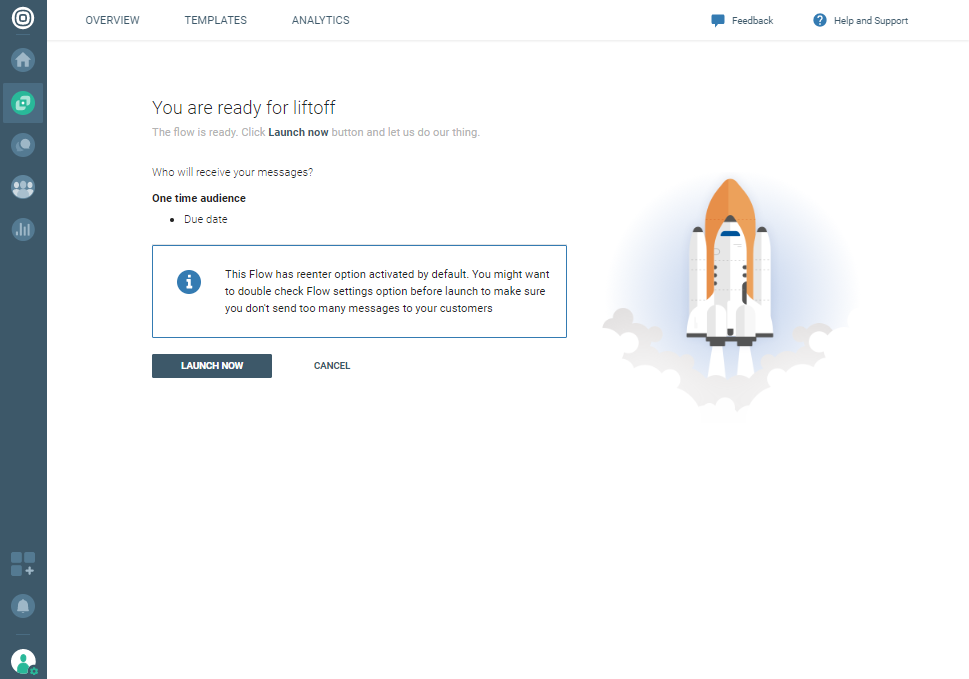
All that's left to do is click VALIDATE and LAUNCH NOW on the next screen.
To obtain the audio files of delivered calls recordings via Infobip web interface (opens in a new tab):
-
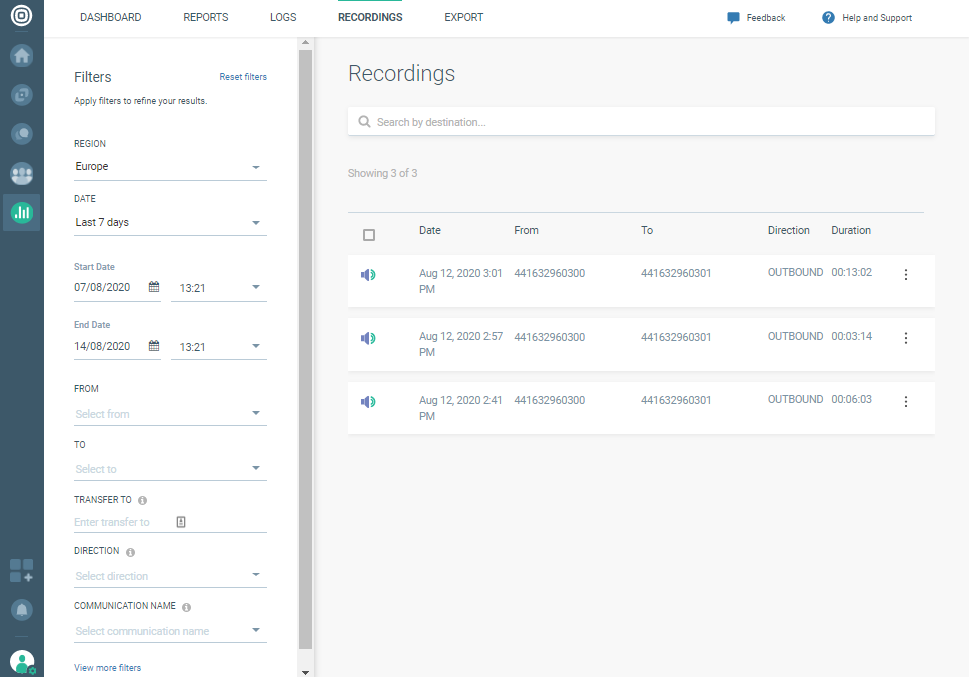
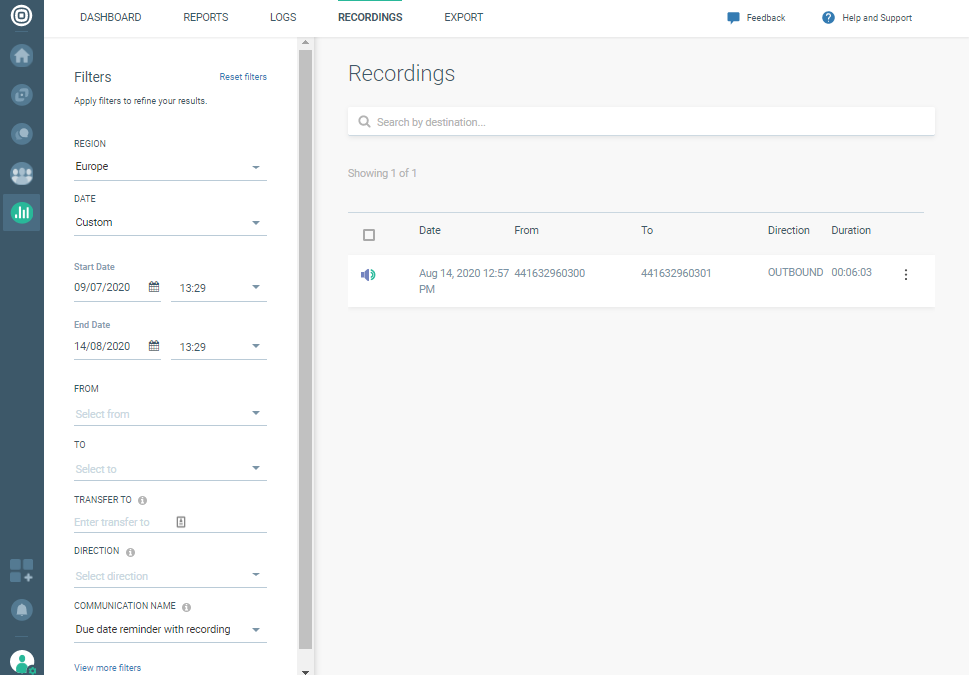
Navigate to the Analyze section of the web interface and click the Recordings tab.
-
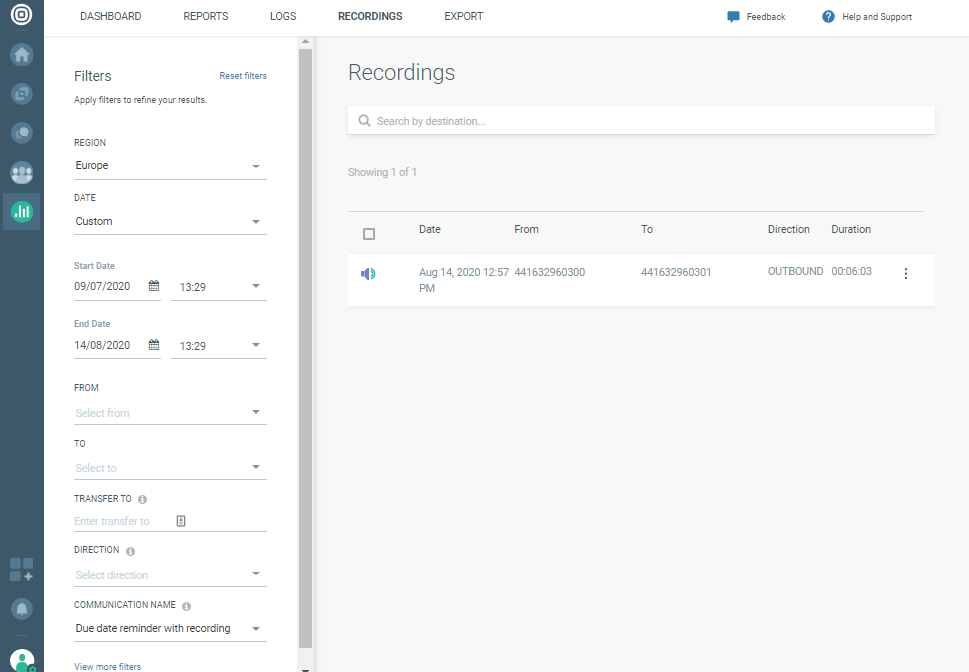
Audio files of every recorded call should be available. To narrow down your search, use the filters one the left side (e.g., Region, Start date, End date, Communication name, etc.)
-
To download, navigate to a specific file and click the file management button (the three dots on the far right side).
-
Click Download to store the recorded audio file to your computer.
-
Listen to the file using your preferred audio player.
Steps over API
- In the web interface (opens in a new tab), create IVR scenario using Flow API as the entry point. The same scenario elements from the previous steps may be used, the only difference is the entry point.
- Send API request (opens in a new tab) from your platform using the endpoint specified in the Flow API side panel
- To obtain audio files you can use the web interface, or, if it suits you better, use the following API request:
- Use Search recordings (opens in a new tab) API to search the recordings and define the audio file you are looking for
- Use Download recordings (opens in a new tab) API to obtain the URL needed to download your audio file
Flow scenarios should be tailored to your business needs. You can use the Forward Call element to connect your end user to a call center agent to discuss the terms regarding the due date of their payment. The entire call will be recorded and available for you to download and listen to after the call has ended.