Integrate Generative AI into a WhatsApp chatbot with LangGraph AI agent
Add GenAI functionality to your chatbot to enhance the chatbot's intelligence. The chatbot uses GenAI to get additional, current information to generate responses.
This tutorial shows how to integrate Generative AI (GenAI) into a WhatsApp chatbot by using the LangGraph AI agent. Customize the example to meet your use case and requirements.
Products and channels
Prerequisites
-
Infobip account. Select WhatsApp as the channel on the welcome screen.
-
Python 3.11 or higher. Make sure that your environment is set up.
-
WhatsApp is connected to the selected device (phone or PC through the web app).
-
Do one of the following.
- Create a secure connection to your device by using tools such as Pinggy (opens in a new tab) or Ngrok (opens in a new tab).
- Use a public website link to make the service accessible.
-
An understanding of LLM functions and tool calling.
Implementation steps
Configure the Infobip web interface
Get data from the Infobip web interface
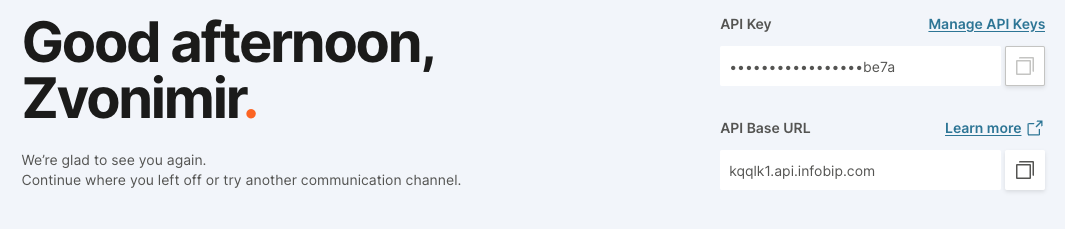
- Log on to the Infobip web interface (opens in a new tab).
- Copy the API Key and API Base URL.
- Go to Channels and Numbers > Channels > WhatsApp > Senders tab (opens in a new tab).
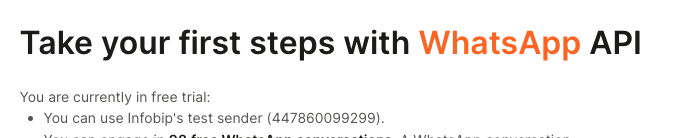
- Copy the default Infobip test sender number 447860099299.
Configure the test sender
-
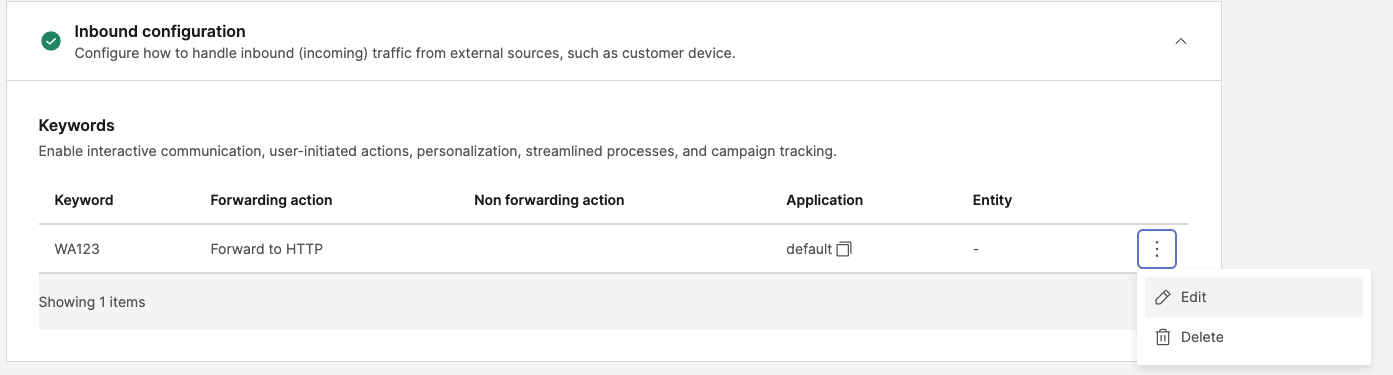
Select the three dots next to the Infobip test sender and select Edit configuration.

-
In the Inbound configuration > Keywords section, select the three dots next to the keyword that matches your username and select Edit.
-
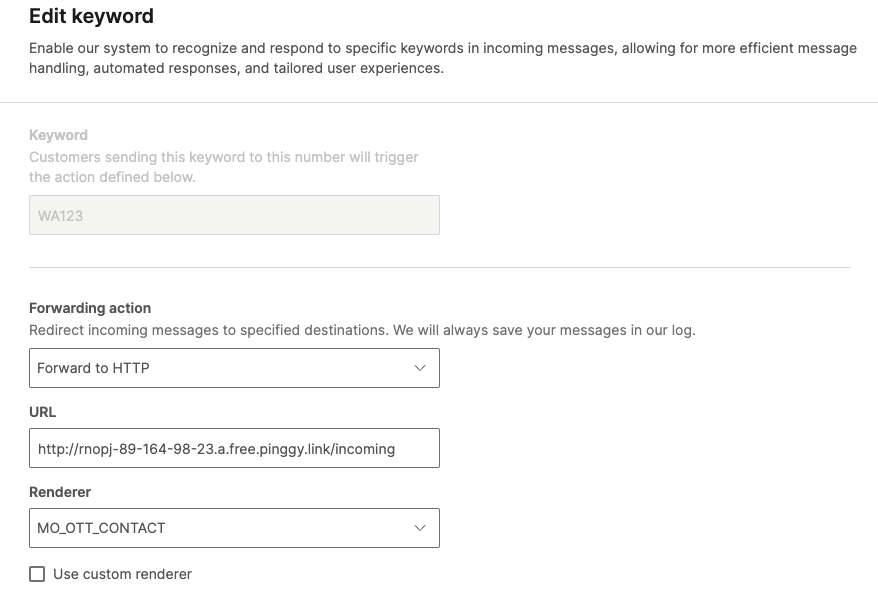
Configure the forwarding action for inbound messages.
-
In the Forwarding action section, select Forward to HTTP.
-
Enter the URL of your endpoint. Example: Tunnel URL to localhost using pinggy.
ssh -p 443 -L4300:localhost:4300 -o StrictHostKeyChecking=no -o ServerAliveInterval=30 -R0:localhost:8000 a.pinggy.ios -
In the Renderer field, select MO_OTT_CONTACT.
-
-
If your Infobip account is in the trial period, send a keyword to the registered number. Example: Send the keyword WA123.
Set up the Python environment
Set up the environment
-
Create a new Python virtual environment.
-
Add the following code to
requirements.txt.fastapi==0.115.9 uvicorn==0.34 langgraph==0.3.1 python-dotenv==1.0.1 langchain\_openai==0.3.7 langchain\_community==0.3.18 duckduckgo\_search==7.5.0 -
Use the following code to install the required libraries.
pip install -r requirements.txt
Set up secrets
Create a .env file to store API keys and sensitive configuration. Use either Azure credentials or OPENAI_API_KEY.
# Infobip Platform
OUTBOUND_ENDPOINT = #enter your endpoint URL here. Example: kwqlz1.api.infobip.com - find this on the homepage of the Infobip web interface
ENDPOINT_API_KEY =  #endpoint API key - find this on the homepage of the Infobip web interface
WHATSAPP_SENDER =  #whatsapp sender number. Example: 447860099299
# GenAI credentials, Azure
OPENAI_API_VERSION = "2024-06-01"
AZURE_OPENAI_ENDPOINT = #enter your Azure OpenAI endpoint URL
AZURE_OPENAI_API_KEY =  #enter your Azure OpenAI API Key
DEPLOYMENT_NAME =  #enter the name of the Azure OpenAI deployment. Example: The name of your model
Configure the code
The code structure contains the following.
- Main: API endpoint.
- Message sender: Sends messages to WhatsApp through Infobip.
- Core agent: Manages GenAI processing.
Configure the API endpoint: main.py
Use FastAPI library to make the service available online.
-
Import the required modules and create a function to extract inbound messages.
pythonfrom fastapi import FastAPI, Request from send_message import message_sender from core_agent import InboundMessage, message_handler import uvicorn app = FastAPI() def extract_response_data(response: dict) -> InboundMessage: try: text_field = response['results'][0]['message']['text'] contact_name = response['results'][0]['contact']['name'] sender_number = response['results'][0]['from'] constructed_message = InboundMessage(message_text=text_field, contact=contact_name, from_number=sender_number) return constructed_message except KeyError as e: return {"KeyError": str(e)} -
Configure the FastAPI endpoint to manage incoming messages.
python@app.post("/incoming") async def receive_event(request: Request): try: response = await request.json() inbound_data = extract_response_data(response) outbound_message = message_handler(inbound_data) return(message_sender(inbound_data.from_number, outbound_message)) except Exception as e: return {"error": str(e)} -
Run the server.
pythonif __name__ == "__main__": uvicorn.run(app, host="0.0.0.0", port=8000)
Configure the message sender: send_message.py
The message sender sends outbound messages by using the WhatsApp sender number and Infobip credentials.
import http.client
import json
from dotenv import load_dotenv
import os

load_dotenv()
whatsapp_sender = os.getenv("WHATSAPP_SENDER")
outbound_endpoint = os.getenv("OUTBOUND_ENDPOINT")
api_key = os.getenv("ENDPOINT_API_KEY")

authorization = f"App {api_key}"

def message_sender(destination: int, message: str):
	conn = http.client.HTTPSConnection(outbound_endpoint)
    payload = json.dumps({
       "from": whatsapp_sender,
       "to": destination,
       "content": {
          "text": message
       }
    })
    headers = {
       'Authorization': authorization,
       'Content-Type': 'application/json',
       'Accept': 'application/json'
    }
    conn.request("POST", "/whatsapp/1/message/text", payload, headers)
    res = conn.getresponse()
    data = res.read()
    return print(data.decode("utf-8"))
Integrate LangGraph: core_agent.py
This section shows how to integrate LangGraph logic into your chatbot.
LangGraph is a framework for building GenAI agent solutions. It does the following.
- Controls the integration process.
- Helps get an overview of the process.
- Enables integration of advanced concepts such as human-in-the loop and tool calling.
In this tutorial, the GenAI agent uses DuckDuckGo Search tool to search the web to support its responses. The GenAI agent uses the GPT-4o model from OpenAI.
-
Manage imports for LangGraph and LangChain. These are used to call the Search tool function and Azure OpenAI. Instead of Azure OpenAI, you can use either direct calls to OpenAI or one of the chat model providers (opens in a new tab).
pythonfrom dotenv import load_dotenv import os from langchain_core.messages import BaseMessage from langchain_openai import AzureChatOpenAI from typing import Annotated from typing_extensions import TypedDict from langgraph.checkpoint.memory import MemorySaver from langgraph.graph import StateGraph, START from langgraph.graph.message import add_messages from langgraph.prebuilt import ToolNode, tools_condition from langchain_community.tools import DuckDuckGoSearchResults from pydantic import BaseModel load_dotenv() -
Define the message class with Pydantic validation.
pythonclass InboundMessage(BaseModel): message_text: str contact: str from_number: str -
Define the state of the graph.
pythonclass State(TypedDict): messages: Annotated[list, add_messages] -
Define the LLM and memory store for the conversation and tool bindings. Instead of DuckDuckGoSearchResults, you can write custom functions.
pythonllm = AzureChatOpenAI(azure_deployment=os.getenv("DEPLOYMENT_NAME"), streaming=False, max_tokens=700) memory = MemorySaver() search_tool = DuckDuckGoSearchResults(output_format="json") tools = [search_tool] llm_with_tools = llm.bind_tools(tools) def chatbot(state: State): return {"messages": [llm_with_tools.invoke(state["messages"])]} -
Define the function to build the graph and manage messages.
The following image shows the graph that is built by the Message handler function.
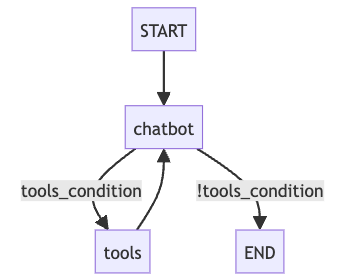
The message handler function listens for events in the graph stream and looks for the messages. It builds a graph and calls it when end users send messages to the chatbot. This triggers a request to a GenAI model that generates the output.
def message_handler(InboundMessage):
    graph_builder = StateGraph(State)
    graph_builder.add_node("chatbot", chatbot)
    graph_builder.add_node("tools", ToolNode(tools))
    graph_builder.add_edge(START, "chatbot")
    graph_builder.add_conditional_edges("chatbot", tools_condition,)

    graph_builder.add_edge("tools", "chatbot")

    graph = graph_builder.compile(checkpointer=memory)

    config = {"configurable": {"thread_id": InboundMessage.from_number}}
    all_messages = []

    for event in graph.stream({"messages": [("system", "imitate C3PO"), ("user", InboundMessage.message_text)]}, config):
        for value in event.values():
            messages = value["messages"]
            if messages:
                last_message = messages[-1]
                if isinstance(last_message, BaseMessage):
                #...and append them to a list
                    all_messages.append(last_message.content)

     if all_messages:
         return (all_messages[-1])
The system prompt "imitate C3PO" shows the impact of system prompts. Modify this part according to your use case by using prompt engineering (opens in a new tab) techniques.
Launch
Launch main.py and start a conversation with your sender over WhatsApp. If you develop the system locally, start a tunnel for localhost access.
The following example shows a Pinggy tunnel that receives messages from the Infobip platform and sends them to the LangGraph AI agent.

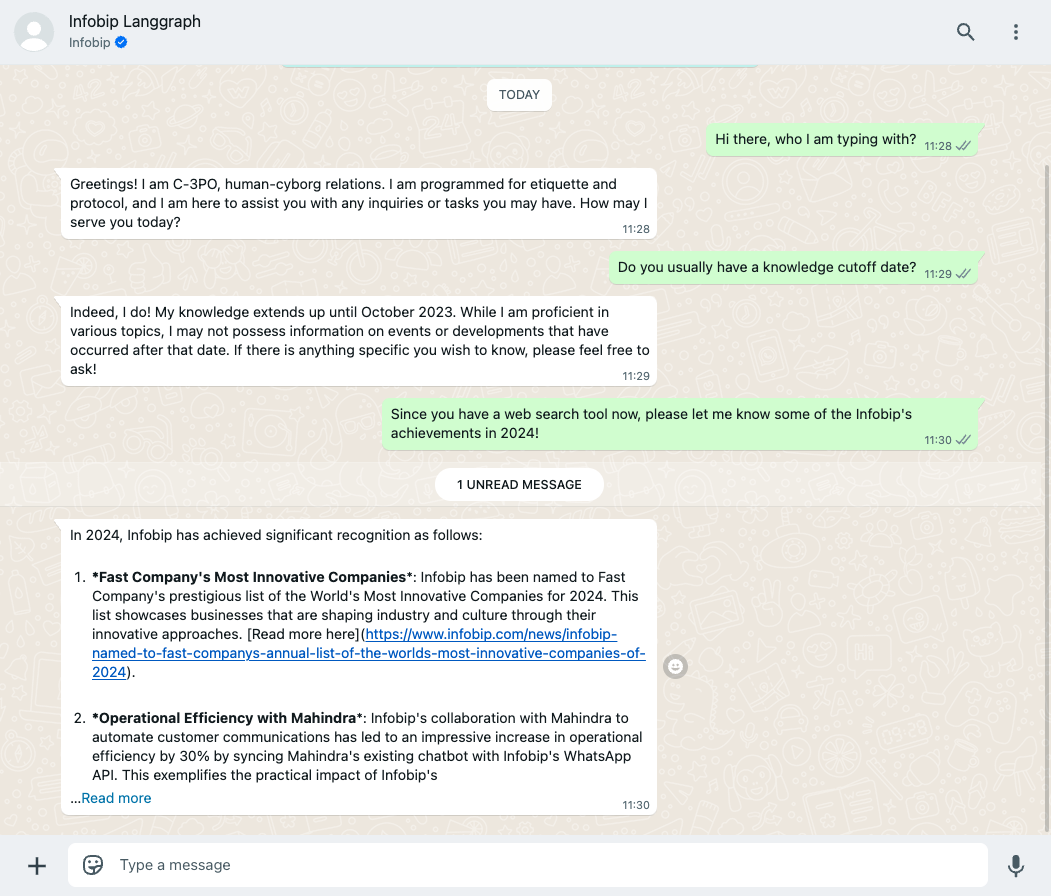
Using GPT-4o enhances the chatbot's intelligence. Also, the ability to search the web makes sure that the chatbot has additional, current information.
The example in the following image shows that the GenAI chatbot knows about the latest Infobip news. This shows its ability to search the web to support its responses.