Automate and Optimize Your Customer Support
Use the automated workflow options to deliver useful content to your customers, keep them engaged, help them adopt and use your product properly, send them manuals and other useful information.
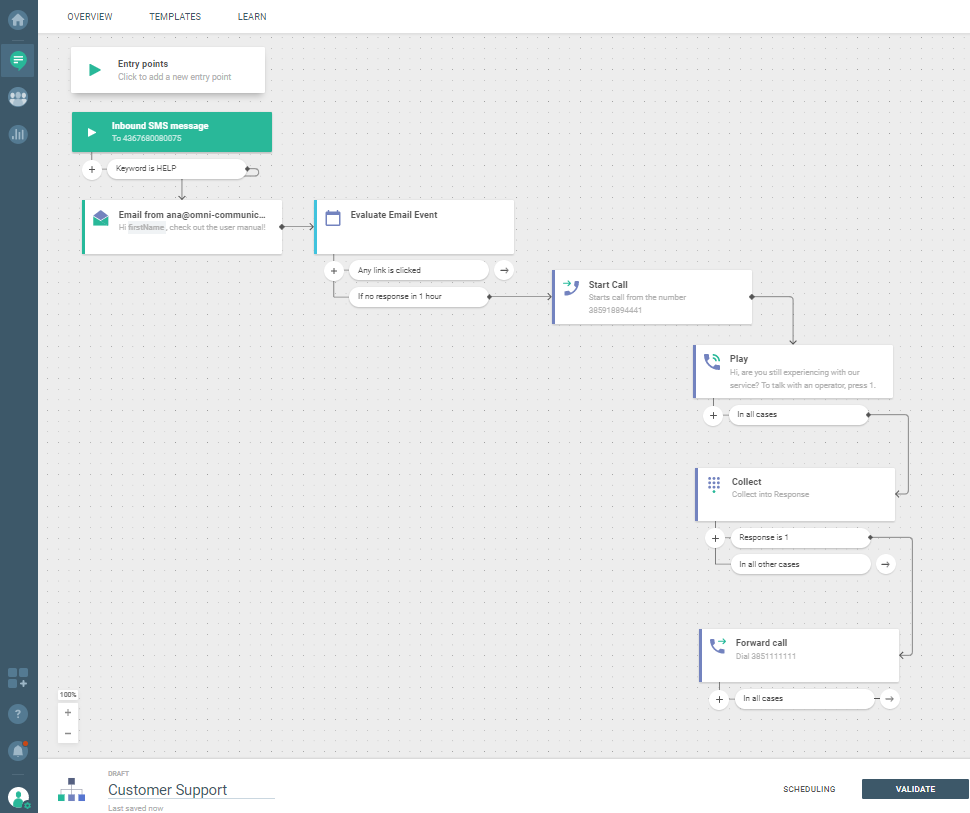
The following Flow allows you to send an email with links to manuals, and if a customer does not click the link, they will receive a call with text-to-speech or a pre-recorded message after which they will have the option to talk to the agent.
To be more successful, you can create a new Flow that will check customer satisfaction with the support process.
IMPLEMENTATION STEPS
Steps over Web Interface
-
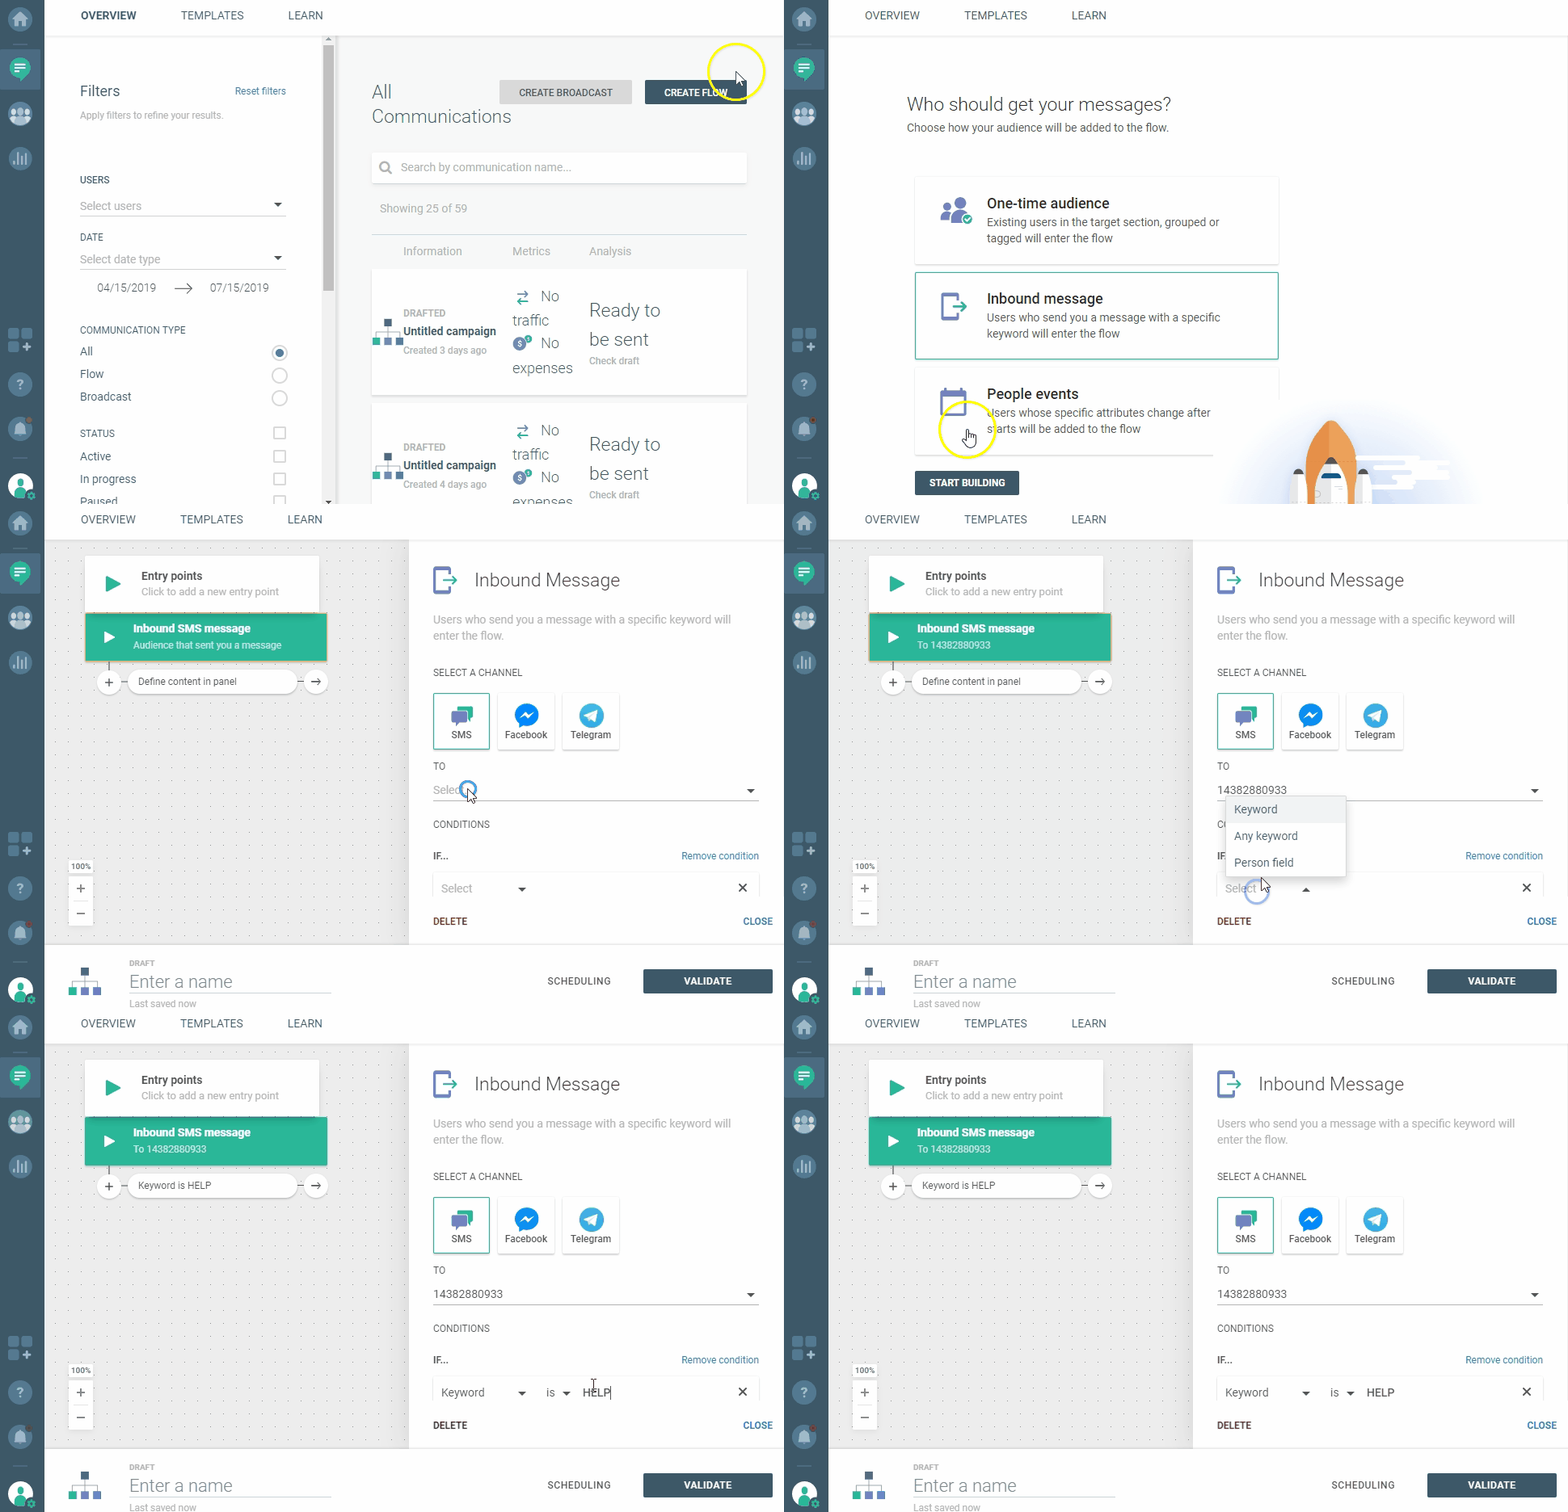
Log in (opens in a new tab) to the Infobip web interface, navigate to the Communicate module, click CREATE FLOW, and then click Start from Scratch.
-
Select Inbound messageand click START BUILDING.
-
Add the Inbound message entry point and then select a channel over which you would like to receive a customer’s request for support. (e.g., SMS).
- In the To field, enter the number to which you want to send this message to.
- Set Conditions. Note that you need to set a keyword that will trigger this flow for your end users.
- IF… keyword is HELP
-
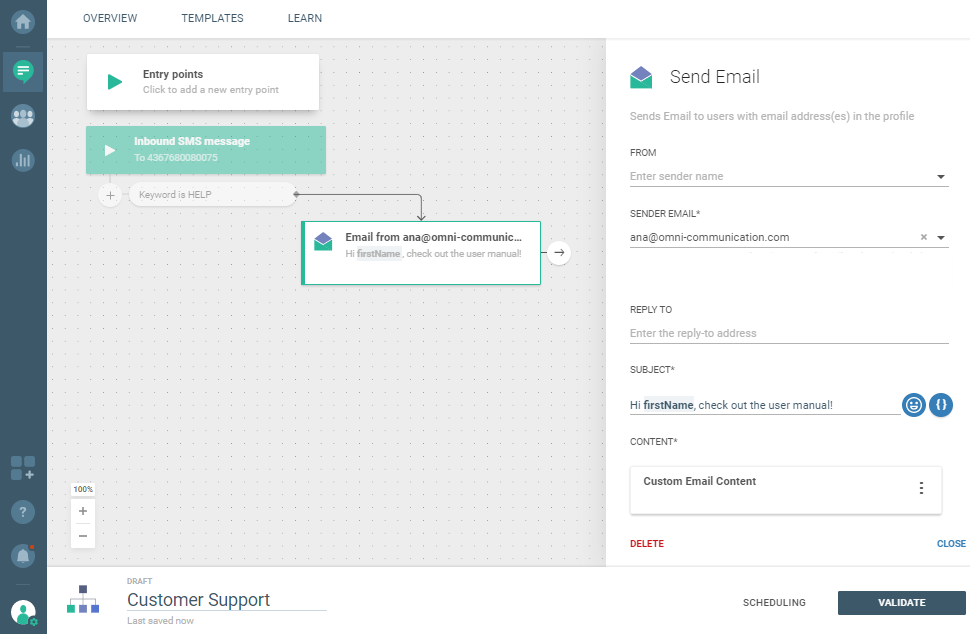
Click the arrow on the Inbound Messageelement and click Send Email.
-
Fill in the data required for the email channel.
- From
- Sender Email
- Subject
- Click Create Custom Email or upload an HTML file you already have. Add attachment if needed.
-
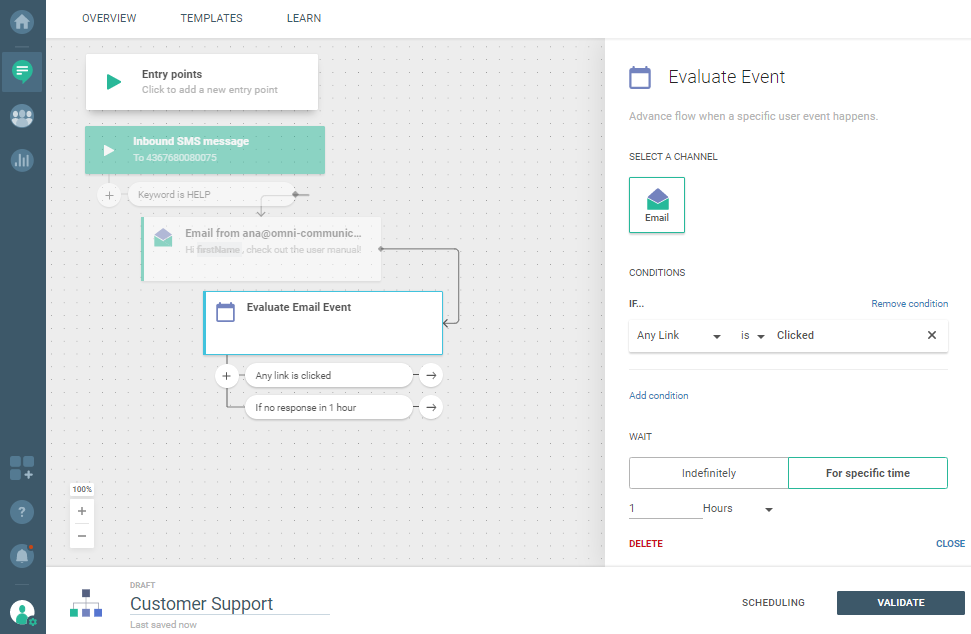
Click the arrow and add the Evaluate Event element and then:
- Select an Email Channel (or leave it selected).
- Set Conditions by selecting Any Links is Clicked.
- Click For Specific Time.
- Set value to 1 Hour, for example.
-
Click the arrow from If There Is Response(This means that we would like to handle those customers that didn’t check the manuals), add the Start outgoing call element, define the Caller ID, and then add and set the Pay element.
- Leave Text-to-Speech (or click File Upload to upload an mp3 file).
- Enter the text that will be transformed into audio and then played to the customer. Maybe something like: “Hi
, do you still have problems with our service? To talk with an operator, press 1. “
-
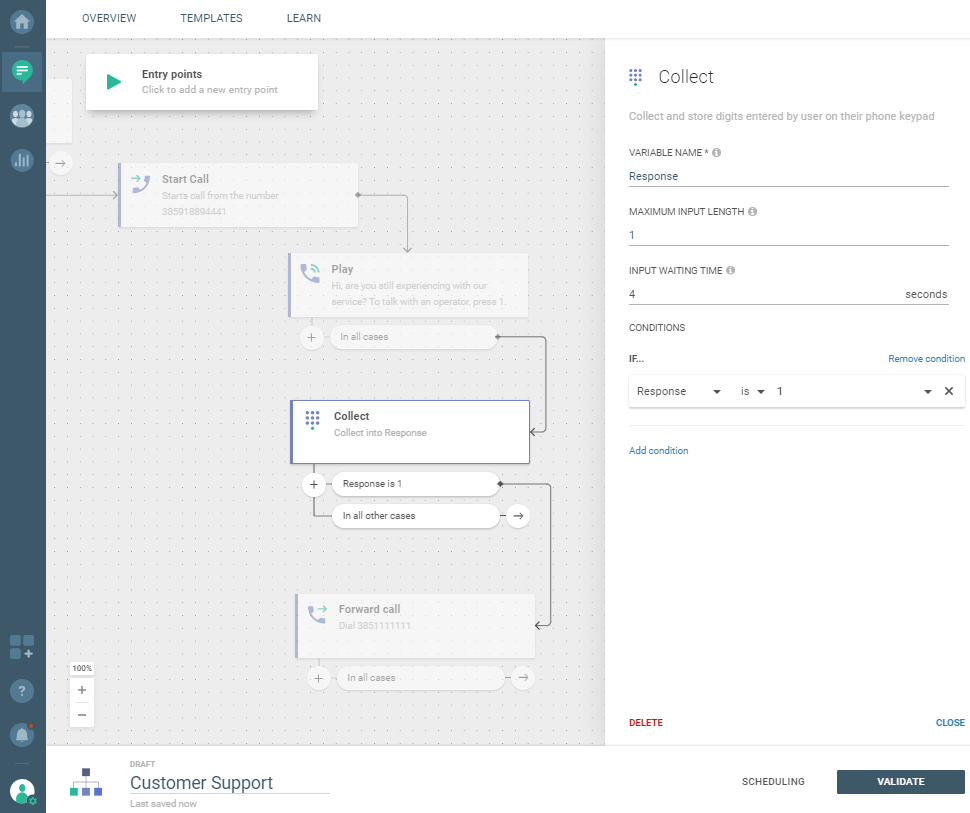
Add Collect element and define the following:
- Variable name - variable to which digits entered by users will be saved
- Maximum input length - number of digits that can be entered (0 for unlimited)
- Input waiting time - how long the platform should wait for users to start typing digits
- Conditions
-
Click the arrow from Response is 1, add the Forward call element, and enter the following:
- From
- Phone number (the number of your call center to which the phone call will be redirected to)
-
Click VALIDATE or schedule the Flow to be launched in the future by clicking SCHEDULING.
If you did everything correctly, you will see a summary screen and then click LAUNCH (if scheduling is not set) or LAUNCH LATER (if scheduling is set).
Add tags to customers that receive a voice message. Use that tag to create an audience for another flow which will help you measure support satisfaction with simple surveys.