Two-factor authentication
Combine different channels on the Infobip platform to send one-time PINs to your customers.
The one-time PIN (OTP (opens in a new tab)) number is generated and sent to the user’s mobile phone. The end user receives the OTP and types it into the application to confirm their identity.
This tutorial explains how to use the Infobip authentication solutions (opens in a new tab) for two-factor authentication. We combined SMS (opens in a new tab) and Number Lookup.

There are various ways how you can incorporate the two-factor authentication into your business use case to resolve any issues your customers may have. You can use it to:
- Confirm phone numbers
- Update account settings
- Confirm customers have filled out a login form
- Confirm transactions
The setup consists of two parts and requires only two API calls to complete the setup process—application setup and message template setup. Later, you will reuse message template(s) to send out PINs.
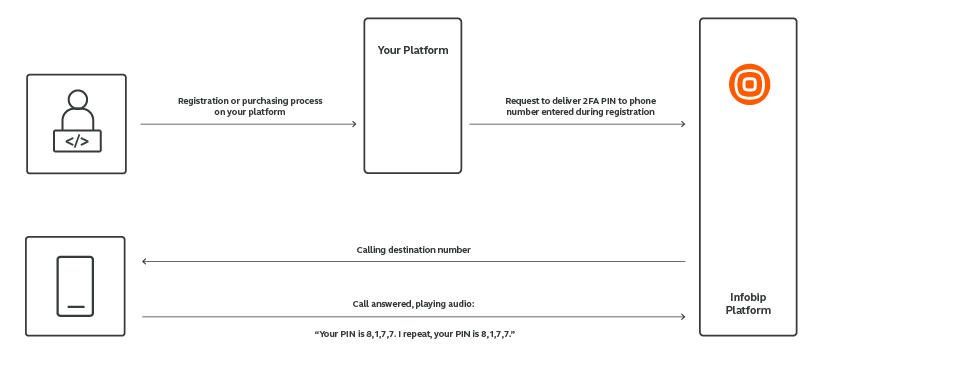
Process workflow
This is how the functioning workflow looks like in action.

Before getting started
To get started with this tutorial, you must have an Infobip account. Log in (opens in a new tab) or sign up (opens in a new tab) for an account.
You'll also need the API key and base URL. Read more at Getting Started with Infobip API.
Implementation steps
This tutorial can be implemented using API. You can use SMS as a communication channel.
2FA over SMS API
Step 1 - Set Up Application
The application represents your service. It’s good practice to have separate applications for separate services. You may also have separate applications for the same service but different use cases.
For example, 2FA for login may be represented as one application and 2FA for changing the password as another.
Separating these cases in different applications allows you to choose different options and behavior for each use case (like PIN attempts or PIN limits).
Request example:
    {
        "name":"Test application BASIC",
        "configuration": {
            "pinAttempts": 10,
            "allowMultiplePinVerifications": true,
            "pinTimeToLive": "15m",
            "verifyPinLimit": "1/3s",
            "sendPinPerApplicationLimit": "10000/1d",
            "sendPinPerPhoneNumberLimit": "3/1d"
        },
        "enabled": true
    }
Read more about the Application Setup (opens in a new tab) process. This covers how to create a new application as well as update it, list all applications, or get application by ID.
Step 2 - Set Up Message Template
This is the message body with the PIN placeholder that is sent to end users.
You may create many message templates per single application and therefore use the same application for different use cases or different languages.
When you create your message template, you will be provided with the message template ID, which you will be using later when sending PINs. By referencing a message template ID, our system generates a PIN, places the PIN in the message template and finally sends the message with the PIN to the end user.
Request example:
    {
      "pinType":"NUMERIC",
      "pinPlaceholder":"",
      "messageText":"Your pin is ",
      "pinLength":4,
      "senderId":"Infobip 2FA",
      "language": "en",
      "repeatDTMF": "1#",
      "speechRate": 1
    }
Read through the Message Template Setup (opens in a new tab) article for more info on how to create/update a new message template, list all message templates, or get a single message template.
To use the 2FA client-side methods, you need to be authorized over API key. Learn how to authorize (opens in a new tab).
After setting up the application, message template, and authorization process, you can start generating and sending PIN codes via SMS to the provided destination.
Request example:
    {
      "applicationId": "HJ675435E3A6EA43432G5F37A635KJ8B",
      "messageId": "0130269F44AFD07AEBC2FEFEB30398A0",
      "from": "InfoSMS",
      "to": "41793026727"
    }
To learn more on how to send PIN over SMS, resend PIN over SMS, and verify PIN, refer to the Send and Verify PIN (opens in a new tab) article available in the Infobip API reference.